Portrait Background Ideas
Last Updated on August 11, 2025
Learn how to capture stunning portraits, from seaside shoots to city scenes. Explore the best headshot backgrounds, creative ideas, and editing tips.
Portraits are relevant at all stages of our lives. Photos are needed for portfolios, to capture a moment, to send your achievements or trip to relatives, to keep photos of loved ones with you forever. Good backgrounds for headshots can say much more than text, conveying the atmosphere, thoughts, and mood of the picture.
If you want to learn how to take high-quality photos by the sea, create your background, don't know how to photograph a fast-paced city, and are interested in editing photos, then this article is for you. We have compiled the main aspects that are of interest at the beginning of creating a portrait photo, from idea to implementation.
Why Choosing the Right Portrait Background Matters
In an era of rapid content consumption, it is challenging to capture someone's attention and encourage them to view your photos. Research by Socialbakers has shown that users spend 2.7 seconds viewing a post in their feed, including photos.
Therefore, it is principal to choose the right portrait background. To do this, ask yourself: “What mood am I trying to convey?” It is dominant to choose the right location that will convey the meaning of the photo (for example, it could be a photo of a person painting, which will present a creative person during their hobby). Don't forget about colors that should contrast with each other. They can be combined with the background, clothing, and skin tone of the subject. To do this, use a color wheel. There are complementary colors — colors that are opposite each other on the wheel for high contrast. There are also analogous colors — colors that are next to each other on the wheel for harmony. And the last group is triadic palettes — three colors in a row for a bright balance.
 No one is interested in static backgrounds anymore, unless it's a photo in a professional profile on portfolio platforms. Therefore, in backgrounds for portraits, try adding elements to the foreground (arches, furniture, plants); or place decorations in the background, or choose a wall with bright wallpaper; or use wood texture or fabric patterns for the middle ground.
 When the background is too bright or certain objects attract too much unnecessary attention, there is a problem with the balance between the object and the background. The easiest way is to place the main object on a calmer background (such as a cloudless sky) in the middle of the frame.
 To add dynamism to the image and balance the planes, use the rule of thirds. Divide the frame into three sections using a grid of horizontal and vertical lines. Place the main object at the intersection of these lines or at their crossroads. This will also help beginners feel the composition and teach them basic skills.
 The space surrounding the main object, called negative space, can highlight the main subject very well. Since there is nothing for the eye to latch onto, the viewer focuses on the main figure in the frame. This is also a way to convey emotions of isolation and loneliness.
 To highlight one object among many similar ones, move closer to the main figure and tilt the camera slightly. This will give the impression of the grandeur of this object and make it stand out notably from the others. If the object is too close to the camera, try to balance it with a similar object further away, in another corner.

Types of Portrait Backgrounds: Indoor and Outdoor Options
For a photo, you need to choose the best background that matches your idea, evokes emotions in others, and introduces them to the concept of the photo shoot. We have created a list of background portrait ideas that you can recreate even at home:
Environmental Portrait Backgrounds
 Let's recall a birthday in childhood, when parents bring a delicious cake with candles corresponding to the age of the birthday boy or girl. Your family is around you, singing “Happy Birthday.” And then comes the moment of making a wish and blowing out the candles. And during this, one of the parents takes a photo. This is a photo with the background of the surrounding environment. The walls of your home surround you, and the event is dedicated to you.
It is believed that a person feels more relaxed when the background matches their environment. A very good solution would be to take corporate portraits of colleagues in the workplace. It is also an easy way to get to know a person, find out what they do, what is part of their life, and who they care about.
Remove Portrait Background in One Click with Luminar Neo
TRY IT NOW!Natural Scenery
 Summer is the season for portraits against the backdrop of beautiful landscapes. It is often a season of different flowers, which help to express the unity of man with nature. Tourists also choose landmarks as a background for portraits to capture themselves at the moment of discovering new places.
The nature in the background of a portrait sets the tone for the rest of the photo shoot. For example, if it is a morning forest, then the mood is mysterious, dreamy, and calm. If it is a field, then often a game with the wind begins, where there is a sense of movement, restlessness, and enjoyment.
Urban and Cityscape Backgrounds
 A portrait with a night city backdrop is an opportunity to capture noise and movement together with a calm object in the center in a single frame.
Often at night, the beauty of city lights takes your breath away, and you want to capture yourself against the backdrop. But the photos turn out to be a disappointment. To avoid this, set the maximum exposure on your smartphone and make sure the ISO level is set to 3200.
If you have a camera, you should maximize the depth of field. Then you will need to edit the photo in an online photo editor, paying attention to light and shadows, brightness, and sharpness.
If you are photographing a busy city, there is a problem with the movement of objects in the background, so a short exposure comes to the rescue. This will help avoid blurring in the frame and focus on the figures. Photographers usually set the exposure to 1/250s during the day or 1/125s at night. However, if you are using a tripod, note that you should turn off image stabilization. Combining this feature with a tripod will result in unwanted blurring.
Beach and Seaside Scenes
 I always want to come back from vacation with good backgrounds for portraits. On the beach, there is constant direct sunlight, which greatly highlights either the main figure in the frame or the background. That is why many photographers focus on the golden hours: the first hours after sunrise or before sunset. Then the light is soft, without sharp shadows and glare.
It would be a good idea to use a wide-angle shot with drone apps, which will make the background the dominant component. This will convey the mood and atmosphere of the sea air. And if you want to focus on the model's face, use a wide aperture (F/1.8 – F/2.8).
Indoor Portrait Backgrounds
 There can be many ideas that can be realistically implemented indoors. Depending on the goals of the photo shoot, improvised means or professional equipment will come in handy. We have compiled a list of types of portrait backgrounds for indoor shooting:
Background type | Examples | Where to use |
Solid | White, gray wall. Large plain Whatman paper. Wallpaper without patterns. | Photo for documents. |
Fabric background | Curtain, plaid, burlap, linen (creates a soft texture). | Home portraits. |
Photo background or imitation texture | Images of wood, brick, marble, and photo wallpaper. | Creative portraits, food photos. |
Interior | Part of a room with furniture. | Photos for interviews, family photoshoot. |
Bokeh background | Blurred lights or bulbs behind the model. | Romantic or festive photos (often at birthdays). |
Sometimes there is not enough space at home, and unnecessary objects get into the frame. Therefore, there is now a simplified option for creating a background — an app to change the background, which can quickly cut out the background and replace it with a ready-made template.
Dramatic Black Background for Striking Contrast
 Thanks to the dark background, the main figure stands out, and all the focus is concentrated on it. If you need to emphasize a person's emotions, use a dark background. To do this, you need one light source directed at the object or person. For better darkening, take a thick black fabric and hang it behind.
Turn on the “portrait” function on your phone and lower the exposure. Cameras often set ISO to 100-200, which helps to remove noise and make the background darker. The shutter speed is 1/125-1/120s, and the aperture is F/5.6-F/8.
The Definitive Solution for Picture-Perfect Portraits
DISCOVER TODAY!DIY and Creative Indoor Backgrounds
 You can also create your background for creative photos. There are many advantages: it is almost or completely free; you can change it constantly; it is easy to bring your idea to life, and you will not often find the best backgrounds for portraits in stores.
Collage. Paste your photos, and you will get a concept of childhood memories or an idea for a family photo shoot. Postcards, posters, or magazine clippings will create an aged style.
Art background. Take a piece of drawing paper and paint it. This idea can be used to reflect the inner world of the model or set the desired mood for the photo.
Floral background. Take artificial or real flowers and arrange them around an arch or place them in large vases. The vegetation will give the photo a fresh look and help create light, romantic shots.
Textured background. To create texture, you can choose an unpressed fabric, which must first be hung on a wall or door. Or crumple up paper or tear it. During the New Year, photos where a person looks out from behind a break in wrapping paper are gaining popularity.
Key Tips for Choosing the Best Background for Portrait Photography
 To make portrait backgrounds look their best, you need to match the subject with the background. We have already discussed how to do this during a photo shoot. But what about finished photos that you also want to show? Many photographers use Photoshop for this. There, you can adjust the size and perspective; select colors and tones; adjust lighting, shadows, and sharpness. However, there is a free alternative to Photoshop for beginners that is easier to master in order to learn what needs to be adjusted in the images.
The next main aspect is depth of field. This is the range of distances from the camera at which objects in the frame will appear acceptably sharp. The background will be in sharp focus if the depth of field is large. Conversely, the background will be blurred if the depth of field is short. So, if you want a blurred background portrait, use a camera focal length of 75-100 mm.
If you are taking photos with your phone, switch to “portrait mode.” In this mode, the camera automatically recognizes the subject and blurs the background. Next, place the person or object 1.5–2 meters away from the background — this will focus on the figure in the frame.
We have already discussed portrait background ideas. Now, let's focus on the rules for creating a background:
Don't overload the background. Props should fit organically into the aesthetics of the photo, not distract from the main subject.
Create contrast. You can use dark props on a light background or vice versa to highlight certain objects in the background. However, don't forget about the main figure; it should also contrast.
Work with layers. There is a foreground, middle ground, and background. To create depth in the background, you need to add objects to different planes.
Editing Portrait Backgrounds for a Professional Finish
 Photo editing becomes much easier with Luminar Neo — an AI-powered software that works wonders with photos using prompts. You can change the background in just a few clicks. All you need to do is select the scene and enter the request that comes to mind. In addition, Luminar Neo makes it easy to edit the finished image by adjusting shadows and light. Try out all the features of the app and see how the pros work!
Why Post-Processing Your Background Matters
Beginners may encounter problems with the background in photos, as it is quite difficult to control all processes, from the model's position to combining everything into a harmonious frame. Therefore, photo editing is one of the key points to pay attention to. Check that your background for portrait is not too blurry, bright, or cluttered with unnecessary elements.
Blurring can remove sharpness settings, and blurring can help solve the problem when the background cannot be blurred correctly. Brightness can be adjusted with light and shadows. And if there is debris or unnecessary objects in the background of your photo, use the “cut out” or remove background from image tool if the situation cannot be corrected.
Editing also helps to correct and improve the moments that the camera was unable to capture. By applying effects, you can easily style your photos to match the specific theme of your photo shoot.
Exclusive Tools of Endless Possibilities in One AI Editor
Explore Now!Top Tools for Enhancing Backgrounds in Portrait Photography
The table shows the most popular programs for computers and phones that you can choose for yourself and use to boost your portrait with background:
App | Ease of use | Background processing quality | Background replacement | Where to use |
Luminar Neo | Simple, clear interface | High (AI tools) | AI replacement present | Creative portraits, family photos, photos on business papers |
Adobe Photoshop | Complex interface for beginners | High (manual control) | Manual replacement available | Professional studio processing |
Adobe Lightroom | Medium | High (AI + manual) | Limited (masks) | Editing photos for personal use |
Canva / Pixlr / Fotor | Very simple | Medium (depends on templates) | Yes (templates/custom backgrounds) | Blogs, social networks, content |
Remove.bg / Cleanup.pictures (mobile) | Very simple | Medium (auto-crop) | Yes (automatic) | Quick background removal |
Snapseed (mobile) | Very simple | Medium | Only blur, in the paid version, sky replacement | Mobile editing |
Suppose many programs seem too complicated for you at the moment. In that case, a free photo editor for beginners will be a great place to start to understand the intricacies of photo editing.
Explore, Experiment, and Elevate Your Portraits
Photography has reached a new level. According to Photutorial, 1.9 trillion photos were taken worldwide in 2024. This figure is expected to rise to 2.1 trillion by 2025.
After reading this article, you will become a professional part of this figure. You can also generate ideas for photos by easily combining them with backgrounds in different conditions and under different lighting. Just imagine that with these background ideas for portraits, you can speak to your audience, set the mood, and draw attention to your work in the right way.
FAQ
What is the best background for a portrait?
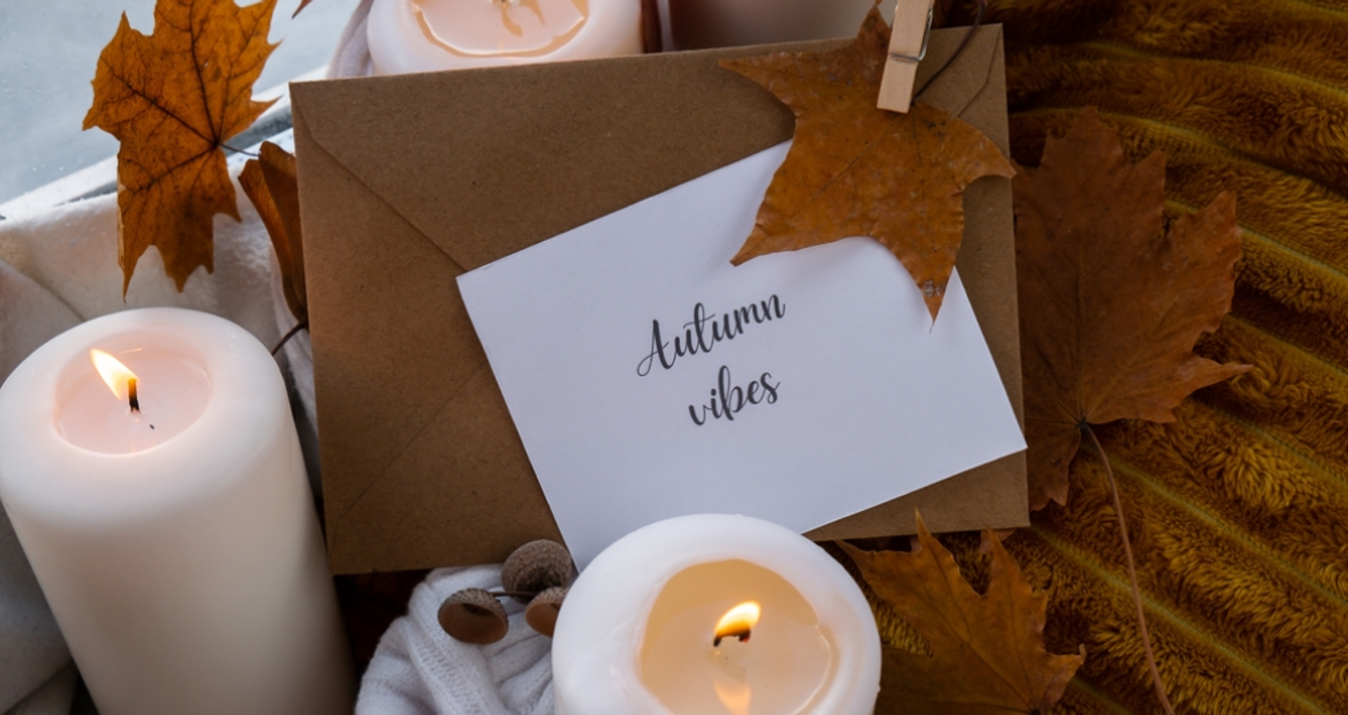
It all depends on your goals. For example, if it is a photo for documents, a bright background will be inappropriate, and your photo will not be accepted. Here, it is worth choosing solid, restrained colors, in particular, gray, white, or beige. If you want to express your creativity, create the background yourself, using paint splashes or a painted picture. If you are inspired by the season, choose a place that is characteristic of that season: summer — the sea; autumn — a park with brightly colored leaves; winter — a New Year's theme; spring — blossoming trees. And if it's a holiday, create a cozy family atmosphere and add some garlands, blur the background, and your picture is ready.
How do I choose a good background for portraits?
Ask yourself a few questions before starting the photo shoot. “What emotions do I want to convey?” “How many main figures will be in the frame?” “How many objects can fit in the frame?” “Will it be an indoor or outdoor shoot?” After answering these questions and assessing your creative and financial capabilities, choose the best background for a portrait.
Can I change the background of a portrait after shooting?
If you have photos ready but don't like the background, this can be easily fixed with photo editing software. Depending on your goals and knowledge, choose the application that is most convenient for you.