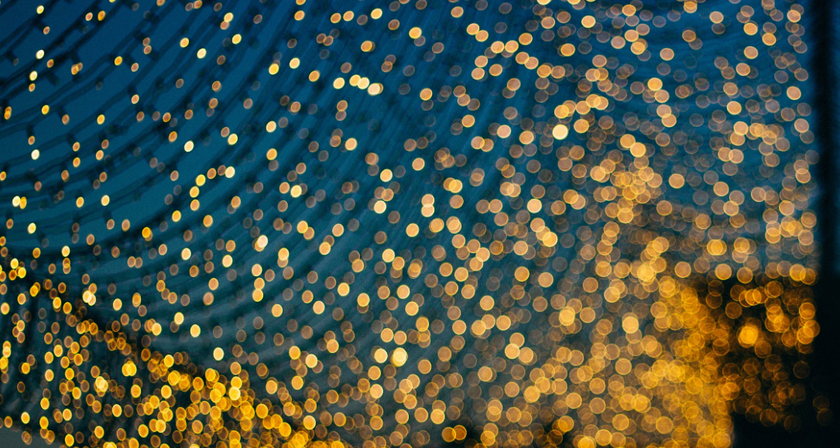
Bokeh Technique: The Art of Portrait Photography
February 25, 2025

Master the bokeh technique in portrait photography to create stunning, blurred backgrounds that highlight your subject. Learn how to use depth of field to enhance your photos.
A family Christmas party, a romantic evening under the pink hue of the setting sun, recollections of your children under the dazzle of the city's lights – these are the moments that will be treasured forever. As a traditional Japanese method, with the invention of digitization, it has grown to be one of the hallmarks of exclusive picture shoots that highlight the model's best qualities. In this article, you'll learn more about the definition of bokeh photography and how to use it.
What is Bokeh?

So, what does bokeh mean? The concept of “bokeh” initially appeared in the photographic world in 1997 by Photo Technique Magazine. Professional photographers are currently just beginning to pay stronger attention to it.
In the classical era, it was customary to prevent blur in both the foreground and background. Artists would place their characters against an unadorned or “busy” background to assist with conveying a tale. Street photography has grown with the bokeh effect in popularity, as it captures the spontaneous character of street activities and immerses the viewer in the spirit of tiny city streets. Unlike social documentarians, street pictures do occasionally have a social aim in mind.
Bokeh Shapes
Few people are aware that blur in pictures can take several various forms of geometry. This is achieved by selecting the appropriate lenses. Numerous lenses give off stunning bokeh tints. Most fast prime lenses with round-blade apertures, such as the Nikon 85mm f/1.8S and the Canon 85mm f/1.2 II USM, present particularly fine blurring. The DSLR versions of the same optic, Nikon 85mm f/1.8G and Canon 85mm f/1.8 USM, also generate a gorgeous backdrop.
Here are some tips for an appropriate bokeh photoshoot:
Perspective on your subject from close range (as close as your lens will allow while keeping it in focus).
Be certain that there are no goods more than 5-6 feet behind it.
Examine your stand with regard to the subject so that you are not looking down on it.
Avoid using a simple wall as a background; instead, look for a bright background with some accents like blue hour or wood.
Most market zoom optics have a minimum aperture of f/3.5, although prime and professional range lenses often have apertures of f/1.2 to f/2.8. Set the shutter speed to the lowest setting possible, then take a picture of your subject and look at the camera's back LCD. It means that the topic should be outlined and in the foreground, with the surrounding out of focus. When using a good lens, the bokeh should be soft and fuzzy, resulting in an appealing image like the one shown above. Round reflections should be messed in shape, with softer edges.
Magic Capturing: How to Get Good Bokeh
 Can blur brighten your pictures? Absolutely! However, not everyone shares this opinion. Let's start with some tips on capturing positive highlights, which are shown in the table below.
Tool | Notice |
Lens | As can be observed in AV Mode, you don't have to guess the brightness and waste time switching buttons. Once aperture priority is set, you merely have to focus on the shutter key. It is possible that your camera selected the incorrect exposure setting, so you have to tap a lever marked with plus and minus signs to make your image brighter or darker. |
Shutter speed | A fast shutter speed could be 1/1,000 of a second, as opposed to a slow speed of one second. Experiment using various f-stops and apertures to discover how your bokeh morphs and changes. |
Environment | Do not look at faraway clusters of lights. Learn their patterns and aim at making attractive design constellations. Also, while illuminating your subject, harness colors that contrast with those in the background, choosing hues that merge well with the prevailing shades on the background could make any person in the foreground stand out. For example, you can employ cold sources of light on your opponent to counteract warm hues in the background without photo filters. |
Foreground | Foreground bokeh works well with glass and other reflective objects like screens. Lights that bounce on surfaces may rapidly fill the vacant space in front of the topic. However, when shooting with the lens, a lot of twisting is required to avoid unwanted reflections (for example, photographing the arm holding the camera). |
Why is bokeh, meaning amateur work mainly wrong? This is one of the stereotypes that does not play in favor of this style. New Year's shots from the film Family Man or Jingle All The Way will be great bokeh examples.
Bad Bokeh and What You Can Do with It
Certain cameras are known for producing good bokeh, but others, particularly low-cost zoom lenses, consistently generate poor bokeh. Bad bokeh means the camera’s sharp edges rather than blurred ones. First and foremost, check that the opening is as broad as possible. If it isn't, you are likely to need an extra optic. This could, however, be due to an absence of blades or an incorrect razor shape in your lens. In this situation, you will have to purchase a replacement lens.
Are you close enough to the subject? Ideally, the depth of field should not be excessively wide. When your aperture is wide open, keep your camera motionless. This happens because any movement can blur the entire image, which does not constitute a bokeh; instead, it is out of focus. Alternatively, use a tripod or a robust, hand-made mount.
How to Take Bokeh During Action Photography?
 The bokeh effect is a great technique for portrait photography, where the subject (model) should be in the center of the viewers' attention. The soft, dreamy backdrop guarantees that nothing distracts from the subject's expressions or features, allowing their personality to shine. That’s the reasons why this style can be used in various photography goals:
Urban photographers adore bokeh due to the tendency to portray the mood. Glowing lights can conjure romanticism, yet blurred city lights might convey a sense of urban bustle.
Bokeh is invaluable in macro photography since the technique allows you to isolate a small insect, a delicate blossom, or any other tiny subject against a soft, colorful background. This absence of distraction highlights the subject's beauty and complexity.
For product photography, bokeh can enhance the appeal of the featured item. It helps to set the product apart from the background, making it appear more compelling and desirable to potential customers.
You can guide the viewer's gaze through the visual story you're trying to tell by highlighting key details while letting others fade into obscurity. In storytelling, bokeh photography navigates the audience through the plot you create with pictures.
Bokeh Technique with Luminar Neo
 Previously, to achieve a background blur when editing a photo, you would have to spend a lot of time making the image look real. Now, you can do it in just a few clicks. Beautiful bokeh in seconds from Luminar Neo will pleasantly surprise you. Portrait Bokeh AI allows you to create fashion and daily portraits at different locations easily. The best way to make the main subject the right focus is to use modern technology in your artwork.
The artificial intelligence in the bokeh portrait tool detects each person in the frame, notably those in groups or unique situations, and builds an initial mask to separate them from the background.
Bokeh: Miracle for Capturing These Moments
Modern stereotypes are that blur is considered the result of amateur work. Therefore, more experienced photographers advise dehaze photos or using editing tools. In fact, bokeh is a great opportunity to show the real magic of the frame with the appropriate preliminary preparation.
Employing a lens with a wide opening (one with a low f-stop size, such as f/1.8 or f/2.8) allows more light to enter the eyepiece. This means you'll have a shallower depth of field along with the proper amount of background blur.
The portrait bokeh effect is widely regarded as the most mandatory method of heightening portraits due to its ability to highlight objects. With Luminar Neo, don’t be shy about capturing the most romantic and heartfelt moments in your life!


