Food Photography Tips for Beginners
February 20, 2019

Food photography is a hard skill to acquire, but we’re here to make it as easy as pie.
Want to know how to take photos of food so that the viewer gets hungry right away? With this ultimate beginner's food photography tutorial, every food photographer can capture mouth-watering photos.

Photo by Evgeny Tchebotarev
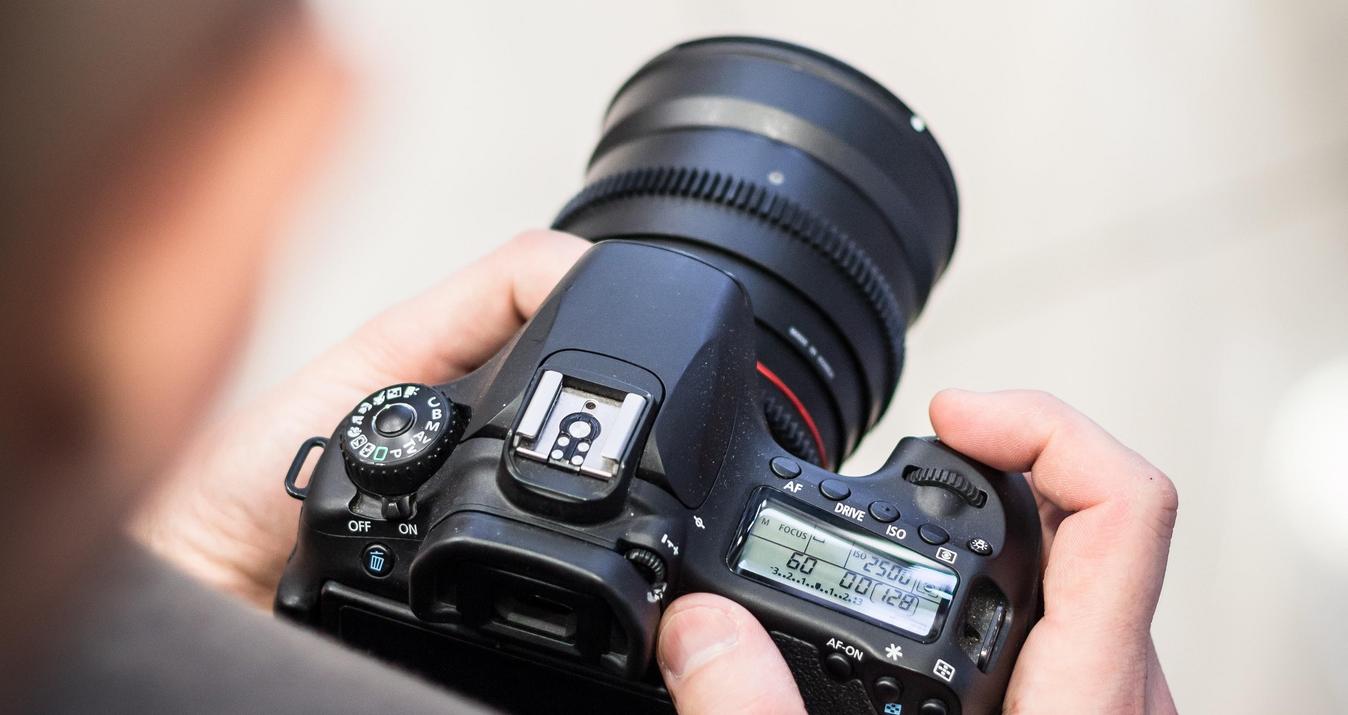
Camera settings
To make your food images as bright as possible, make sure you’ve taken care of the manual mode camera settings: shutter speed, aperture, and ISO.
Shutter speed
Slow down the shutter speed to let more light hit the sensor in low-light conditions. A slow shutter speed is a go-to option when shooting on dark, cloudy days or in the fall when it gets dark early. However, with the shutter being open longer, there can be more blur, and therefore you might need a tripod. You can shoot handheld at 1/125s, but under 1/100s it’s best to use a tripod to avoid camera shake and blurry food images.
 Aperture
 Aperture
Opening up the aperture allows in more light and also creates a shallow depth of field, resulting in a bokeh effect. This effect allows you to direct the viewer’s attention to your subject. The lower the f-number, the wider the aperture. If you want a sharp focus in one area and a bokeh effect, choose a wider aperture like f/3.2 or f/3.5. If you want the background to be more in focus, set a narrower aperture: go with f/11 or f/14. Keep in mind that this doesn’t let in as much light, and you’ll need to adjust your shutter speed or ISO.
ISO
ISO is how you measure your camera’s sensitivity to light. It’s the setting to adjust last, after shutter speed and aperture. A high ISO can affect the quality of your image and create digital noise, particularly in darker areas of the photo. Try to keep your ISO below 500, but when shooting in dark conditions without a tripod and with the aperture already wide open, you can go higher.

Photo by Evgeny Tchebotarev
Food photography lighting
How to take food photography for beginners? A natural source of light is the best assistant in your food photoshoot. You can try out professional lights that can simulate natural light, but we recommend getting your hands on your camera and using natural light before spending money on expensive lighting equipment.
Most importantly, avoid indoor kitchen lighting as it projects a yellow glow. In case you have to photograph food at 5 pm on a rainy day and you have no choice but to shoot with indoor lighting, set your white balance to Tungsten. This adds more blue to your photos and minimizes the yellow.
Consider using backlighting when you face the front side of a dish placed on the table and the window lits the subject from the back side. Backlighting illuminates the subject in the most favorable way. However, try letting the light hit from various points and see what you like most.

Photo by Evgeny Tchebotarev
Choosing equipment for the food photo shoot
Taking pictures of food may require different equipment. This is a tripod, reflectors, props, etc. But the most important thing is the camera and the lens. Let's take a look at what is best for professional food photos.
5 best cameras for cooking photography
Sony A7R IV
Sony A7R IV is a full-frame camera with a 61 MP resolution that can deliver superb detail to your beautiful food photography. In addition, it has excellent frame coverage with focus sensors, which helps a lot when shooting food compositions. There is a decent selection of affordable macro optics for this model. Manual focusing is made easy with focus peaking and zooming right into the frame to check critical focus.
The screen functions quite well, although it's not entirely convenient that it can only tilt, unlike cameras with a full swivel screen.
Probably the biggest drawback of the Sony A7R IV camera is its high cost. However, food photographers will undoubtedly find the hefty investment in the best high-resolution food camera worth it.
Nikon Z7 II
This is another quality camera for photographing food. With a high resolution of 45.7 MP, you will have ample opportunity to capture fine details and crop to achieve high-quality images of the food composition in the pictures. In addition, the fantastic spread of AF points across the frame is impressive, as is manual focus, which benefits significantly from peak focus and focus magnifier.
Like the Sony camera, the Z7 II's screen is tilted, something to be aware of. Although Nikon has only recently released macro lenses for its Z-series, you can also use lenses for SLR cameras with the F-mount adapter, giving you more creative options.
If photography food isn't your only favorite genre, then the Z7 II is an intelligent choice as it's great for capturing a wide range of subjects.
Nikon D3500
If you're just getting started with food photography techniques and you're on a tight budget, don't look at more expensive cameras - the advanced camera technology they come with will likely be overkill. It makes sense to opt for a DSLR on a budget food camera like the Nikon D3500. It guarantees you much better image quality than your smartphone can provide and a rewarding interchangeable lens camera experience, all at an affordable price.
Because it's a DSLR, you'll mostly be shooting with the optical viewfinder, although Live View mode can also be activated if you're using a tripod when taking food photos.
With an extensive range of compatible SLR lenses, including macro lenses, any photographer can find the perfect lens for their needs. However, it should be noted that this model has a couple of drawbacks. This is a fairly limited spread of AF points, which creates some inconvenience when shooting food compositions and the lack of Focus Peaking. Nevertheless, the Nikon D3500 is an excellent choice at the beginning of your journey into the beautiful world of food photography.
Canon EOS R6
Since the Canon EOS R6 has a lower resolution than the same brand's EOS R5, it can be purchased at a much more affordable price. In addition, a reasonably wide range of manual focus options will be available to you. But still, the most impressive thing about this camera is the incredible number of focus points across the frame - up to 6072.
Thanks to the innovative RF mount type, you can use different types of lenses for shooting, including macro lenses and a wide range of lenses for SLR cameras (via adapter). Another advantage of the EOS R6 is the fully rotatable display, which is extremely useful when shooting food compositions at awkward angles. This top Canon camera is ideal for creating aesthetic cooking pictures.
iPhone 12 Pro
Many enthusiasts bring their food photography ideas to life with a smartphone. The advanced models of these devices do an excellent job with such tasks. Our choice fell on the iPhone 12 Pro model, which is cheaper than the later iPhone 13 Pro.
One of the advantages of the iPhone 12 Pro can be a disadvantage for some photographers - the camera is effortless to use, which makes it much easier to take great food photos. Still, at the same time, the possibility of manual control is minimized.
Another good news is that you can work in Apple ProRAW shooting mode and, if you wish, edit the resulting RAW files in post-production.
Finally, one of the exciting food photography tricks is shooting in portrait mode. While it's primarily intended for shooting people, using shallow depth of field effects properly can help make your food shots stand out.
5 best lenses for food photography
50mm go-to lens
The “nifty fifty” 50mm lens is great for every photography style, including beginner food photography. It’s small, lightweight, affordable, and delivers tack-sharp focus and stunning bokeh quality.
What’s good about a 50mm lens for food photography is that it has a fixed focal range that offers a natural perspective and field of view that’s almost identical to what we see with our own eyes. Shoot with 50mm from a comfortable distance and you’ll minimize visual distortions.

Photo by Evgeny Tchebotarev
60mm macro lens
When shooting food, we hope there won’t be a need to use photo editing software afterward. Thus, you need a sharp lens that produces a focal length similar to 50mm and has macro qualities for creating flawless pictures of food with intricate details. Go with a 60mm macro lens. It will highlight the structure of every tiny piece you shoot.
At maximum aperture, a 60mm macro lens captures light well, and its macro optics allow for a short minimum focusing distance for taking close-up shots.

Photo by Evgeny Tchebotarev
100mm & 105mm macro lenses
A longer focal length like 100mm or 105mm allows you to step back and shoot from a greater distance. This aids in averting optical distortions for full-frame cameras and dramatically enhances the appearance of your 45-degree shots. Both of these lenses can give you the details and accuracy you need for your good food pictures.
24–70mm zoom lens
If you’re new to photography food, you may want to experiment with shooting at different focal lengths. That’s why a 24–70mm zoom lens is an all-round option. It covers a pretty wide range, so you can zoom in and out for capturing different scenes and subjects without even bringing other lenses. Fortunately, the most notable camera brands typically have this focal length.
85mm & 90mm tilt-shift lens
A tilt-shift lens may seem too complex for beginners in food photography — first because these lenses are expensive, and second because they’re more popular for architecture photography. However, if you can afford it, give an 85mm or 90mm tilt-shift lens a shot. It may just end up being your favorite lens for this niche.
Manual focus tilt-shift lenses give you precise control over the perspective and plane of focus, which means you can quickly spotlight an entire dish by blurring everything else out with the shift movement and correct the perspective so you don’t distort the scene with the tilt movement.

Photo by Evgeny Tchebotarev
These are five of the best lenses for food photography. But keep in mind that these are only recommendations. The best lens for you still depends on your own needs. So play around to find out which lens best suits your shooting style.
Food photography: Tips and Tricks
1. Find a food stylist
A food stylist creates authentic compositions and stylizes your dishes so they look perfect. A food stylist deeply understands aesthetics and knows how to use different props and can create a specific mood, pick the best colors, and even evoke a certain emotion. But don’t worry: if you don’t have the opportunity to work with an expert in food styling, there are still tons of tips on how to take good food pictures on your own.
 2. Use fresh products
 2. Use fresh products
One of the best tips for food photography: try not to get all your ingredients too far in advance. The shelf life of most products is between 2 to 4 days, so the earlier you buy, the more noticeable it will be.
3. Test your food beforehand
Playing with food isn’t a bad idea in this case. We highly recommend dedicating the day before your photoshoot to experiments. Test how your ingredients react with one another to minimize mistakes that might cost you time and money. For instance, if you’re photographing a bowl of cereal, try replacing milk with something of a thicker consistency like yogurt to keep the oats afloat. Certain products alter their color or enlarge or shrink when they become warm or cold. That’s why shooting food requires a lot of practice.
4. Use props for your food
If you are looking for your own food photography style, try to incorporate props. Different accessories create different moods. Try using dried herbs, baskets, a cutting board, or even a tattoo on your hand to evoke certain emotions. Whatever you choose, make sure it doesn’t take the attention away from the main subject of your photo.

Photo by Evgeny Tchebotarev
5. Use soft lighting
Food is great to photograph with soft, natural lighting rather than medium or hard lighting. If you can use a natural light source such as a large window, it’s even better. If your lighting is too intense, try to reduce harsh shadows with a bed sheet or tracing paper. It’s easier to achieve diffuse lighting in a studio with a good softbox and umbrellas.
6. Create a unique composition
There are three angles that are commonly used in food photography:
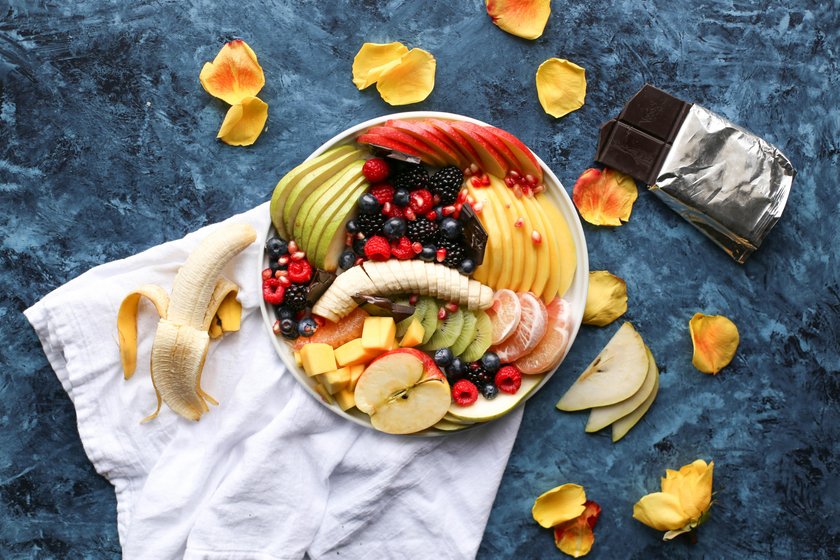
- A 90-degree angle (bird’s-eye view) has become very popular and is recommended for dishes that have different textures: muesli bowls, salads, pizza, and tapas, for example.

- A 45-degree angle (standing eyesight) allows you to view the whole scene and gives a sense of depth to the photo. This angle is also widespread and is recommended for foods that have layers like hamburgers, cakes, or a bowl of fruits. This is also a great angle to show the inside of a dish. To achieve a warm, soft background and a focused center, keep your aperture nice and wide and use your camera’s standard ISO (usually 100) depending on the amount of light you have, the composition, and the mood of the dish.

- A 0-degree angle (table level) is slightly less popular, as it can produce a flatter photo. However, this option is great if you want to emphasize the height, texture, or color differences such as in a series of glasses filled with colorful juices or a row of apples from baby to gigantic.
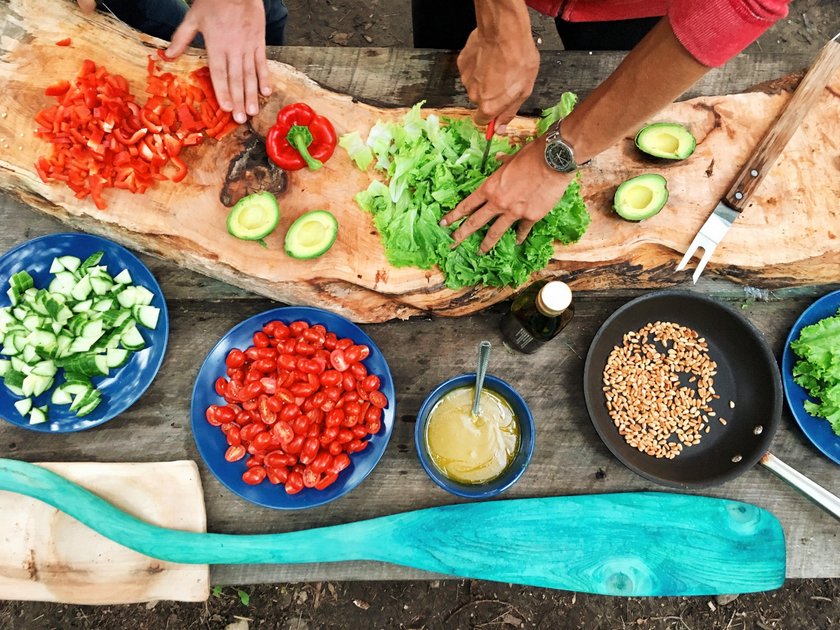
7. Go beyond the boundaries
You’ve probably noticed the tendency to photograph food in a studio atmosphere, typically using dishes on a flat surface. Don’t get stuck shooting that way only. Try to think outside the box and capture food in unique conditions. Take a shot of chefs working in a kitchen in an energetic atmosphere. Other food photographers prefer photographing people with food, like a child holding an ice cream. In other words, try to tell a story about the food you’re shooting. There are so many creative ideas for food photography that will make you stand out with your photos.
Post-processing tips for appetizing food images
Using a photo enhancer, you can refine your food shoots with minimum effort. Luminar Neo, for example, boasts a wide range of tools for enhancing images right off the bat.
Presets in Luminar Neo can help you solve the most common issue that every beginning food photographer faces: giving your images a unique style and making them look really creative.

Photo by Evgeny Tchebotarev
With intelligent AI-driven filters, you can bring out the details of your dishes and make them truly attention-grabbing. Try out the Details Enhancer, Sharpening, and Smart Contrast tools in Luminar Neo to achieve clear and the most natural look.
Professional filters like HSL and Dodge & Burn enhance your food shots in specific areas. While HSL allows for selective color editing, the Dodge & Burn tool brightens or darkens a certain part of your culinary masterpiece.
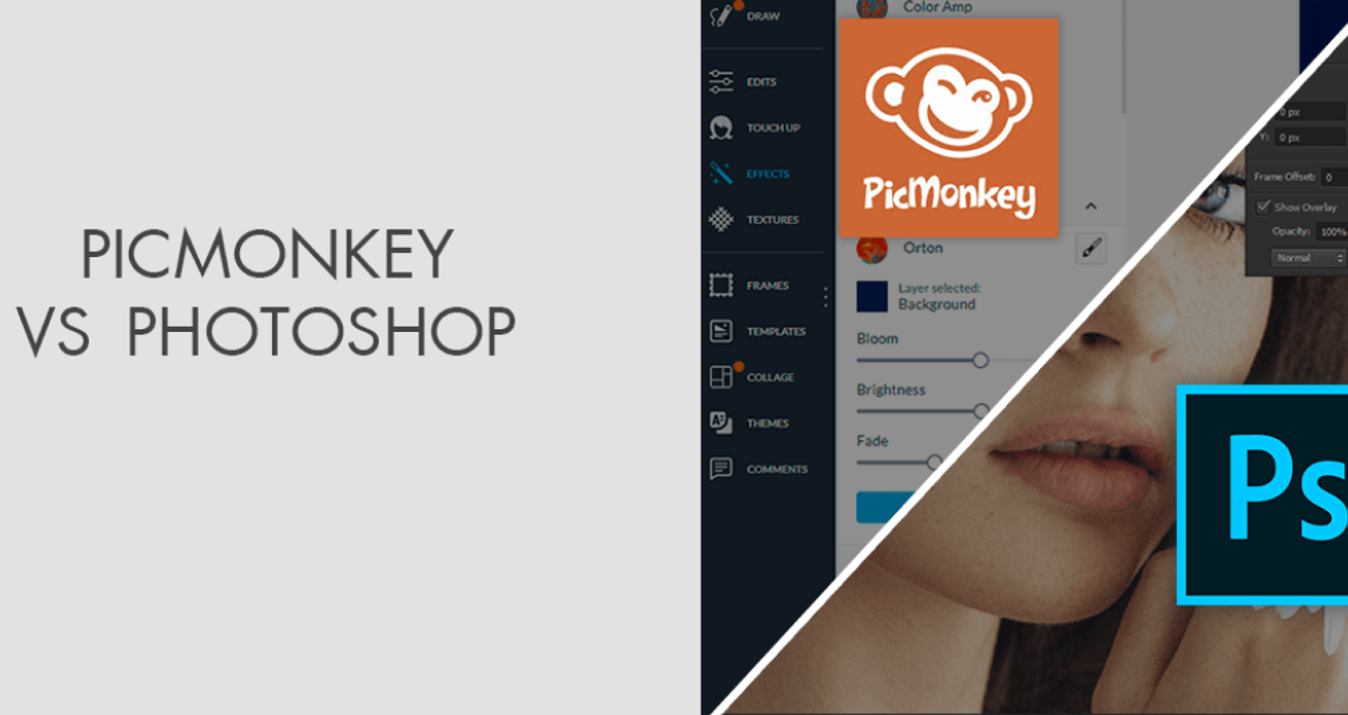
If you prefer using different software for post-processing, you can use Luminar Neo as a Photoshop plugin. It works seamlessly with Photoshop and can drastically improve your workflow.
 Photo by Evgeny Tchebotarev
FAQ on How to do Food Photography
How to take good food pictures with manual camera settings?
In addition to lighting, pay attention to the depth of field since the main thing in food photography is that the viewer's eye stops on the dish. If the background is also in focus, the photo won't work.
How to choose a camera for cooking photography?
Focus on these options:
- sensor resolution;
- number of auto-focus points;
- the ability to manually adjust the exposure;
- range of optics (including macro) for this camera model;
- the possibility of remote descent.
How to take food photos in natural light?
The main thing is to avoid hard lighting in the kitchen. It is better to turn off the lights altogether and shoot only with the light from the window. Of course, you will need a tripod, but it's worth it. And it's easier than fixing the lighting later in post-processing (although Luminar Neo can do this).
Also, experiment with backlighting or portrait lighting patterns. It may look interesting!
Follow Skylum Software on YouTube // Get the latest videos, tips, and photography inspiration each week!