How To Photograph The Sun: A Simple Beginner’s Guide
December 13, 2024

New to sun photography? Learn how to safely photograph the sun with easy tips on settings, gear, and creative techniques for breathtaking results.
It is difficult to capture nature in a single moment, and photographing the sun is something few people can do. How do you take a picture so that the shots turn out spectacular, unique, and high quality? You need experience, special training, tools — a camera and the right settings. How to take a picture of the sun, what tools are needed for this, and how it can safely and not harm your camera.
Preparing for the Solar Photography
 Taking pictures of the sun is a unique art form. Taking pictures of sunrise, sunset, and sunlight involves different preparations for the photographer. To get unique sun photography, many factors need to be considered — time, expected result, equipment, and safety.
The best time to close up a picture of the sun is early morning, while the atmosphere is still stable and not too warm. This provides an exciting play of light, and there is no need to remove shadows from images.
The following equipment is required for photographing the sun: lenses with UV or ND filters, a tripod, and remote shutter release. Besides that, it's worth worrying about:
- Stable tripod. Use a sturdy base for your camera to prevent camera shake and to ensure the sharpest possible images when photographing the sun's dynamics. What happens if you take a picture of the sun without a sturdy tripod? You won't be able to get the shots you're hoping for.
- Remote shutter release. When using a tripod, a remote shutter release — threaded, wired, or remote — will also help reduce vibration and give you better-quality pictures.
- A solar filter for the lens. Filters protect your equipment and allow you to focus on capturing details. When pointing the camera to the sun, protection prevents damage to your eyes and camera from invisible IR and UV radiation. You don't have to experiment with homemade filter mixtures to save some money.
- ND-filters. Reduce the amount of light hitting the sensor or film without changing the color balance of the image. They allow you to use a wide aperture to blur the background or a slow shutter speed to create a motion blur effect in bright sunlight. ND filters are for sun astrophotography.
Working with such an object is difficult and can harm your health. Be sure to take all necessary safety precautions before shooting. Do not look without certified sunglasses or through a telescope or camera lens without a proper filter. Do not point the camera or look through the viewfinder of an SLR or rangefinder camera without a filter. Optics not equipped with filters can amplify the intensity and brightness of sunlight, which can result in equipment damage, severe eye damage, and even blindness.
Adjust the Camera Correctly
 Best camera settings for bright sunlight are the variables that determine its operation and exposure when photographing. Prepare your equipment properly before shooting.
Use the manual mode for full control. It allows you to adjust the aperture, shutter speed, and ISO separately to ensure a perfect balance.
Settings to get you started. Start by adjusting the aperture by choosing a narrower aperture, and a higher f-number, to control the light entering the lens. This helps prevent overexposure and preserves detail in highlights.
Low ISO (100-200). Ideal if you can shoot at the camera's native ISO setting. This is usually around ISO 100 or ISO 200, depending on the camera manufacturer and model. Depending on the lens and filter, you may need to raise the ISO to reduce movement in the frame.
Aperture around f/11 for better clarity. Adjust the aperture to control exposure better. With a solar filter, the sun will be the only thing visible in the frame, so use spot metering and try to keep the lens aperture in the sweet spot and the sun in the center of the frame.
The shutter speed should be adjusted to avoid overexposure. Shorter shutter speeds are recommended in sunny weather to prevent overexposure of the frame. It also helps to freeze fast-moving subjects.
Experiment with exposure bracketing for HDR photos. Use the camera's exposure compensation function to adjust exposure settings. This can help brighten an image and adjust the overall brightness.
Don't forget to keep an eye on the histogram. This visual representation of the tonal distribution of the image gives a balanced exposure.
Unleash the Power of Image Brightener
Try It Today!Once you've mastered the basic camera settings, you can confidently take stunning pictures even in the brightest sunlight, highlighting subjects clearly and accurately.
Different Ways of Photographing the Sun
Astrophotography
Astronomers and photographers are still trying to get high-quality and unique images, for example, how to get sun rays in photos. It is impossible to realize what they have planned without preparation — strict safety measures and suitable conditions are needed. That is why the pictures are rarely found in photo galleries or social networks.
Close-up Shooting
 Close-up photography allows you to view the intricate features of a subject, revealing unique angles. Capturing the image requires solar telescopes and filters to protect the camera and eyes from the intense brightness. With these tools, sunspots, prominences, and other details can be detected.
Sun Rays On Your Photos
With solar astrophotography, it is possible to capture the rays. Special solar filters make it possible to safely capture solar textures, flames, and magnetic disturbances. At this brightness, special equipment and techniques are needed to ensure that neither the camera sensor nor the photographer's eyes are damaged.
How to Get Sun Rays in Photos: Tips
Choose a time near sunrise or sunset when the sun is lower;
Position so that it is partially obscured by objects such as trees or buildings;
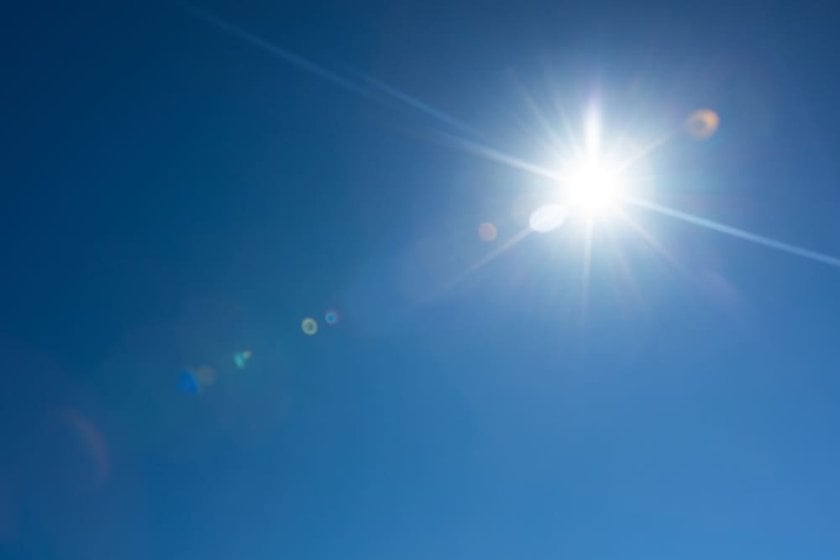
Use a narrow aperture with a larger f-number to create a starburst effect;
Control lens flare by allowing the part to be visible;
Use diffraction gratings to amplify the rays;
Place your subject strategically to interact with the rays.
Enhance the effect by using modern photo editor features. For example, Luminar Neo offers an AI-based filter that helps you process images containing rays, enhancing the effect and adding magic to your photos.
Creative Sun Photography
 Beyond traditional astrophotography, there are artistic ways to capture the sun that focus more on emotion and storytelling than scientific detail. Try experimenting with silhouettes, lens flare, or sunbursts behind subjects. Use the golden hour to create dramatic contrasts and warm tones. The sun can become a powerful visual element in landscapes, portraits, or even abstract shots—once you learn how to work with it creatively.
How to Take Photos of the Sun With a Phone
 Capturing is technically challenging; however, with the help of a smartphone and the right approach, it is possible to capture the star in great detail and remain safe.
Tools | Тіps |
Use a solar filter | Specialized ND filters or removable lenses with UV and IR protection are suitable. They reduce the brightness of the light and help avoid overexposure. |
Plan to shoot at sunset or sunrise | This makes it easier to shoot without additional accessories. |
Stabilise your smartphone | Use a tripod or sturdy support to prevent shaking. This is especially important when shooting with Zoom. |
Manually adjust the exposure | Reduce it to achieve the correct detail of the solar disc. |
Use the zoom | If your phone supports optical zoom, use it. Digital zoom will degrade the quality, but it's fine for your first experiments. |
Protect the sensor | Prolonged exposure to direct sunlight can overheat the camera sensor. |
Use photo processing tools | They can help you emphasize details and correct imperfections in the image. |
Photographing on your phone is possible if you take precautions and prepare yourself. The main thing is to pay attention to safety rules and use filters.
The Bottom Line
Specialized solar filters and equipment are paramount to protect equipment and eyes from the intense brightness. A planned approach allows you to take unique gunshots safely and capture all the features of the subject. Mastering the nuances of camera settings is critical to the quality of your photos. By thoughtfully adjusting the aperture, shutter speed, and ISO, you can achieve well-exposed images that reveal the essence of the sun. Remember that safety remains the top priority.
FAQ
Will taking a picture of the sun damage a camera?
Without filters, the sun's intense brightness suppresses the camera sensor and causes permanent damage. Concentrated light gives glare to the lens and reduces the quality of the shot. Use a solar filter to protect your camera and eyes. These filters reduce the intensity of the sunlight, allowing you to capture all the details.
What type of lens is best for sun photography?
For photographs, a telephoto lens with a focal length of 300-600 mm is best suited to capture the star's disc with details such as sunspots. For maximum magnification use super-telephoto lenses 800mm and larger, or solar telescopes with inbuilt filters, H-alpha, and calcium. For eclipse photography, 14-35 mm wide-angle lenses are suitable for capturing the landscape. Use solar filters to protect your equipment and eyes.
How do I avoid overexposure when photographing the sun?
To avoid overexposure when taking pictures: 1. Use solar filters (ND 100000) to reduce brightness; 2. Adjust the exposure manually: minimum ISO, short shutter speed (1/2000), narrow aperture (f/11); 3. Shoot at sunrise or sunset when light is less intense; 4. Apply spot metering to the sun's disc. These steps will ensure clear pictures without overexposure.
Can I photograph the sun during a solar eclipse?
Taking photos during the eclipse is possible as long as basic safety precautions are observed. Solar filters are used for the partial phase, which can be removed only during the total phase. Eyes should be protected with certified sunglasses or special filters. Set your camera to minimum ISO, short shutter speed (1/1000), and f/11 aperture using a tripod. Carefully plan your shots for the different phases of the eclipse to ensure quality images.
What’s the best time to photograph the sun?
The best time to photograph is at sunrise or sunset when the light is softer, and the risk of overexposure is minimized. At these times, the atmosphere acts as a natural filter, and the low position allows you to add landscape elements to the frame. Daytime shooting is only possible with the use of solar filters to protect the camera.
Can you point a camera at the sun?
Pointing a camera at the sun can be dangerous for both your eyes and your camera's sensor, especially without proper protection. The intense brightness and UV radiation can cause permanent damage. If you're interested in photographing the sun, always use solar filters specifically designed for cameras. These filters reduce the light to safe levels, allowing you to capture details like sunspots or solar flares without harming your gear. So yes, pointing a camera at the sun is possible—but only if you take the right safety precautions.


