Product Photography Tips for Perfect Product Images
May 12, 2023
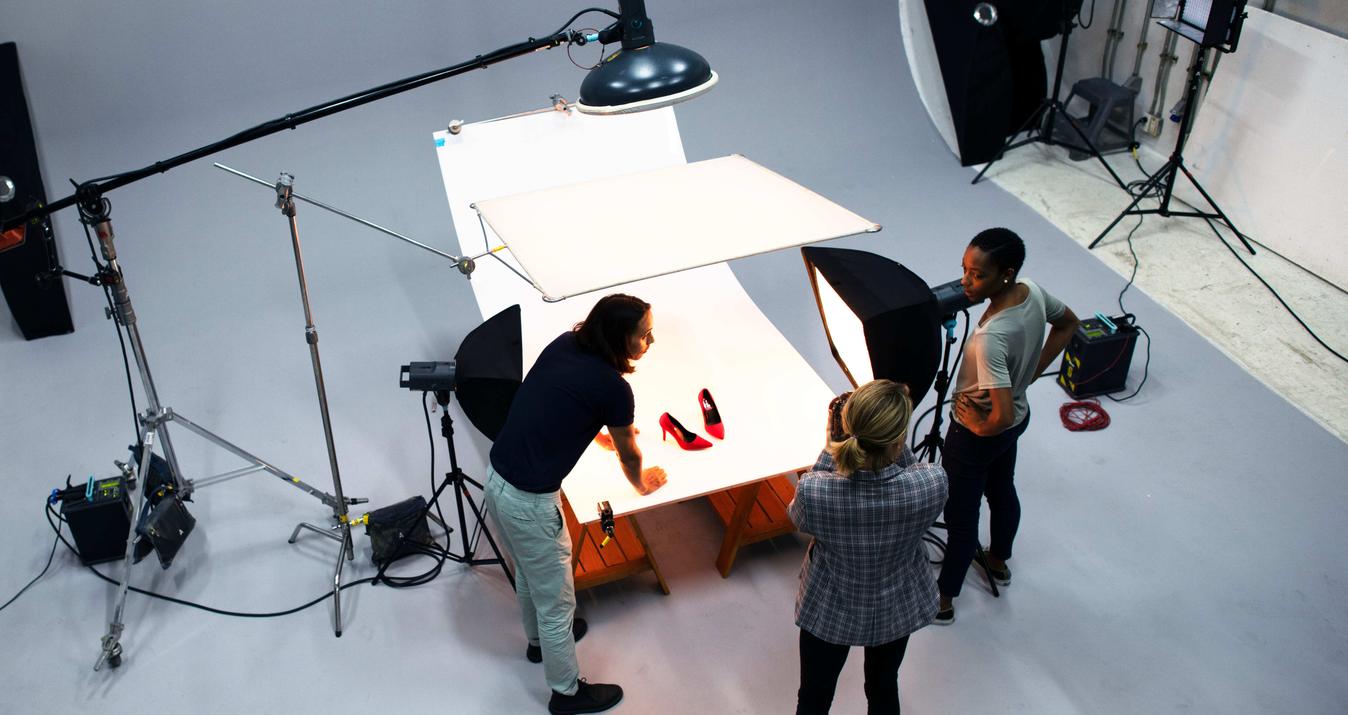
As a commercial photographer, one of the things I do the most is product photography. No wonder, because it is very important for the field of e-commerce.
From high-tech gadgets to apparel and beauty items, product photography is my main type of assignment. I also shoot a fair amount of food photography but this article will focus on the basics of composing and lighting for product photos and many of these techniques can be used for food as well. Do you want to know how to make great product shots? Well, then let's go!
Remember that even the best images get better with editing. For example, you can use a special tool to remove an item from a photo.
Camera & Gear
One of the first things to consider for stunning product images is your camera and how you will be using it. I highly recommend using a DSLR if you have one available but a point-and-shoot (all automatic) can work as well. The main benefit of a full DSLR camera for good photographs is the ability to use its Manual settings, which allow you to have more control over your images. Shooting in the Auto or Program modes can work as well but I encourage you to try using your camera on Manual so that you can get the most out of your efforts. To speed up subsequent editing, use the AI image editor.
In post-production, you'll understand how photography products look to potential shoppers and what to change in your camera settings if you want to improve their appearance. Use only the best ecommerce photo editing tool if you want results and great product shots.
With product photography, it’s also a good idea to have a tripod on hand. This will allow you to shoot with wider apertures and slower shutter speeds and not worry about camera shake. Without a tripod, your product photoshoot risks failure simply because the pictures won't be clear. And not even the coolest lens will help you! I use a tripod often with both natural light sources as well as studio lighting.

Sensor Size
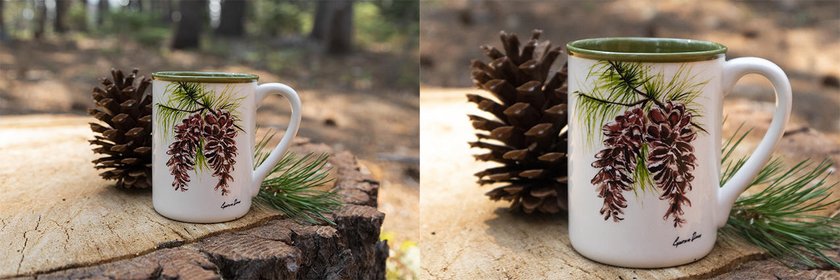
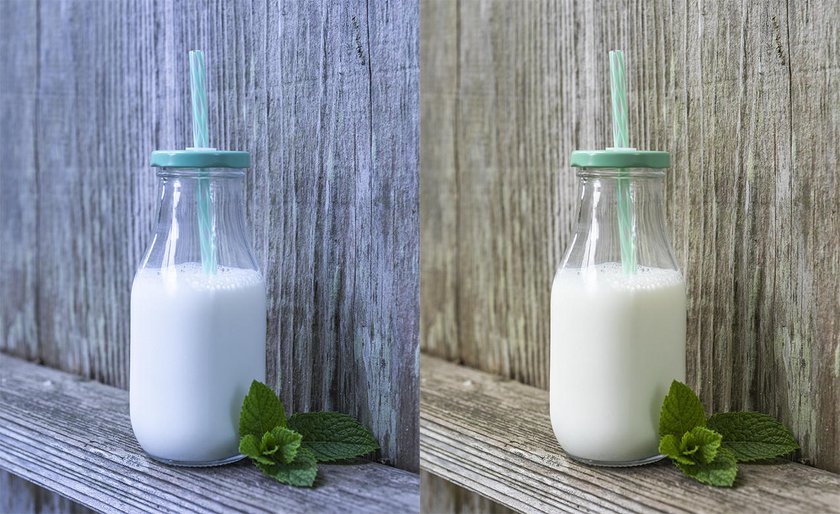
It’s also important to consider the size of your camera’s sensor in product photography as it affects your lens’s field of view in comparison with focal length which we will discuss more later. A full-frame camera has a sensor sized at 35mm, similar to many film cameras. Sensors smaller than 35mm can result in excellent images, however, the crop factor will affect how your lenses function. For example, most Canon cameras have a crop factor of 1.6x (for Nikon it’s 1.5x) meaning that your field of view through the lens is 1.6 times larger. For example, with a Canon camera, a 50mm lens will have a field of view closer to 80mm on a crop sensor. In the example below, the same image was captured with a full-frame camera on the left using a 50mm lens while the image on the right used a crop sensor camera, also with a 50mm focal length.
File Format
We've already learned a few nuances about how to take product photos, but you have no idea how important the format you choose is. When setting up your camera, you will need to decide between capturing RAW files or JPG files.
- RAW files are similar to a film negative in that they have a lot more information and are a lot larger in terms of file size.
- JPEG files are similar to a printed photo in that they are compressed and therefore significantly smaller in file size.
With the additional information that RAW files capture, you have more control over how you can manipulate your photo later during post-production (editing). I highly recommend shooting in RAW format so that you can adjust an image later that you may have over or underexposed. In fact, later we’ll cover strategic underexposing for studio-style product photos.
White Balance
Another thing to consider is your White Balance setting. If you make a mistake, you cannot get eye-catching pictures. The White Balance controls the color temperature of your camera and needs to match the lighting present when you are shooting. For example, if you are shooting on the smartphone outdoors, in the sunlight, the “Sunlight” White Balance setting will yield the most natural–looking results. Alternatively, if you are shooting product images indoors and there is only fluorescent lighting available, then the “Fluorescent” setting will look the best. The “Auto” White Balance setting is great when you have a mixed lighting scenario. For example when you want to shoot product photos indoors and there is a mix of window light and artificial light. On Auto White Balance, your camera will help average the temperature to look natural.
Lenses & Focal Length
How to take product pictures? Of course, we can't forget the lenses. For product photography, I like to use a 50mm lens or longer. Wide angle lenses that are a lower number than 50mm, like a 15mm or 24mm lens, can create distortion in the product you are photographing and can be a hassle to fix later. A 50mm lens is most similar to the way our eyes perceive the world around us and using this or longer (greater than 55mm) will create the best results in reproducing a product photo that is accurate to how the product looks in real life.
A macro lens can be great for shooting products as it offers more detail and the ability to get much closer to your subject than non-macro lenses. It’s not a requirement to use a macro lens for product photography, however, just a bonus. With a special tool, you can easily denoise images.
Aperture & Depth-of-Field
Another big element of product photography is the aperture you choose to work with. This is a big decision to make in how you want an image to look so I never use the Auto setting for this.
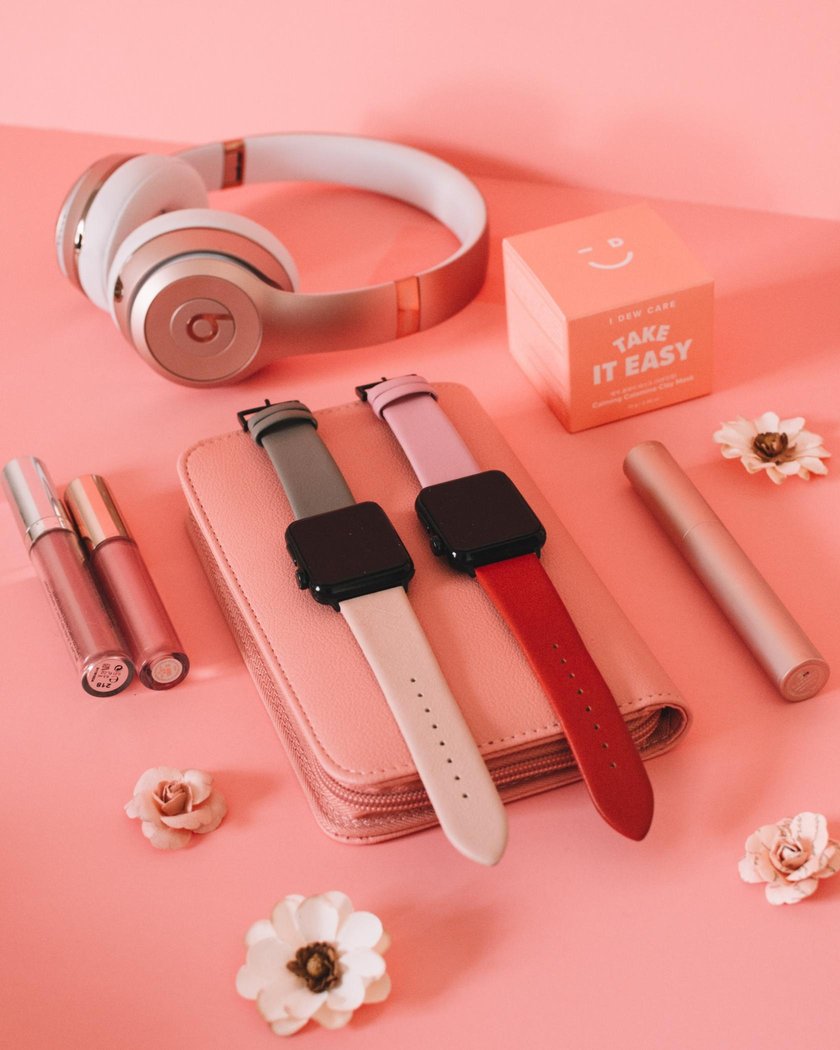
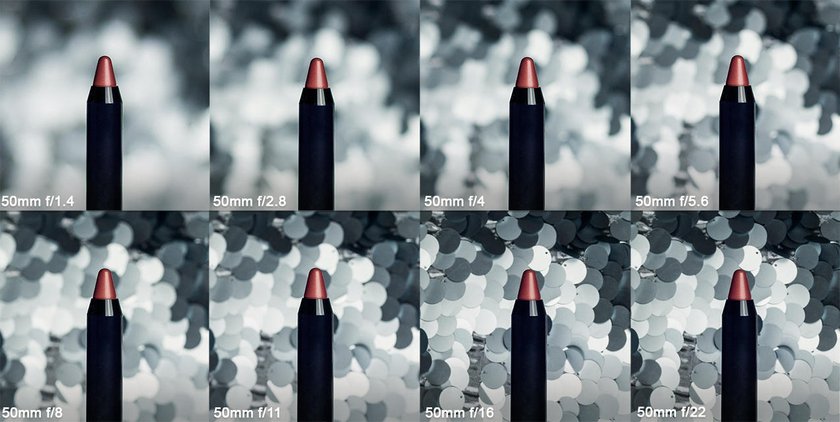
- A large aperture like f/2 or f/4 will create a shallow depth of field meaning that the area in focus will be small. This can allow you to create a beautiful look with the product you are photographing in sharp focus while the background is out of focus. I like to use this technique a lot as this really puts the focus of the image on the product.
- Alternatively, if the background behind your subject is integral to the theme of your photo, then using a smaller aperture like f/11 or f/16 will keep both the subject and background in focus. In the example below, you can see how the different apertures impact the depth of field (area of focus) in relation to the background.
As you can see, a lot depends on the right aperture. When you're doing e-commerce photography, I advise you to try different options to see which one will work best in any given situation. Remember that you can only use a photo editor to make your pictures better.
Shutter Speed & ISO
When we talk about product photography setup, we should definitely talk about things like shutter speed and ISO. If you set them up correctly, your picture can quickly be placed on the poster board.
The Shutter Speed setting of your camera determines how long the aperture will be open, exposing the image. This doesn’t affect the overall look of an image as much as the aperture so I recommend shooting in Aperture Priority mode (Av). This setting will lock your camera on the desired aperture and then automatically set the shutter speed as needed to create good exposure. This is a great short cut and shooting in RAW format allows you to adjust the exposure later if your camera is slightly under or overexpose your images.
Another setting to consider when we speak about product photography ideas is your camera’s ISO. The ISO determines how light-sensitive your camera’s sensor will be while shooting. ISOs like 100 and 200 are great to use when you have a lot of available light, like outdoors, and you don’t need your camera to be as sensitive. Low light situations like shooting indoors, when it is overcast, or late in the evening as the sun is setting when the light source is not too bright is the time to use more sensitive ISO settings like 800, 1200, and greater. One thing to keep in mind is that the higher your ISO, the more pixelated your image can look as it compensates for the low light. I always try to shoot on the lowest ISO possible unless I am trying to freeze motion. In that case, I will use a higher ISO to keep the image as sharp as possible.
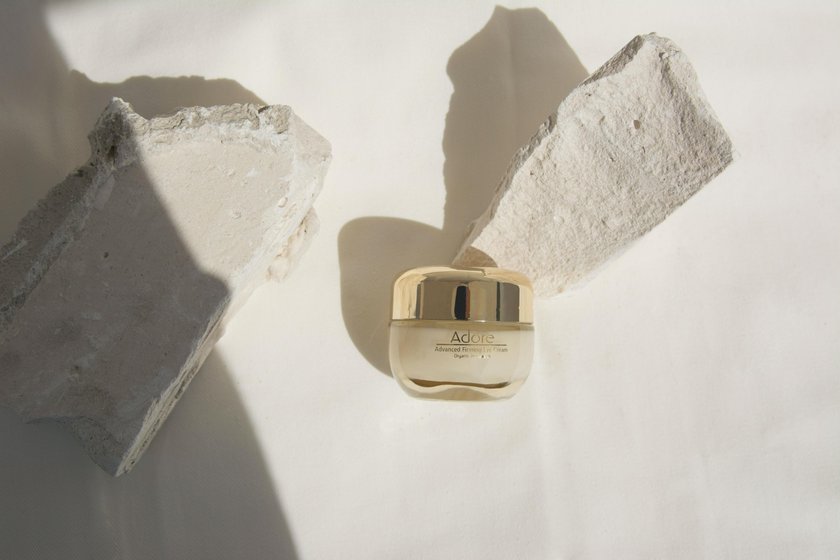
Styling Tips
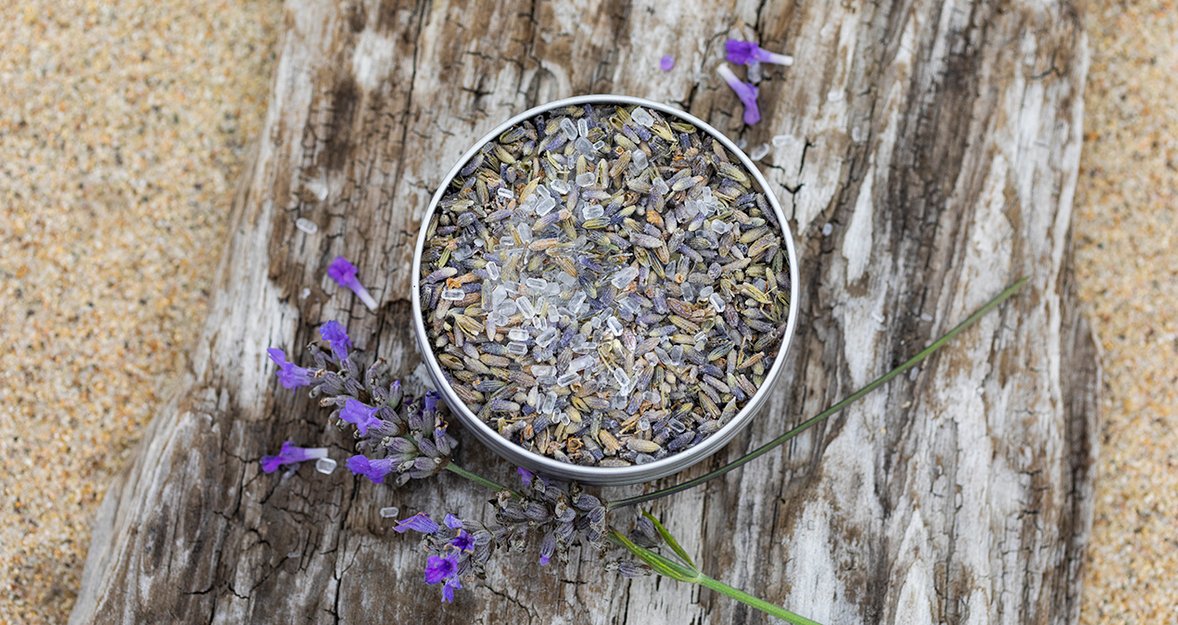
How you set up a scene for a product photo is very important and can mean the difference between an interesting photo and a boring one. I like to use things that are contextually significant and help tell a story of the product's origin or how it is used. For example, if I am photographing a high-tech water bottle, I think about where water bottles are used and then I add a prop that makes sense like a backpack or a pair of athletic shoes. In the example below, the product being photographed is a container of natural Lavender Bath Salts. So to tie in the sea salt, I used beach sand and a piece of driftwood to pose the product on and then added some fresh lavender to add color and make the shot more interesting. Without the added lavender prop, the image would have been pretty uninteresting.

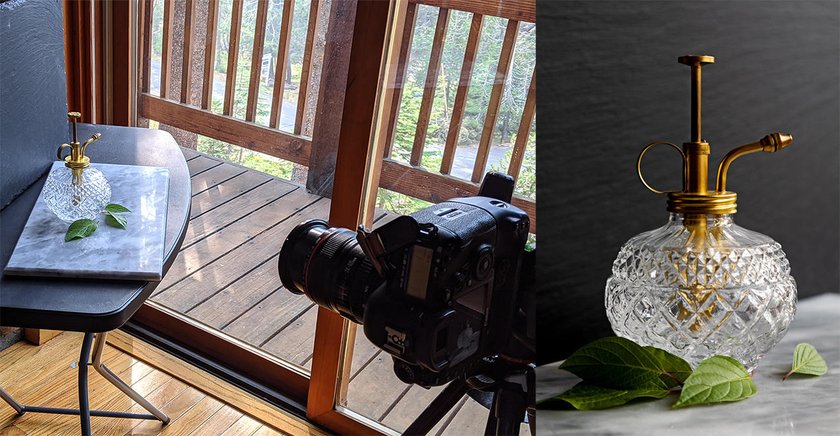
Window Lighting
One of the techniques I use most to light product photos is bright window light. It's natural light, so your product photographs will look great. The reason is that it helps "soften" the photo. You need to set the light back to illuminate the whole picture, not just certain parts of it. You don't need any additional equipment. That's why using light from the window is a better idea for a newcomer.
This is the look used most commonly for lifestyle photos and many brands use these types of images for advertising, social media, and website use. We all have windows in our homes so this can be a good place to start.
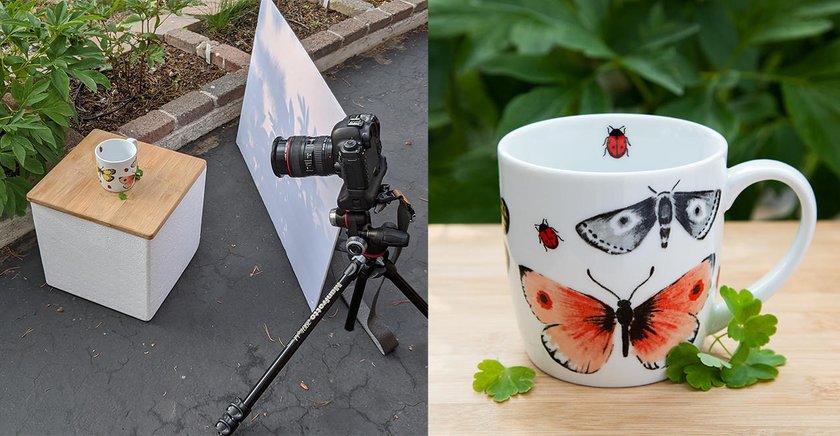
Let's talk more about the product photography lighting setup. I like to position my subject with the window light coming from the side or slightly behind my subject at an angle. This look is very flattering for most products in a lifestyle setting and works especially well when photographing food. In the example below, you can see that the subject is placed close to the window with a backdrop positioned in the back. A white piece of foam core board is opposite the window to bounce light back at the subject and keep it from looking too dark on that side. If your pictures turn out too dark, don't be upset. You can use a special tool to lighten up photos.
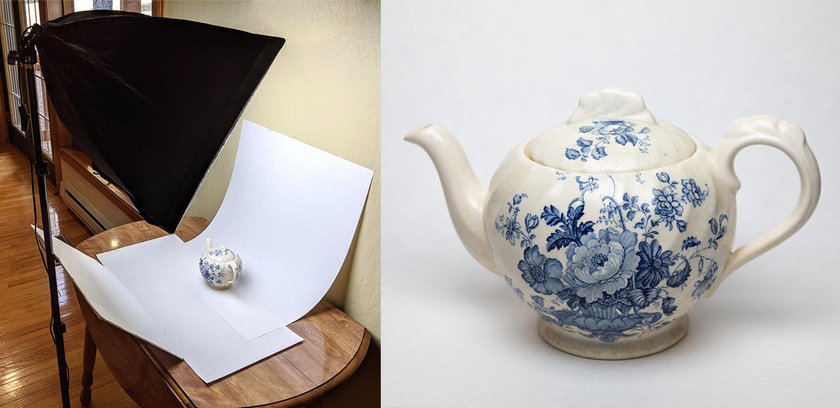
One-Light White Backdrop
When capturing images for e-commerce, most clients request a white backdrop behind the product. It can be a lot easier to create a bright white background look in your home than you may think. I like to place a small table next to a wall and tape a large piece of tag board to the wall, curving it down to the table (secured with tape). This white background creates the “no horizon line” effect and looks very clean. To light the product, I use a medium-sized softbox with an LED light bulb and angle the softbox to light both the backdrop and the product. You can also use a small piece of white foam core that is added to the front to bounce light onto the front of the product and lighten any shadows. Simple LED lights like this can be purchased on Amazon and are quite affordable.
Capturing Shiny Surfaces
Photographing jewelry, beverages, and anything with a shiny surface can be quite challenging as the reflective nature of the product will reflect you, your camera, the room you are photographing in, etc. To solve this issue, I use a frosted lamp shade to create a light tent cone effect. Having the product enclosed within the lamp shade, the light shines through and eliminates almost all of the undesirable reflections. Many times your camera will still be seen and then you can remove that later during post-production. In the example below, I am using a Melodi Lamp Shade from IKEA but any frosted white plastic or glass lamp shade will work. If those are difficult to find, this technique can also be executed using a thin paper or velum cone. Just curve the paper into a cone shape and leave a small hole at the top that is the correct size for your lens to fit through. When using one light with this set-up, I always add a white foam core reflector opposite the light to soften shadows. The reflector makes my photos look well-lit. In addition to filling in shadows, it also helps the white background to be more evenly lit and in the example below you can see the difference it makes in the final image.
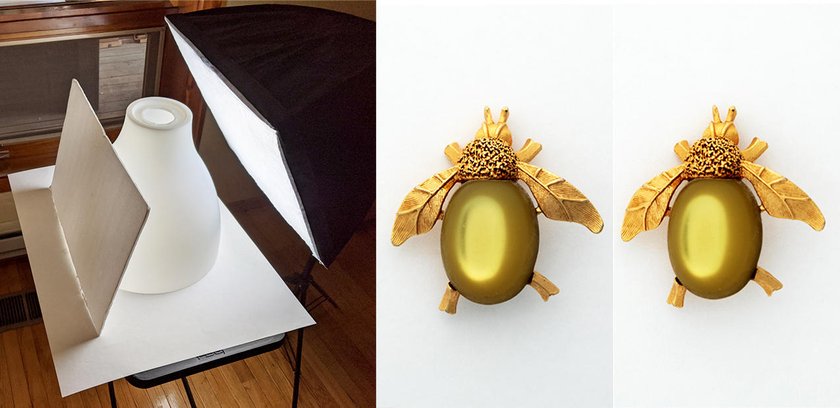
With this set-up I will often underexpose slightly so that reflected light areas are not too bright. When working with RAW files I can always brighten the image later on in the post but if I accidentally overexpose while shooting, it can be difficult to recover highlights and have a good-looking exposure. This works especially well with jewelry and underexposing slightly ensures that I won’t have to spend a lot of time editing areas that are blown out (highlights too bright in relation to the rest of exposure). Please see the short video at the end of this post for more details on that.
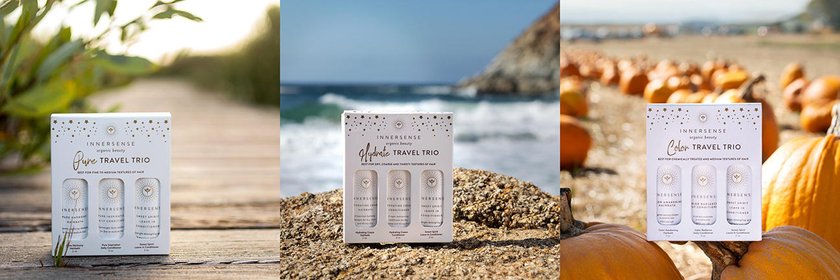
Shooting On-Location
How to take good product photos? Many products can benefit from being photographed in a location that makes sense to the nature of the product and its uses. While it’s important to capture products on a white background for e-commerce use, the majority of my product work is done on-location, with storytelling in mind. For example, while a sports drink can look fine in a studio setting or photographed on a kitchen counter, it can be more exciting to shoot it on the bench of a canoe in a lake or at the top of a mountain with an epic view in the background. The more you can do to make a product look dynamic and desirable, the more interesting your photos will be. I like to think about where the product goes out in the world and then I brainstorm from there. Below is an example of travel-size hair care products I photographed on location to highlight the product qualities as well as the fact that they are convenient for traveling.
When shooting on location, the easiest approach is to avoid shooting in full sunlight and place your product into the open shade. I look for areas that are not too dark and position the product close to the edge of the shade so that light will filter in and help to give the product dimension and nice highlights. If your shady area is too shady, then the lighting will lack depth and the product will look flat. As much as you can, try to have the brightest sunlight behind your subject or to the side. Too much frontal light will also render a flat look. Feel free to bring your foam core reflectors with you into the field to bounce light into your shadow areas. This will ensure that the front of a product is not too dark when you have your light source primarily coming from behind or the side of the subject.
I also try to shoot either early in the morning or late in the day and avoid the middle hours when the overhead sunlight is too bright and harsh. With the sun at an angle as it is at the beginning and end of each day, the effect is flattering and the dynamic range (ratio between highlights and shadows) is easier to work with.
Conclusion
I trust that my product photography tips will be useful to you! I hope this article gives you some ideas and the confidence to try some product set-ups. Use your imagination and have fun with it!
FAQ
What Do You Need for Product Photography?
Of course, you definitely need a camera and the right lens. I also recommend having a tripod and a white background. You should take your photos in a bright room so that the product you choose is clearly visible.
How Do Small Businesses Take Good Product Photos?
Regardless of the size of the business, you have the opportunity to take impressive photo shots. First, decide what kind of product you want to shoot, then use the right equipment and take photos from different angles. Don't forget about post-processing, because it will help you achieve the desired result.
How Do I Start Product Photography for Beginners?
I recommend attending a course first (you can do it online). After that, buy all the equipment you need. And the most important advice is to practice, and then you will succeed.
How Can I Do Product Photography at Home?
You don't need much to do that. If you don't have a camera, use your smartphone. I recommend buying a tripod and thinking about what to make a white background out of. Choose a well-lit place and start taking pictures.