Mountain Photography: A Photographer’s Guide To Peaks
Last Updated on July 23, 2025
Learn how to photograph mountains beautifully: tips on light, framing, and capturing breathtaking landscapes for travel and road photography.
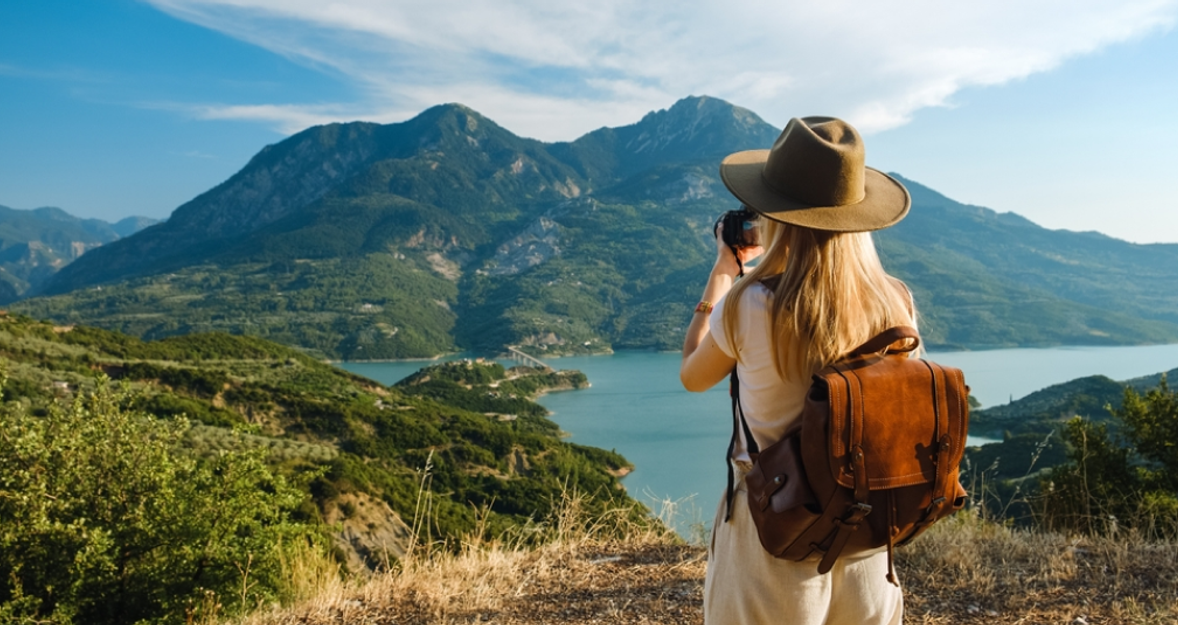
Travel photography (road capturing) stands apart from other types of shooting in terms of atmosphere and frame composition. At first glance, snapping an image is simpler than framing a portrait. What could possibly go wrong since the item is static? However, by the fifth or tenth picture, it becomes evident that mountain landscape photography necessitates a certain level of preparation. For example, the Swiss Alps and the German Alps are part of the same mountain range, yet their photos contrast.
How to photograph mountains, so the pics take your breath away? We will discuss this in today's article.
Images That Stunned Over Time
 Mountain photography originated in the mid-nineteenth century. A little-known German photographer said at the time, "The Alps want to be photographed." Contemporaries recall one more person who has become an icon in the mountains and for capturing images.
Ansel Adams (1902-1984) was one of the most astonishing landscape photographers of the 20th century, and arguably America's most admired. During the decade, technological advancements had a profound impact on the mechanical, social, and aesthetic aspects of photography. The first compact Kodak Brownie and roll film revolutionized photography by eliminating the need for chemicals. Many people grew to view the camera as a chore. But the one for this artist was a way of recording something that nature had kept hidden, something that human conflict had not yet caught hold of.
Exclusive Tools of Endless Possibilities in One AI Editor
Explore Now!The black and white "Looking Back and Forward Looking" reminds of Caspar David Friedrich's Wanderer Above the Sea of Fog. It may be because the photograph makes the image more compelling to see, or the opposite is the case. Mountain photography tutorials on numerous websites are almost identical to those for more common landscape pictures. The main difference is that mountains have their own environment. We will explain how you can engage with it further.
How to Transform Mountain Pictures into Gems?
 Mountain photography ideas are limited by imagination. For example, nearby are often pictures of mountain peaks with clouds or of some very impressive snow slopes. Individuals or groups who have backpacks and trekking sticks are likely to be photographed in Ireland, Iceland, and Norway. However, this is just a small portion of what lies behind the new sensations elicited by the camera click. Let's have a peek at some general mountain landscape photography tips.
Planning the Exposure
 Beginners regularly become so taken with the natural aesthetics that they cease thinking about how to capture this beauty in a shot best. After all, a photographer must create a composition for each picture, and shooting everything in sequence is a horrible idea. Shooting mountains is not a photo report, and you don't need to push the shutter every second pic. The quantity does not equate to quality. So, how to photograph mountains? The list below includes several common mistakes.
A tourist mistake. Taking shots exclusively of the mountain's summit. In the ideal situation, this technique will just replicate one postcard available at any neighborhood souvenir shop. But a branded one will at least have captions with the names of the peaks. Even this will be lost from your photograph.
Shooting without a UV filter. On a cloudless day at two kilometers altitude, UV radiation is usually sufficient to transform your photo's palette into something resembling a blue denim shirt. Furthermore, remember that snow reflects light. As a result, lighter areas may appear in the images.
Where you stand, there you take a photo. At the same time, you will undoubtedly come across other objects that will climb into the frame, the artistic value of which is quite questionable: poles and high-voltage masts, wires and serpentine roadways, automobiles and wayside cafes, and, lastly, odd individuals roaming around.
Mountain landscapes shot from the ground are the most prevalent type of photography among beginners, and they produce the least intriguing results. The starting point is that when filming from the bottom up, the scale is lost, and the mountains become a background that desperately needs a foreground. Remember the Windows screensaver and consider why it is so appealing.
The presence of trees is the most distinguishing aspect of mountain moments photographed at this level. In many situations, they block the picture, although careful placement of trunks and branches in the frame can sometimes produce satisfactory effects. Consider that there may be towns on the plain below, which will add to the appeal of the photograph.
Camera Settings
 Mountains are beautiful in their grandeur, so photos and camera settings for mountains paintings should correspond to nature. First and foremost, it depends on how good the lens distortion correction and the set parameters are. Digital cameras from Fuji, Canon, and Nikon are good, but require a little adjustment. We will describe the latter in detail in the table below.
Feature | Size | Description |
Format | Raw | The camera performs minimal processing on the RAW file. As a result, the RAW image could appear desaturated. If there are slight flaws in your shots, you can use the camera's internal settings to rectify them. |
Drive Mode | Single shot | Single Shot mode (AF-S, ONE SHOT) starts autofocus when you press the shutter halfway down and locks the focus in that position. If you wish to shoot while the camera is in a cable car or moving van, select Continuous AF (or AF-C) autofocus mode. |
Core Mode | 3:2 | Whether you're shooting with a cropped sensor, a full-frame sensor, or a medium-format detector, you should set the image aspect ratio to match the native sensor size. This allows you to maximize the use of all the pixels on the photographic sensor. Most digital cameras have a 3:2 crop sensor, although there are additionally 3:4 crops. |
Focusing | Single point | As an alternative to "Single point," the "Automatic area selection" option is often employed, in which the camera determines the focus point, or "Dynamic mode," in which the camera tracks the movement of the subject specified by the user. |
ISO | Camera base values | ISO stands for "ISO" or "International Organization for Standardization," not "gain," or how much the camera amplifies the readings from the lens. The base ISO, also known as Native ISO, produces images with less noise and higher quality while being less sensitive to light. |
Aperture | f/11 to f/16 | Photos of mountains with all static objects in focus are more visually appealing. The depth of the field (DoF) increases with cutting aperture size. Although apertures over f/16 expand this parameter even further, they also generate a slight blur in the image due to diffraction. |
Shutter Speed | 1/100 | Choose a rapid shutter speed of 1/100 of a second or faster for ceasing any movement in the frame. If you want a blurred appearance in your landscape shot, pick a slower shutter speed, such as 1/3 of a second or more. |
Mountain photography settings can’t be visualized without the right equipment. The 24-70 mm is a classic landscape lens. The Canon EF 70-300 mm, Nikon AF-P 70-300 mm, and Sony E 70-350 mm are more portable and weigh less (up to 1 kg). If you carry plenty of lenses, a belt system with lens pouches will make changing optics easier.
Daily and Night Shooting
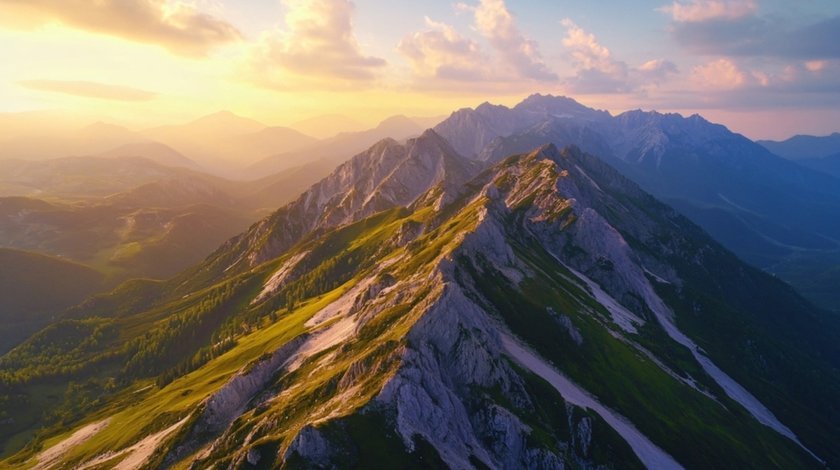
Daytime mountain photography is stunning. You can admire the rocky peaks and the contrasting landscape below them. The most beautiful photos with hills, stars, and mountains are made in 4k image resolution. Agree that film photographs look great on greeting cards, backgrounds, and posters. What is typically the preferred lighting for mountains? Let's find out.
Golden hours. Sunrise and sunset create diffused, pleasant light. This light emphasizes the mountain terrain and creates a range of colors in the sky.
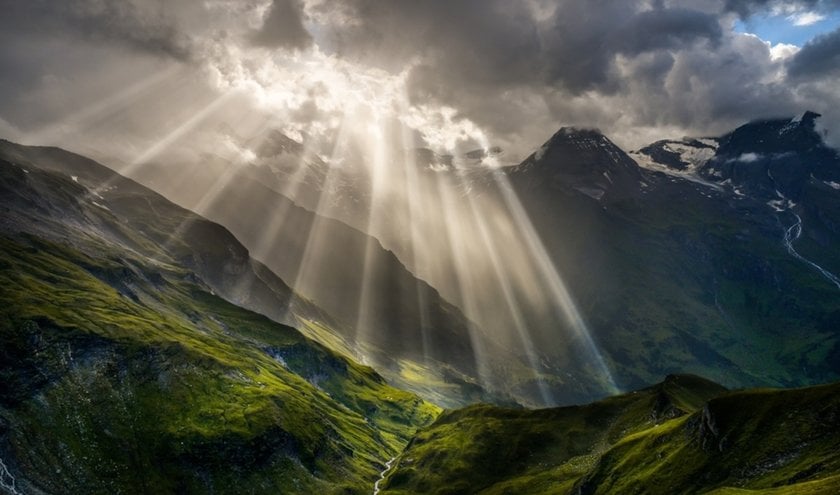
Overcast and rainy weather. Wet elements alter the reflection of light. Furthermore, weather phenomena like rainbows may suddenly appear.
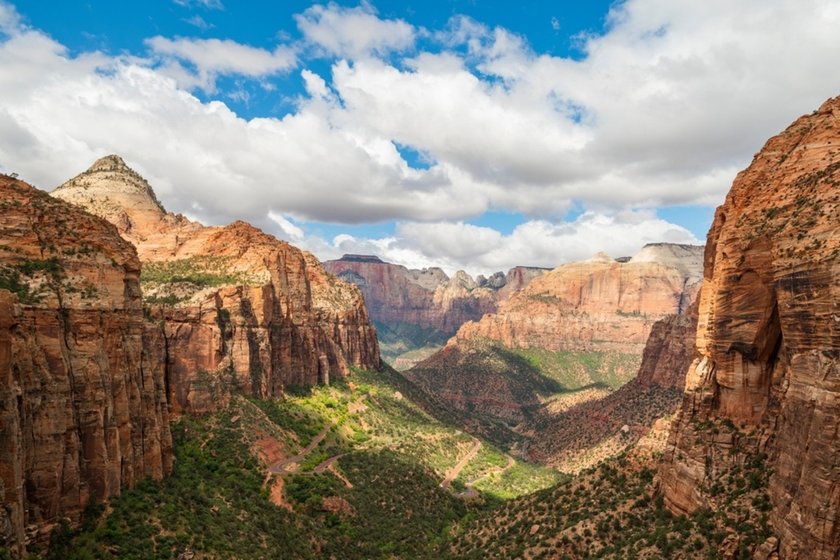
Midday. Midday light is intense, creating pronounced contrasts. This can emphasize the severity and detail of the mountain.


Night photography of mountains can often be challenging due to the very little light available. However, in the highlands, there are enough places to get dim light from the moon and stars. In any case, it is necessary to use the maximum aperture (f/2.8 or f/1.8) to capture as much light as possible. When using a 50 mm lens, a shutter speed of at least 1/50 sec. Similarly, for a 600 mm lens, use 1/600th of a second.
Preparation Notes
 The preparation for a picture shoot in the mountains is determined by how you envision the shooting process. For example, if it's part of a sightseeing tour, you can just check the camera settings and tripod. If you are purposely going on your own, you need to prepare basic equipment. It should contain:
thermal mug;
basic equipment;
thermal suit;
checking the weather forecast.
It is best to have someone knowledgeable about the mountainous terrain with you. There are guides in every mountain community. If you meet geologists, ask them for advice on the mountains. Some of them contain amethyst or alexandrite gemstones, which are stunning and can enhance your collection.
Hidden Landscape Photography Tips
 Temperatures tend to drop quickly in the mountains, which can lead to numbness in your fingers while shooting. Choose gloves with fold-over finger flaps for comfortable handling. The second obstacle is wind, so prepare a balaclava, scarf, or turtleneck.
The main thing about mountain photography ideas is not to overdo it with the choice of filters. It is recommended to take a polarizer to keep the colors vibrant, and don’t forget about a 3-stop Soft or Medium Grad.
How to make mountains look bigger in photos? One option could be to use the landscape photo maker tool in post-processing. On the other hand, you can shoot from a half-crouch initially, allowing you to change the scale naturally.
Luminar Neo: Multi-tool for Breezing Capturing
 In any case, an unintended inclusion of an object in the photograph is a common phenomenon when it comes to the life of a photographer. Others or people can disturb the whole aesthetics by creating unwanted blur, such as the sun or rocks. Luminar Neo is a multi-tool that works in all areas of photography.
color correction;
smoothing photos;
working with layers;
removing broken frames and much more.
Why are photographers drawn to mountainous terrain? One of the answers can be Aldo Rein (Brad Pitt) from the movie "Inglourious Basterds": "Doggy doc's going to dig that slug out of your gam. He's going to wrap it up in a cast, and you've got a good how-I-broke-my-leg-mountain-climbing story. That's German, ain't it? You all like climbing mountains, don't you?"
Your AI-Powered Photo Editor for MacOS and Windows
Discover Now!Final Thoughts
Mountainous terrain does not intimidate inexperienced climbers and photographers. The former must include fasteners, ropes, and other safety features. Shooters, in turn, require ways of communicating with people: optics, a camera, and creativity. Luminar Neo will assist with editing, so don't doubt yourself and dazzle everyone with stunning mountain landscape photographs.