Rembrandt Lighting in Your Portrait Photography
February 22, 2023
Rembrandt lighting is one of the most popular portrait lighting techniques. Learn what it is and how it's done in this informative article.
The right lighting in portraits is the secret of masterpiece photos. It gives the face an amazing dramatic mood. But beginner photographers often struggle to find the right lighting in their portraits. That’s why they spend a lot of time on the test shots. However, spending hours behind the camera and moving it from place to place does not always achieve the desired result. Only knowing how and where to set up the right type of photography lighting can distinguish a casual shot from a professional-looking portrait. One type of lighting that will immediately add depth to your photography is called Rembrandt lighting. It’s a good idea for those photographers who want to add lively images of people to their portfolios or Instagram feed. This article deals with all the ins and outs of the Rembrandt style in portrait lightning.
No matter how good your Rembrandt photography is, you can always make it better with the AI tools in Luminar Neo. Luminar Neo also has special presets that you can apply to give a unique feel to each photograph.
What Is Rembrandt Lighting?
Portrait photographers use several classic ways to illuminate a scene, from using a flash to natural light from the window. But in order to achieve the dramatic effect, they focus on exactly Rembrandt portrait lighting in particular, which is widely used by creative people around the world. You’ve probably heard the name of this technique many times, but you still don't know what it means. So, what is Rembrandt lighting? Now we will tell you everything in detail.
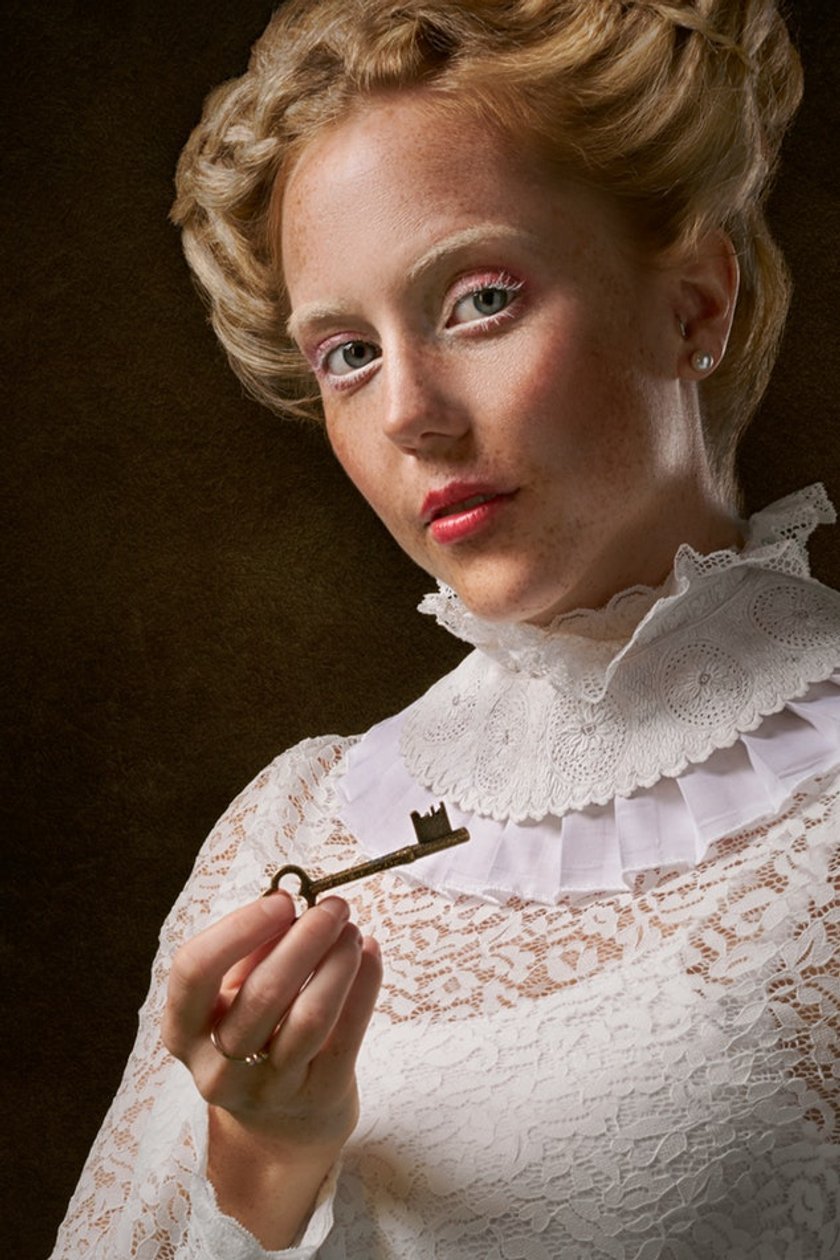
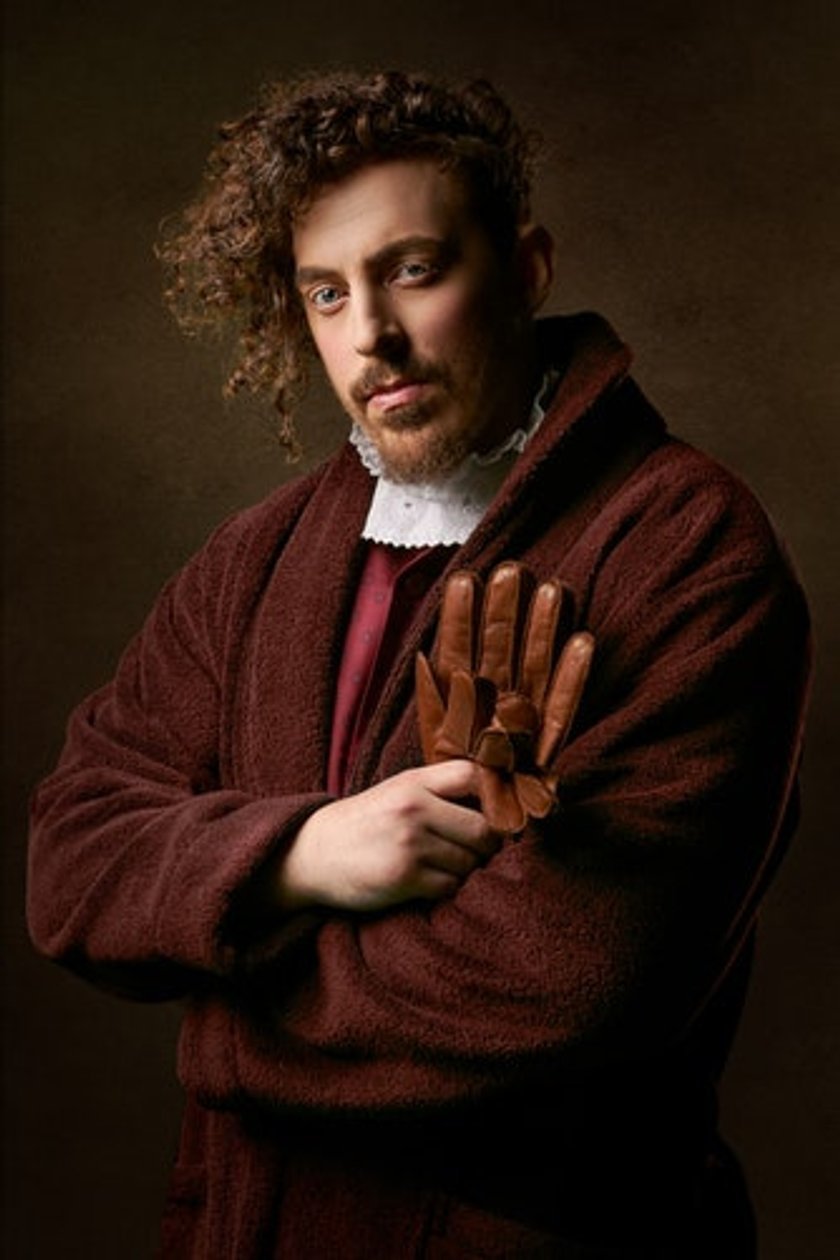
Rembrandt lighting is a popular lighting technique in photography and cinematography that creates a triangle of light on the cheek opposite the light source. This method is named after the great Dutch painter of the 17th century, Rembrandt Harmenszoon Van Rijn, who often used this type of lighting in his portraits. You can observe some of his paintings as face-lighting references. It is worth saying that the famous artist did not invent this type of lighting, as it had already been used by others. However, painter Rembrandt was effectively and successfully able to apply the scheme when painting portraits, after which it was named after him.
The thing about Rembrandt lighting in photography is that it’s formed indoors. How does it occur? Some sources claim that Rembrandt painted most portraits in the same room with a specifically placed window and seated his models in the same place, creating a constant and pronounced style of lighting.
What does Rembrandt Lighting Look Like?
This Rembrandt style lighting scheme is usually defined by the presence of a small triangle of light on the cheek, further away from the light source. It is Rembrandt's triangle presence that distinguishes this light. Technically, the triangular island for photography Rembrandt lighting should not be wider than the eye and longer than the nose.
Why Use Rembrandt Lighting?
There are several reasons why you’ll like to use Rembrandt lighting:
- Helps to achieve impressive drama in a portrait, that is the so-called chiaroscuro effect. That is when one side of the subject has shadows and the other one has sharp lighting. It is the play of these two bold contrasts that creates a certain mysterious atmosphere in which it emphasizes the character of a person in an unusual way.
- Easy to implement. This means that you don’t have to spend a lot of time and effort on the right light setup. It also doesn’t require a lot of different equipment, as is usually the case in photo studios. In most versions of this technique, all you need is a camera and natural light. A reflector is the maximum you can add.
- Rembrandt lighting in photography and video looks fascinating. This technique is used by actors in almost every movie. Look at the expressions on the faces of the main characters in Fight Club, Birdman, and other movie masterpieces, and you’ll definitely notice a scene with the same triangle on the subject’s face we talked about. The directors decided to add this element as a powerful technique that demonstrates emotional changes in the character.
Rembrandt Photography Basics
As we said before, this technique is used in a room with a specially placed window light and seating of models in the same place. Therefore, the position of your camera here is appropriate.
So, how to build the basic Rembrandt lighting? Everything is simple. This effect is created when the face of the model is illuminated on one side and the other side is left in the dark, but with a little exception. There’s a small inverted triangle of light on the less-illuminated cheek, opposite the light source, which is the basis for creating a dramatic look.
Also read: Focus Stacking in Photography: Share Secrets of Making Images Sharp
Another tip to keep in mind is that the patch of light shouldn’t be overly big, being the same width as the eye above it, while at the same time, the tip of the inverted triangle shouldn’t extend below the model’s nose. By just following these simple rules you can take impressive Rembrandt portraits that attract the viewer’s attention. Now you know the Rembrandt lighting definition. Let’s take a closer look at this lighting and how to use it in practice.
Rembrandt lighting gear
You won’t need complicated gear for Rembrandt lighting. Just get your camera and choose appropriate portrait backgrounds, the main light source, and a supplementary light source (optional). Rembrandt lighting is most easily achieved with directional light. This means that the light should come from one source. If you don’t have a suitable lamp for Rembrandt photography, even one window with light coming from it into the room is enough.
In fact, one light source can be almost anything: you can use direct sunlight, a beauty dish, or a lamp as long as the light flatters your subject. What matters is the overall effect you achieve in the final image. If you want to get an amazing self-portrait, the light source should be placed above eye level at an angle of about 45 degrees to the front of your subject. Use a face lighting reference to see exactly how the camera should be placed. Of course, you can shift the angle or adjust the position of the model’s face until you achieve that perfect inverted triangle. Additionally, you’ll need to edit your photos with good photo editing software. Because if you’ve done a great job with the basic Rembrandt lighting setup it doesn't guarantee that you’ll get a harmoniously complete picture. Luminar Neo helps to achieve this result thanks to intuitive tools. It works great for all kinds of photographs, including portraits. Below, we’ll consider the main types of Rembrandt light in photography.
Natural lighting
One of the best things about Rembrandt lighting is that it can be achieved with natural lighting: that is, a simple window with light coming through it. Some photographers even prefer window light because it’s soft and flattering to most skin types. Another perk of working with light coming from the window is that people are used to it. And this means no discomfort during the realization of shooting with this lighting style. Your models for Rembrandt photography lighting will be comfortable and will act more naturally in front of the camera.
Indeed, apart from lighting, any photographer needs to consider how to make their model comfortable and which male and female poses work best for their models for a face portrait. Make sure that on the day of the photoshoot where you’ll use Rembrandt lighting, there’s no harsh direct sunlight, but that the sky is cloudy. This way light will diffuse. If the sun is overly bright, think about moving your shoot to a room with a north-facing window. Another trick is to hang a white sheet in front of the window, which will help you mimic the effect of an overcast sky.
Additional photography lighting
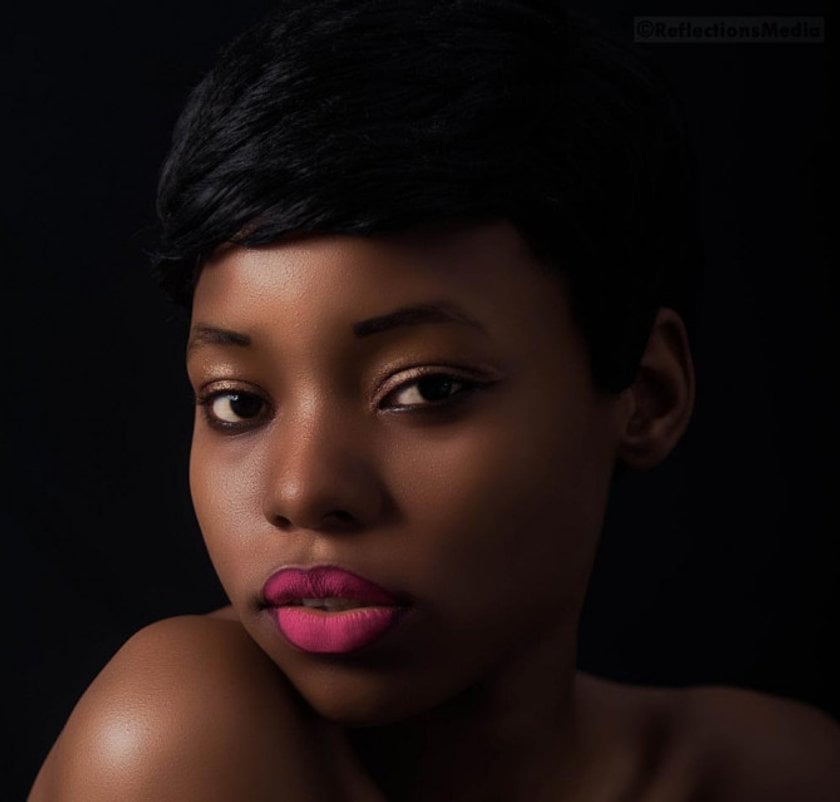
As we noted, only one source of lighting creates a triangle on the model’s face, which provides a dramatic mood for photography. But not always so. In some cases, you may also need a supplementary light source to get some additional lighting on the opposite side of your Rembrandt photography face portrait. Make sure that the secondary light source for the Rembrandt lighting technique is roughly half the intensity of the key light source and is placed below eye level for best results.
In order to achieve the desired result of Rembrandt lighting photography, you can use a reflector or a secondary light source; the type of light doesn’t particularly matter. What you should pay attention to is matching the color temperatures in your face portrait. For example, if you’re using a reflector, silver or white will best reproduce the temperature of the key light source. Mismatched light sources are difficult to correct even in a good photo enhancer.
Flattering face lighting
Now let's talk about flattering face lightning. The reason Rembrandt lighting is so popular is because of the dimension and depth it adds to your portraits. That’s what makes a photograph so interesting and pleasing to the eye, drawing attention to the model just by the means of face lighting.
Above, we told you why you should try this technique. We would also like to add that when you use it in your portrait, you can correct facial features, hide imperfections, and focus your attention on the true character and emotions of the models. For example, it’s a great type of photography for people with prominent cheekbones, as it can accentuate those features. Rembrandt's portrait lighting also suits people with full or round faces, as the part that stays in the dark hides the unflattering roundness. At the same time, itisn’t a good choice for narrow faces, as it slims down the face even more.
When viewing finished photos on a computer, the subject’s eye sees in front of him more than just an image of a certain human. After all, this type of face lighting is reminiscent of the classic Hollywood portraits, which remind us both of drama and sensuality. Remember that the mood set by this type of photograph is dark and dramatic. Your model shouldn’t smile too brightly or otherwise pull an unsuitable facial expression for this mood to be realized fully.
Catchlight
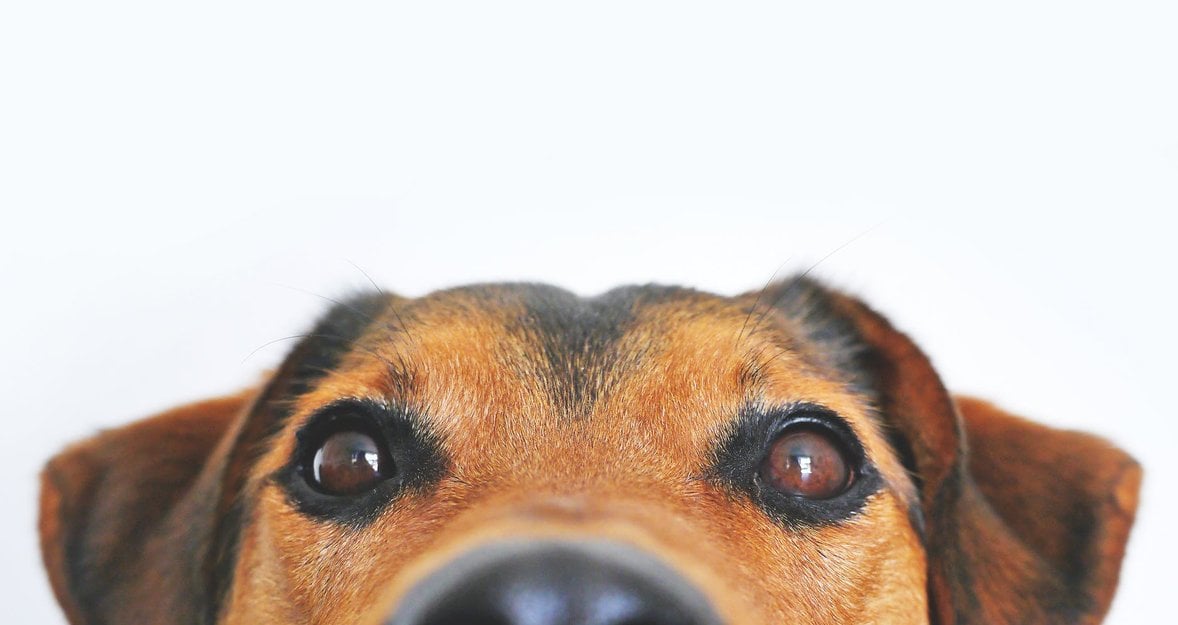
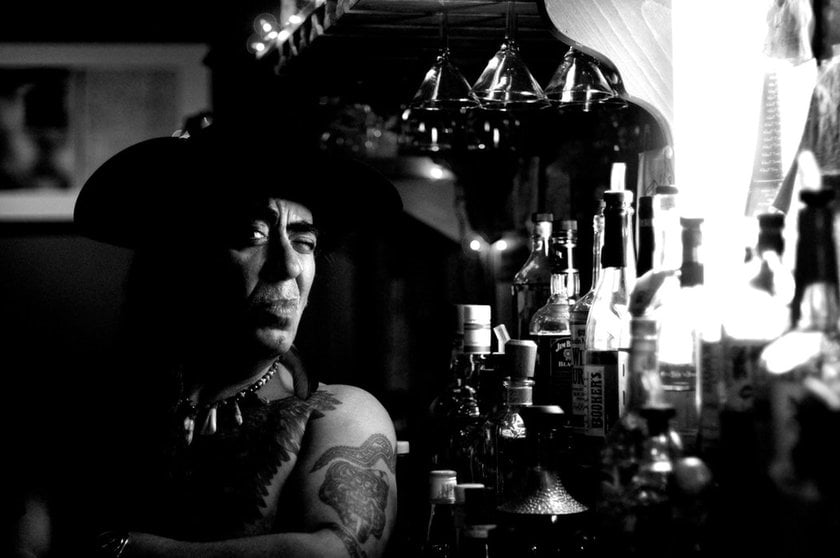
Another detail for Rembrandt's light photography to keep in mind apart from lighting on the face when shooting any type of portrait is catchlight. With the help of catchlight, the eyes of your model will appear lively and bright. Additionally, catchlight accentuates the color of the iris. If you’re doing family portraits with the Rembrandt lighting setup, it’s important that all members of the family have catchlights. In order to spot them, look at the model’s eyes. For Rembrandt lighting in photography, there should be a white reflection of the light you’ve used in the model’s eyes. At least one of the eyes should have the catchlight to give life to a portrait, but it’s better if both eyes have this sparkle. Take a look at this dog’s eyes to understand exactly what catchlight is!
Reflector
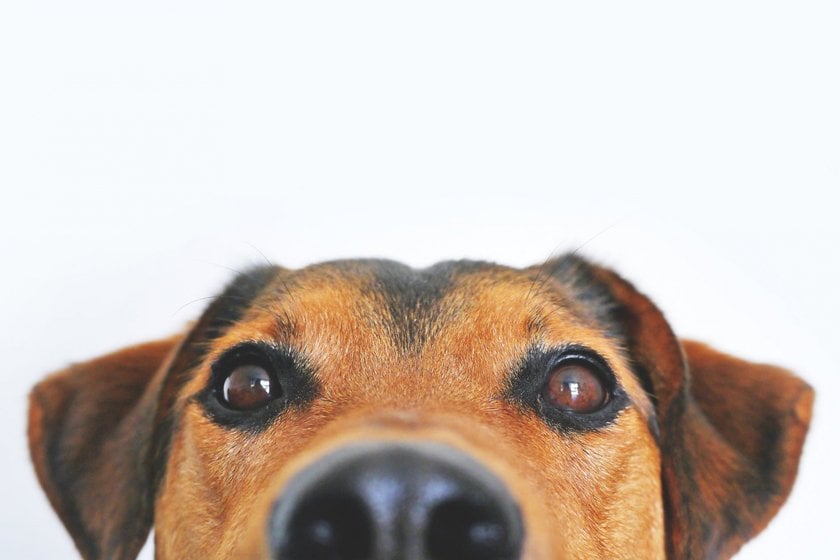
And now we’ll talk about adding studio lighting. In some cases, it’s really necessary. For dramatic portraits, it's also a good idea to put a reflector on the shadow side to soften the transition of light to shadow. A reflector, or even using a fill light at minimum power, will help illuminate some shadows and add detail to Rembrandt's lighting photography. Some photographers say that using a reflector is not true Rembrandt light. Nevertheless, do what looks best. There are no rigid boundaries in photography.
Other types of portrait lighting
There are different types of portrait lighting that suit different people and different occasions. Learn them all to avoid mistakes during your next photoshoot with such specific photography lighting.
Split lighting
In this case, you’ll get amazing results, playing with light and shadow on both sides of the subject’s face equally. After all, split lighting is a type of portrait lighting that splits the face of the model into equal halves. One side is in bright light, the other in shadow. This type of photography lighting is popular for dramatic portraits, for example, those of movie stars or singers on the cover of posters.
Rembrandt lighting set up flatters people with round faces, as it makes them appear slimmer. Make sure that the light source is placed on one side of the model, preferably at eye level. Ideally, it should be 90 degrees to the left or right of the subject, and possibly even slightly behind their head. Adjust the position of the light or the subject’s face until you’re completely satisfied with the result.
Loop lighting
Have you stepped away from the camera and thought about how else you can play with light and shadows? We suggest you consider loop lighting. What does it mean? Let’s explain it with an example. So, If you create a small shadow of your model’s nose on their cheek, this means that you’re using loop portrait lighting.
With loop lighting, the shadow of the nose and the shadow of the cheek don’t touch like they do in Rembrandt lighting. To achieve loop lighting, place the light source slightly higher than eye level and about 30 to 45 degrees from the camera. The reason it should be placed above eye level is that this way the loop shadow will angle toward the corner of the mouth. If the light is placed lower, it will illuminate the bottom of the nose, which is undesirable.
Be aware that if you use this lighting in your shots, it may not be suitable for everyone. For example, people with high or prominent cheekbones will look good with loop lighting, but those with small noses or flat bridges may not. Even so, this type of photography lighting is one of the most common, as it flatters most people.

Butterfly lighting
If you’re looking for ideal lighting in photography and video for seniors, this option is for you. The poetic name of this type of portrait lighting comes from the butterfly pattern of the shadow that appears under the nose of the model when we place the main light source above and directly behind the camera. This means that the photo gets shot underneath the light source.
Butterfly lighting is used for glamour shots. It creates shadows under the cheeks and chin. Flattering for older people, as it makes wrinkles appear less prominent. Additionally, someone with prominent cheekbones and a slim face will also look striking with the butterfly pattern.
As you can see, butterfly lighting has its own advantages. But despite this fact, when you use it in your portrait, not everyone will be good with it. So, models with a round, wide face will look better with loop lighting or even split lighting, which slims the face. You can use face lighting reference to see what lighting will work best based on your model’s complexion. To achieve butterfly lighting, you need a harder light source like the sun or a flash for a more defined shadow in the form of a butterfly pattern under the nose.
Broad lighting
All of the portrait lighting photography techniques such as Rembrandt lighting and loop lighting mentioned above can be done either with broad or short lighting. To achieve broad lighting, turn the model’s face slightly away from the center. The broader side of the face which is turned toward the camera will be in the light. This means that a larger portion of the face will be in the light, while the shadow side will appear smaller. You can use broad lighting for high-key portraits. This photo lighting can be used for someone with a slim face to make their face appear broader, taking up more space.
Short lighting
As the name suggests, short lighting is the opposite of broad lighting. Turn your model’s face towards the source of light. Even a window will work fine for natural lighting photography. This will make the shadows appear on the largest part of the face. This type of photography lighting can be used for low-key, or darker, portraits. It’s slimming and flattering for most people. You can still combine Rembrandt lighting with the short style and achieve a unique and wonderful effect. However, it’s better to use a face lighting reference to see if this style will suit your particular model.
3 Tips for Working with Rembrandt Lighting
The following simple guidelines for dramatic lighting will make working with Rembrandt portrait photography much easier for you.
Create a basic scheme
The basic setup consists of a single light source turned at a 45-degree angle relative to the camera, pointed at the subject, and raised above eye level so that the light falls from the top down. The greater the angle of rotation relative to the model, the thicker the shadow and the sharper the transition. It is important not to go too far to the side of the eye as the shadow side of the face will lose its luster with Rembrandt's lighting diagram.
Light source height
This feature plays a big role because it creates the famous triangle on the cheek for a classic portrait. If you raise the lamp above eye level, some of the light will pass over your nose and illuminate the piece of the cheek on the other side of your face (so, the light source should be higher than eye level). This is what forms the true Rembrandt lighting that is different from the simpler shorter light. As for the Rembrandt lighting setup, if you have a permanent or model light, it will be much easier to position it to get the triangle in the right place.
Light from the window
If you are using natural light from a window instead of a flash, you need to pay attention to other things with light and dark. On an overcast day, or with sunlight reflecting off the building across the street, the model should be placed closer to the window. If the sun is shining directly into the window, you should put the model farther away to avoid harsh shadows for this lighting method.
Post-processing
Rembrandt lighting is a simple, effective photography lighting setup that’s flattering to a wide variety of faces and is easy to master quickly. It’s possible to achieve this using just your camera and a single light source. When you’ve chosen the best photography lighting, taken your portraits, and achieved the effect you wanted with the most appropriate face lighting, it’s time to edit your photos. Luminar Neo is a great tool because it also lets you remove blemishes, soften the skin of your subjects, and adjust the photo lighting and shadows to make your model stand out for the portrait Rembrandt lighting. If you’re not ready to buy Luminar Neo, you can try it for free by clicking the button below. Maybe it will be just the software you need to achieve that stunning effect.


