December 09
15 min. to read
How to use color replacement tool: Photoshop tutorial 2026
These days, when it is impossible to imagine your life without high-quality visualization of anything, image-processing skills that go beyond simple cropping or filter applying can often be needed. In this tutorial, I will teach you how to use Color replacement tool in Photoshop. This can be useful in plenty of situations, from running social media profiles to presenting your ideas to colleagues or customers or in other cases. But this one is not the only one to use. And it has limitations. So we'll also explore other ways to change one color to another with Photoshop and not only.
Easiest ways to colorize an object in Photoshop
With the Color replacement tool
This feature was first implemented in the CS version of the program. It was initially in the Healing Brush group in the toolbar. But since version CS3 this has moved to the Brush tool group. Note that Photoshop's toolbar is customizable, so if you don't see the Color replacement tool, it's probably hidden under the three-dot icon. So it was in my case:
 Once you've selected the tool, the cursor will change to a circle with a cross in the center. As with many other tools in Photoshop, you can change the scope of the edit area of an image and the brush's hardness.
How does the Color Replacement tool work?
How to make a Photoshop color swap? As you move the tool's cursor, Photoshop continuously samples a color from the pixels immediately below the cross at the center of the cursor. This color will replace the current foreground color from the color palette. All pixels that fall into the large circle surrounding the cross and whose color matches the sample taken will change their color.
For example, if a cross is on a green pixel and the foreground color is red, then all green pixels within the circle will change from green to red.
Choosing a replacement color
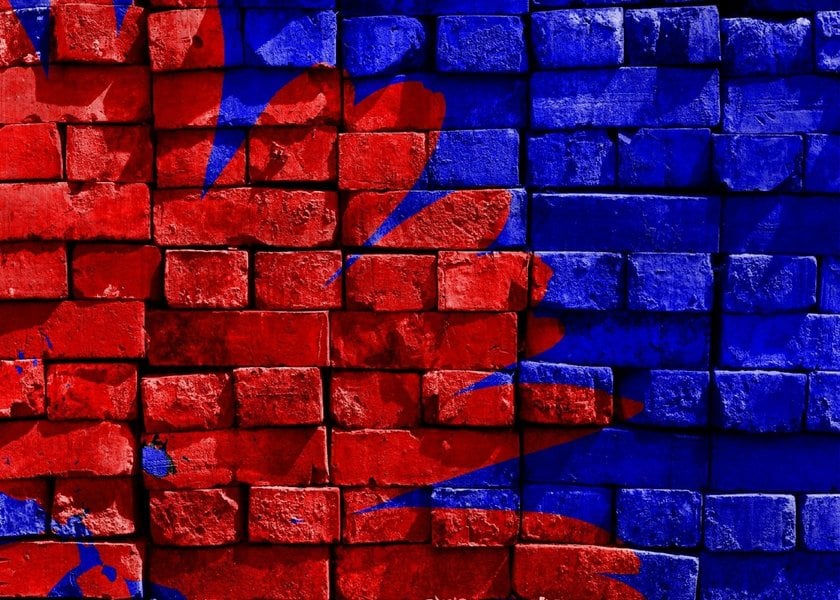
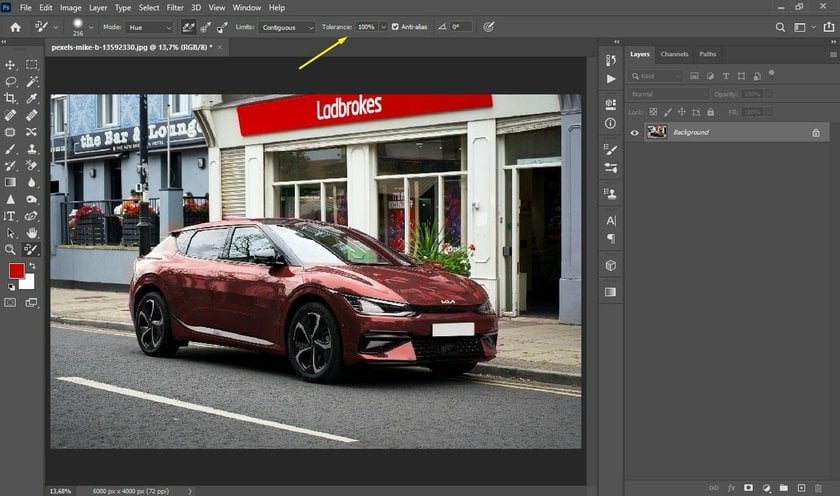
Of course, you can set the replacement shade yourself. The primary color on the palette will be the one with which the tool will replace the original image. For example, in the picture below, the main one is red. Therefore, all pixels within the circumference of the cursor circle will be changed to red:

Replacing color in Photoshop in practice
How to replace colors in Photoshop? So, now that we've covered the theoretical part, let's try another way to replace a photo. Here's a great test subject:
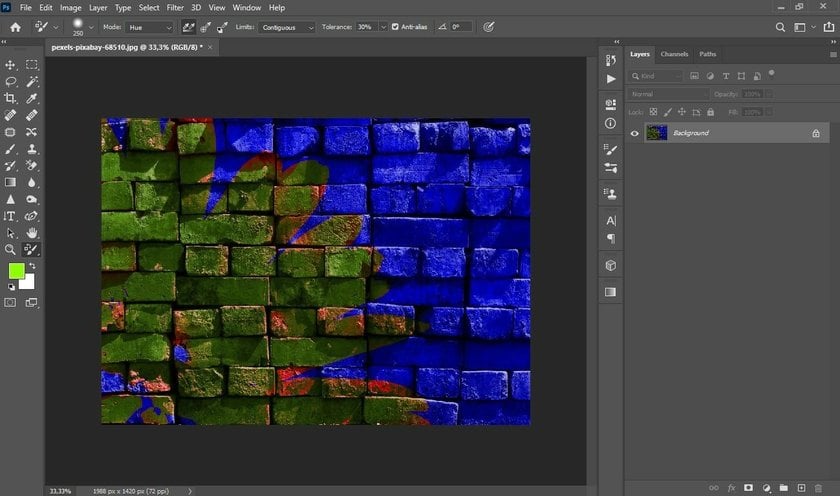
 How does Photoshop replace colors? Open your image and activate the Color replacement tool as I showed you earlier. Then choose the main shade, for example, green. All you have to do is paint over the parts of the image you want to change:
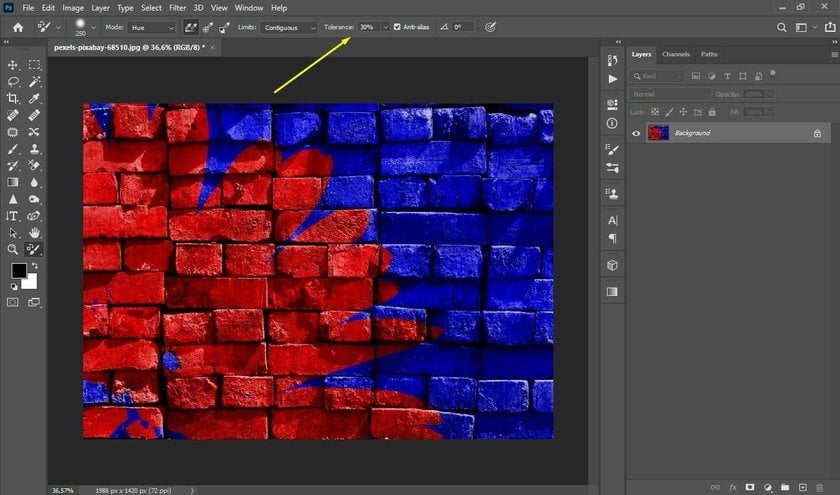
 That's what I did. In this particular case, we don't have to do anything else, but there are situations where, after coloring, a fringing of the original color appears around the object. To avoid this, increase the tolerance percentage in the settings bar at the top of the screen. This is how Photoshop switches colors.
 There is another exciting way to change colors with this tool. To do this, we need another test case:
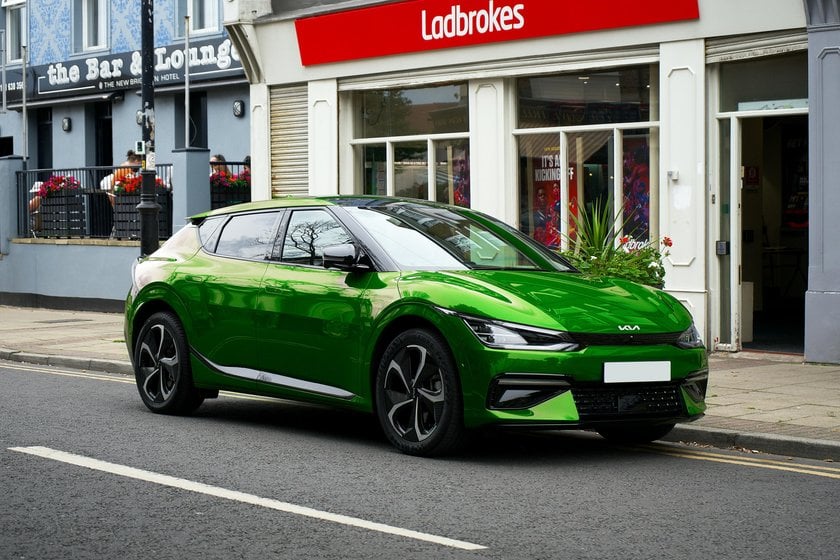 Last time, we chose the color ourselves from various options. But sometimes, we want to paint over an object with a color already in the photo. This way, you can create eye-catching pictures with a stunning combination of shades. But you won't be looking for that particular shade in the palette, will you? So now we will study how to change a specific color in Photoshop.
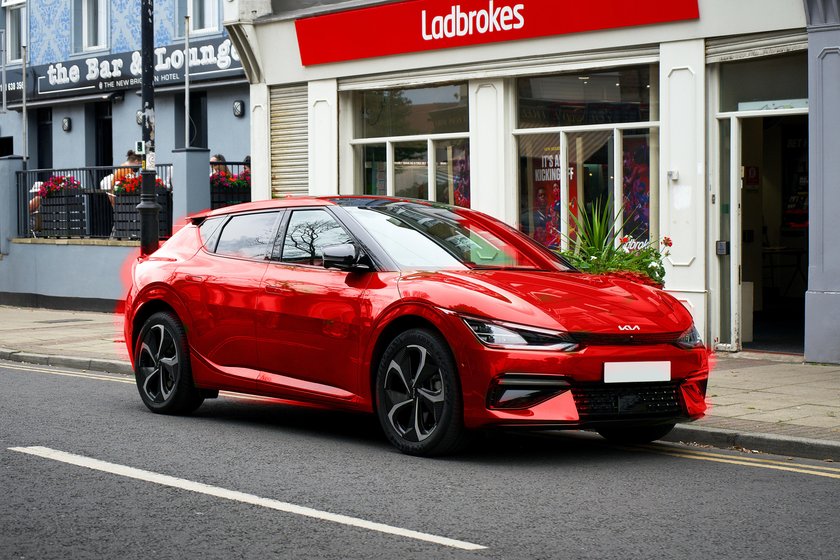
The car in the photo above goes well with the greenery in the background, but the bright red tint of the sign on top would also look great.
We need to do almost the same as with the wall, but instead of choosing a color from the palette, we will take it from the object in the photo. To do this, activate the Color replacement tool and hold Alt. The cursor will change to an eyedropper for a while. Then select the object that suits you and click on it with the left mouse button.
Then do everything the same as last time. Don't worry if your cursor circle goes outside the object when you recolor an object. The program will only change those areas of the image that match the pixel's color in the center of the circle. Please note that here I raised the tolerance to one hundred percent. Without it, the gaps between the doors and the car's body visibly glowed green, which looked unnatural. But this problem is easily solved. This is how Photoshop swaps colors.
 As you can see, the car does not look so bright. I immediately understood where I made a mistake but decided to leave it as it is so that there is a good example. Now we will fix it.
What are blend modes?
Talking about how to change one color in Photoshop, we should mention the basics. The most important advantage of the Color replacement tool is that it does not change the picture's texture. Look, all the glare on the car remained. This is because the technology uses blending modes, that is, it affects either only saturation, or only brightness, or only hue. There are four blend modes: Hue, Saturation, Color, and Luminosity.
The first one (selected by default for me) replaces only the hue but not the brightness or saturation. The saturation of the car's original color is lower than the saturation of the sign. That's why the car looks faded. Now let's try setting the Color parameter, which changes both hue and saturation:
 It looks much more convincing, doesn't it? Well, you already know how to replace a color in Photoshop, but there are two more options that we haven't explored.
The Saturation parameter changes only the saturation of the object. Let's try this:
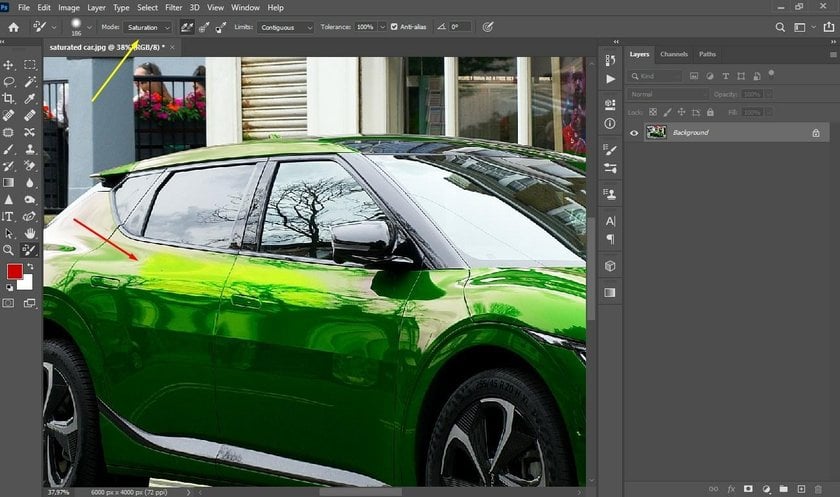 I borrowed the saturation value from the red sign and applied it to the car. As you can see, the color has not changed, but the screenshot clearly shows where I worked with the brush. This is the mistake I made at the beginning, not paying attention to the different saturation.
The Luminosity parameter is the Achilles' heel of the Color replacement tool. It only affects the brightness of the original color without changing the hue or saturation. Unfortunately, with a significant difference in brightness between two objects, Luminosity in all its glory demonstrates its uselessness:
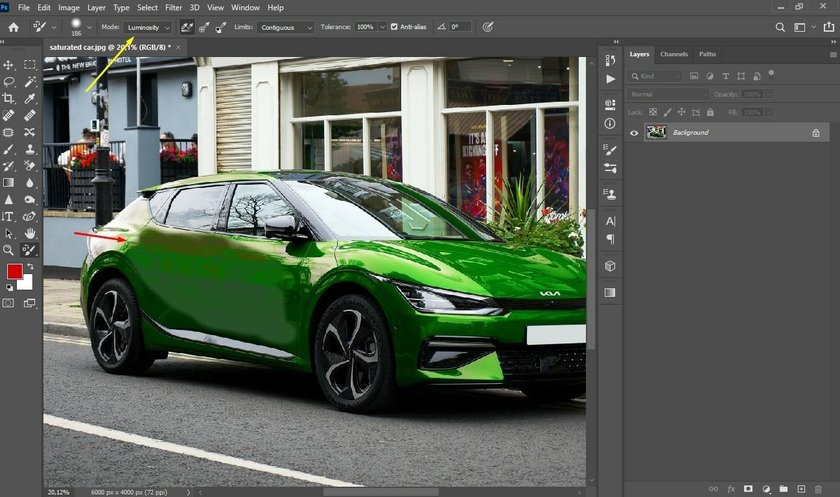 As you can see, we could not have succeeded in something worthwhile. The conclusion is simple: the Photoshop Color Replacement tool is excellent for changing hue or saturation, but it's useless if your image has several objects with a significant difference in brightness.
Changing the Hue and Saturation of an Object
Another way how to replace one color with another in Photoshop is to change Hue and Saturation per object. This is one of the most flexible tools for changing colors, although it also has a drawback: if you want to recolor an object with several colors (for example, a daisy), you will most likely not succeed.
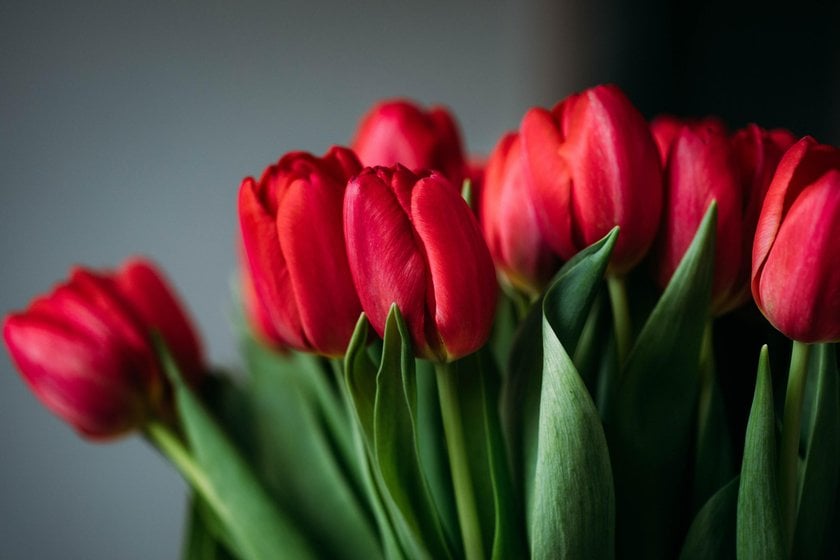
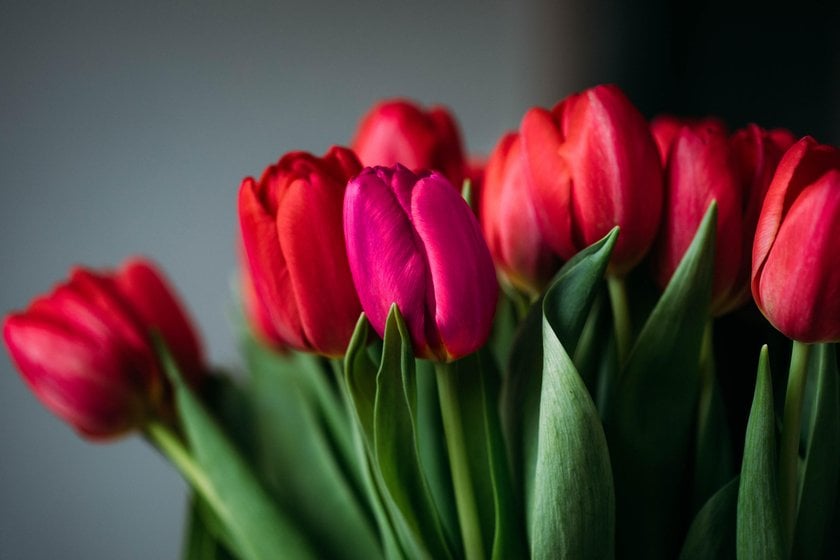
Another photo, another experiment. Let's try to make the tulip in focus pink:
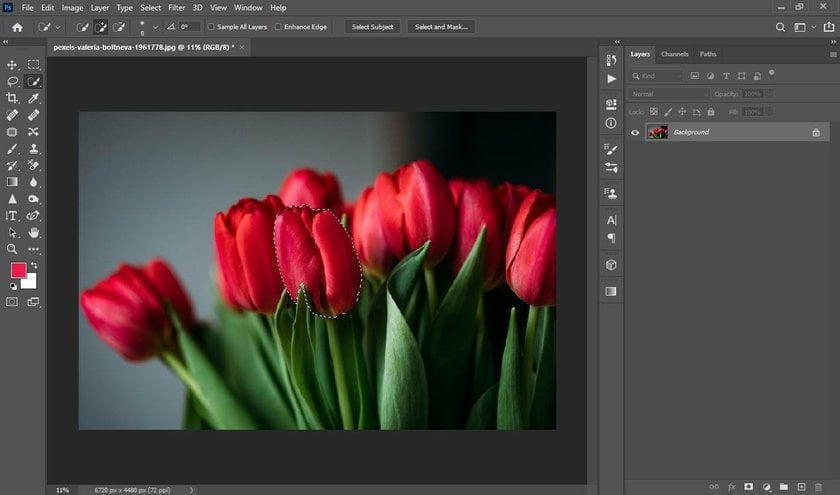
 First, open our photo in the program and select the object. I used the quick selection tool, but you can also use the lasso or magic wand:
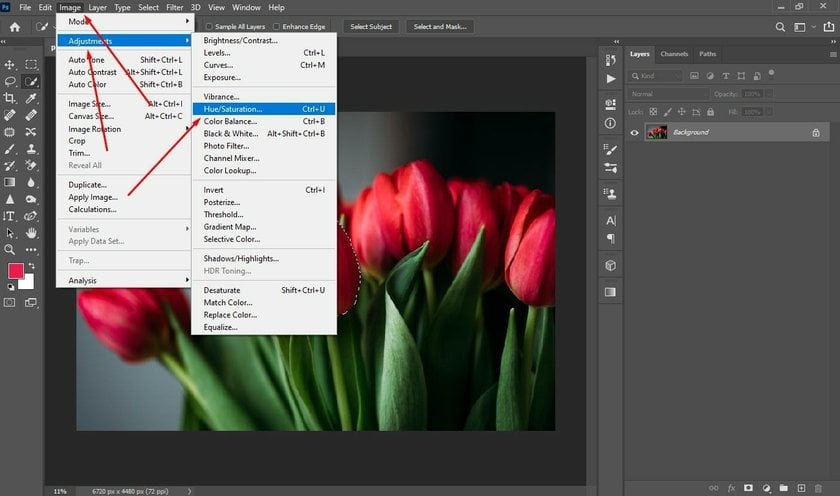
 Now open the adjustment tool (Image → Adjustment) and find the option to correct the saturation and hue:
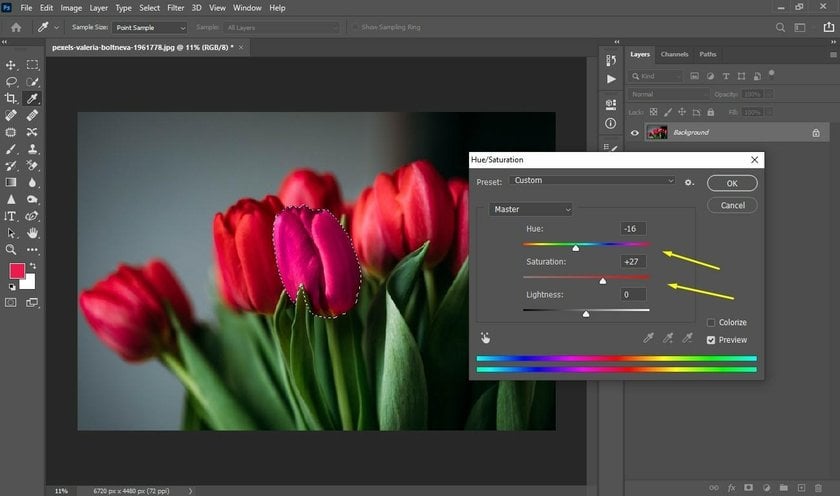
 Find out the shade you need by dragging the sliders in the window that opens. But do not touch the lightness slider cause this will change the contrast of the selected object:
 Press OK to save changes. Here is our result:
Luminar Neo: an alternative solution that has something to surprise you with
There are several more ways how to change one color to another in Photoshop. For example, you can use adjustment layers and replace the color dialog box. But these methods are complicated and take a lot of time. I mentioned them so you can master them if you want. However, I don't want to dwell on them because I don't like to use them myself. Instead, I'll talk about something more fun, in my opinion. This is Luminar Neo.
First, I want to say that Luminar Neo uses artificial intelligence to automate most of the processes we had to do manually in Photoshop. For that reason I will not write here step-by-step instructions about Luminar Neo. Knowing how to change one color to another in Photoshop is appropriate since the program is complicated. But Luminar Neo is so straightforward that you can quickly master it without any prompts.
One of the features that I use all the time in my work is selective coloring. This tool makes the color correction process as flexible as possible, changing only one shade without affecting others. This allows you to create incredible dramatic effects in photos and set the necessary accents without disturbing the natural harmony of colors.
Another exciting feature is the Color Balance, which allow you to work separately with shadows, highlights and midtones. You can change the lighting of only shadow areas, change only gray tones, or change only well-lit parts of a photo.
Luminar also has a Split Color Warmth tool that allows you to separately control warm or cold tones, which is very good for creating spectacular summer and winter landscapes.
As a result, Luminar Neo is the maximum control over the exposure and color correction of the image. And thanks to artificial intelligence technology, it is also incredibly simple. If that's not magic, then I don't know what is.
The bottom line
I will probably never cease to be amazed at how advanced photo post-processing software has become. And although these are still auxiliary (after all, the quality of the images depends primarily on the photographer's skill), it really looks like the future of photography. The many opportunities for self-expression and implementation of even the most unusual ideas that technology presents us inspire me and encourage me to do new searches. Perhaps you share my opinion.
I hope that you have received a comprehensive answer to the question of how to swap colors in Photoshop, and I also cherish the hope that my article will inspire you and push you to learn other post-processing secrets. May the muse never leave you. See you (write you) in the following articles.
 >
>
