October 16
14 min. to read
How to Edit Night Photos in Luminar Neo
 If you're nodding, you're in the right place. In this post, we'll dive into the secrets of how to edit night photos. Ready to turn your ordinary shots into nighttime wonders?
Let's light up the night together!
Night Photos Are Cool but a Bit Tricky, Too

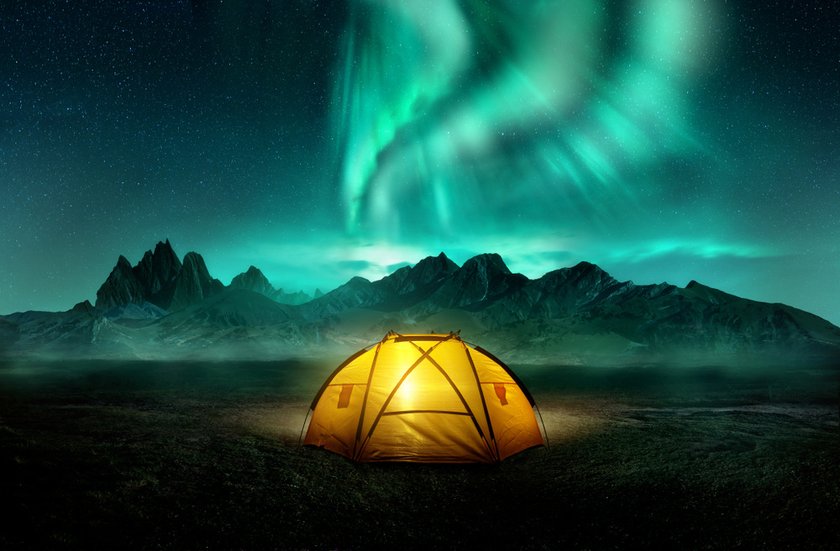
Taking photos at night is a special kind of fun, isn’t it? The dark sky, twinkling stars, and bright city lights create scenes that are simply wow. Whether it’s the city lights twinkling like stars or the actual stars flickering in a dark sky, nighttime gives us some pretty cool moments to snap.
But snapping those cool moments isn’t always easy. Ever noticed how pictures can look grainy, a bit blurry, or just not as fabulous as you hoped? And don’t get us started on trying to figure out how to take good selfies at night. A tricky business, that is!
Here’s the fun part, though—a bit of editing magic can turn those not-so-great snaps into wow-worthy shots! That means your nighttime pics can become marvelous with a few cool tricks. Exciting, right?
Stick with us! We’re diving into the handy world of photo editing next, turning those tricky nighttime shots into something super cool. Ready to make your night pics shine? Let’s go!
Advanced yet easy-to-use photo editor
Get Luminar Neo NowWhy Use Luminar Neo for Night Photos

Luminar Neo is a software that uses smart AI to quickly turn dim shots into bright and clear pictures. It's like having a magic wand for night photography editing. So, if you want your night snaps to look their best, Luminar Neo is the way to go. Let's see why!
Noiseless AI


Those little grainy specks in night photos can ruin a perfect shot. But here's some good news: Luminar Neo's Noiseless AI is here to save the day!
What does it do? Simply put, it makes those annoying grains disappear. Whether you've got a RAW or JPEG image, Noiseless AI tidies it up without messing with the details. You even get three choices on how strong you want it to work, and with Mask AI, you can choose where exactly you want to clean up.
Quick Guide on Using Noiseless AI
Open your image in Luminar Neo using the 'Add Photos' button or Cmd/Ctrl + O in the Catalog module.
Pick your night photo.
Go to the Edit module.
Head over to Tools, then Extensions, and find Noiseless AI.
Decide how much cleanup you want: low, middle, or high.
Adjust other settings to fine-tune: Luminosity Denoise, Color Denoise, Details, and Sharpness.
And voilà! Your picture is all set, minus the grainy bits.
Relight AI


Have you ever felt your night photos were a bit... off? Were some parts too dark or others too bright? Enter Relight AI, Luminar Neo's brilliant solution. This clever tool looks at your photo, figures out where everything is, and then uses a 3D map to make sure every bit of your picture is just right—not too dark, not too bright.
Quick Guide on Using Relight AI
Pick the photo you want to improve.
Head over to the Edit module.
Navigate to Tools, then Creative, and click on Relight AI.
Adjust the settings for both near and far brightness using the Brightness near and Brightness far' sliders.
Play with the Depth to get the balance right.
Want more? Dive into Advanced settings, and tweak Dehalo, as well as Warmth near and Warmth far.
All set! Your photo now has the perfect lighting.
With Relight AI, you can make every corner of your photo shine just right!
Light Up Your Images with Luminar Neo
Try It Now!Magic Light AI


Use light as its language. Dive into the enchanting realm of photography where Luminar Neo's Magic Light AI adds a touch of fairy-tale to your images. From the whimsical glow of lanterns on a serene street to the captivating twinkle of holiday garlands, Magic Light AI ensures that each light source doesn't just shine but tells a tale.
Elevate your night photos and transform them into magical visuals, where every light becomes a part of a splendid narrative.
Quick Guide on Using Magic Light AI
Select the photo you're eager to enhance.
Access the Edit module.
Head to Tools, scroll to Creative, and choose Magic Light AI.
Use the Intensity slider to control the strength of the light enhancement.
Adjust the Direction to position the light source accurately.
For fine-tuning, access Advanced settings to play around with options like Softness and Spread.
Once you've achieved your desired effect, save and exit.
With Magic Light AI, every picture you take has the potential to glow with that elusive, magical light you've always dreamt of capturing!
Portrait Bokeh


Looking to make your portraits pop with that dreamy, blurred background? Luminar Neo's Portrait Bokeh tool is your ticket! With just a click, turn plain backgrounds into beautiful, soft blurs, making your subject stand out. There is no need for fancy lenses or expert skills; this tool gives you complete control over blur depth, background details, and focus.
Plus, it seamlessly integrates with Adobe Photoshop and Lightroom Classic. So, whether you're a newbie or a pro, achieving that perfect bokeh effect has never been easier.
Quick Guide on Using Portrait Bokeh
Open up Luminar Neo.
Click on the Edit module.
Navigate to Tools, then select Portrait, followed by Portrait Bokeh AI.
Go to Brush Control. Here, you'll refine the mask around your subject. This mask helps Luminar decide where the bokeh effect should appear.
To keep areas in focus, stay on the Focus tab and paint over those areas.
Want some areas out of focus? Head to the De-focus panel and paint to remove the mask.
Made a mistake? No worries! Go to the Restore tab on the right and paint over to revert to the original detected mask.
The Background section lets you replicate out-of-focus highlights. Adjust the depth with Depth Correction for that ideal bokeh.
Next—Edge Correction. This helps tighten the mask around your subject. Be careful: too much, and it might cut into your main subject. Usually, it's best left alone or minimally adjusted.
Erase Tool
Ever had that photo that's almost perfect except for that one annoying thing in the background? Whether it's a random passerby, an unsightly trash can, or just an unexpected photo bomber, Luminar Neo's Erase tool is here to help. With just a few clicks, you can get rid of unwanted bits and the best part? It does it so smoothly that no one will ever know they were there!
Quick Guide on Using Erase Tool
Open up the photo with those pesky unwanted items.
Find the Erase tool in the Essentials section of the Edit panel, or use the shortcut Cmd+E (macOS) or Ctrl+E (Windows).
To check the photo in detail, use the Zoom tool at the bottom. Want to move around the image? Just hold the spacebar to switch to the Hand tool.
Found something you want to be gone? Click on it and brush over the unwanted bit.
Adjust your brush size with the Size slider to fit the area.
If you brush over an area you didn't mean to, hit the Deselect button. Want to add more to erase? Use the Select button or press X to switch between the two.
Happy with your selections? Click the Erase button, and watch those distractions vanish!
Now, enjoy your cleaned-up masterpiece without any distractions!
Atmosphere AI
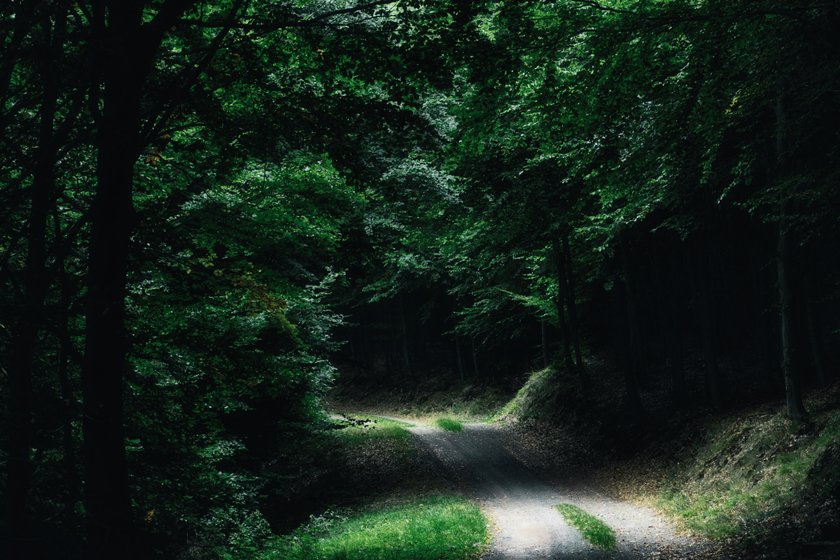
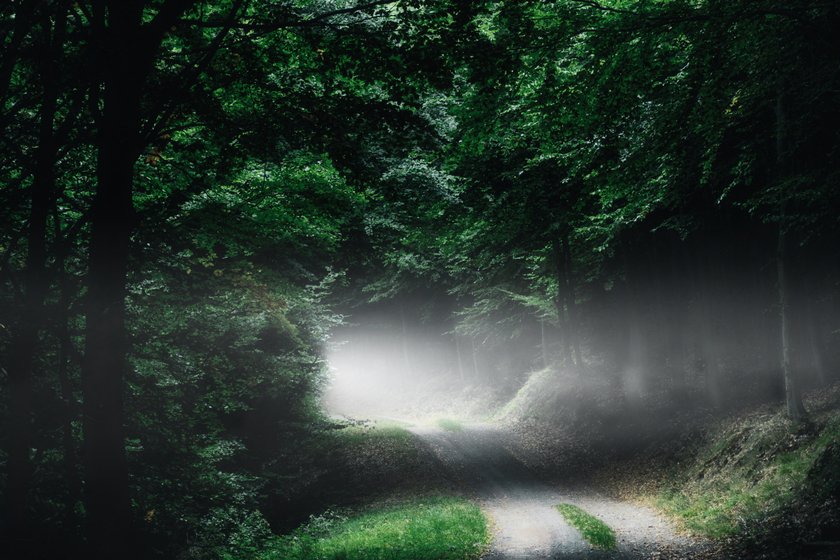
This feature offers a seamless way to infuse your images with mood-enhancing elements like fog, mist, or haze. Leveraging content-aware and depth technology it ensures main subjects remain clear while adding a realistic touch of atmosphere. After your initial photo edits, simply select from the four atmospheric modes and tweak with Amount and Depth sliders. For precise effects, combine with masking to apply only to desired areas.
It's all about crafting emotion effortlessly!
Quick Guide on Using Atmosphere AI
Open your image in Luminar Neo.
Shift to the Edit module.
Start basic edits with tools like Develop, Enhance AI and Color.
Dive into the Creative section to find Atmosphere AI.
Slide the Amount to at least 50%.
Pick your desired atmosphere effect from the Mode dropdown.
Adjust the Amount and Depth for intensity and positioning.
Tweak the brightness with the Lightness slider.
Once satisfied, finalize your edits and enjoy your transformed image!
A 7-day Free Trial of Luminar Neo with No Obligation
Get it now!
A Little More
As we wrap up, if you're enthusiastic about the cosmos and want to step up your game, don't miss our post on Tips for Photographing the Night Sky. And if you're the kind who prefers learning visually, we've got you covered. Want to watch a video tutorial for night photography post-processing? Check out the video guide!
Conclusion
Taking night photos can be an exciting adventure that brings out the charm of the after-hours world. Yet, as thrilling as they can be, these shots also present challenges like graininess and dim lighting.
But here's the magic touch—with the right editing techniques, even a seemingly lackluster nighttime shot can shine brilliantly. After diving deep into the myriad of tools available in Luminar Neo, from Noiseless AI to the Erase tool, it's clear that transforming your night photos into masterpieces is just a few clicks away.
Happy editing and starry adventures to you!
 >
>
