12 Steps to Achieve Creative Lens Flare
February 04, 2019

Lens flare is one more piece of evidence that imperfection can sometimes be a brilliant idea.
As a photographer, you have to understand light perfectly. You can do both accidental and intentional lens flare effects. Some photographers like this because it allows you to add some creativity to the shot. It all depends on your shooting style and the result you want to achieve. Lens flare in photography adds a touch of spice and uniqueness to every picture. You can use this simple effect to embellish absolutely any image you have. In this article, we will tell you how you can achieve this. Anyway, it is useful to know what causes lens flare so that you can learn how to prevent it or, in some cases, purposefully achieve this effect in your images.
What is lens flare in photography?
- From a technical point of view, lens flare (or light flare) is a reflection of stray light on your camera lens, causing streaks of sunlight along with a decrease in the contrast and saturation in your photo.
- From an artistic point of view, light lens flare is a special photography effect that adds drama and individuality to your photos. Light flare is technically an error, but it can be a beautiful one and can add an ethereal, dreamlike desired effect to your photos. Once you understand how it works, you’ll see why professional photographers use lens flare on a regular basis.

Artistic lens flare is a good technique to spice up your photography. Start creating dreamy pictures with this ultimate beginner’s guide.
12 Lens Flare Tips for Creative Photos
All photographers have a love-hate relationship with types of lens flares. When you don't want them to appear, eliminating them is impossible. And when you do seek them out, they are difficult to produce and control. That's why we felt it necessary to write an article with tips on eliminating lens flare, as well as some ideas about how to get sun rays in photos.
If you are a beginner and don't know exactly what is a lens flare, it is the bright flashes that appear in the image due to exposure to the sun or other light sources. In addition, there are several lens flare types that can help add creativity to your work and stand out from the rest.
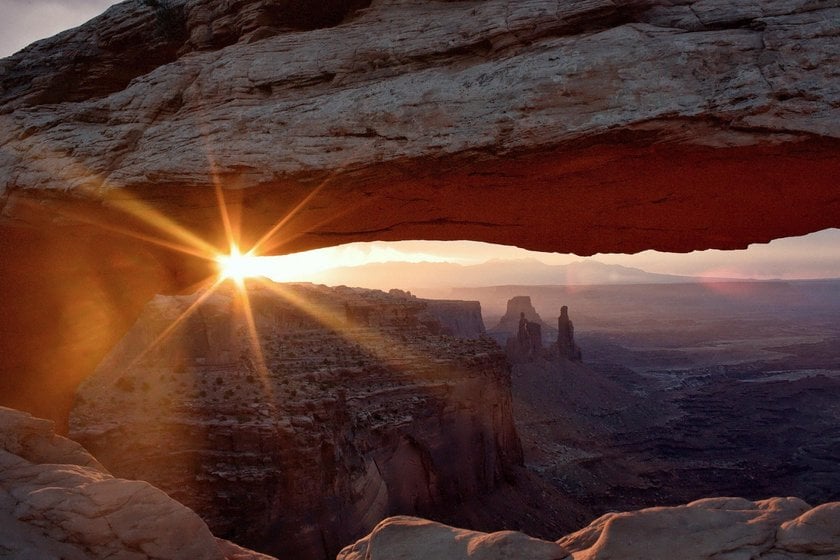
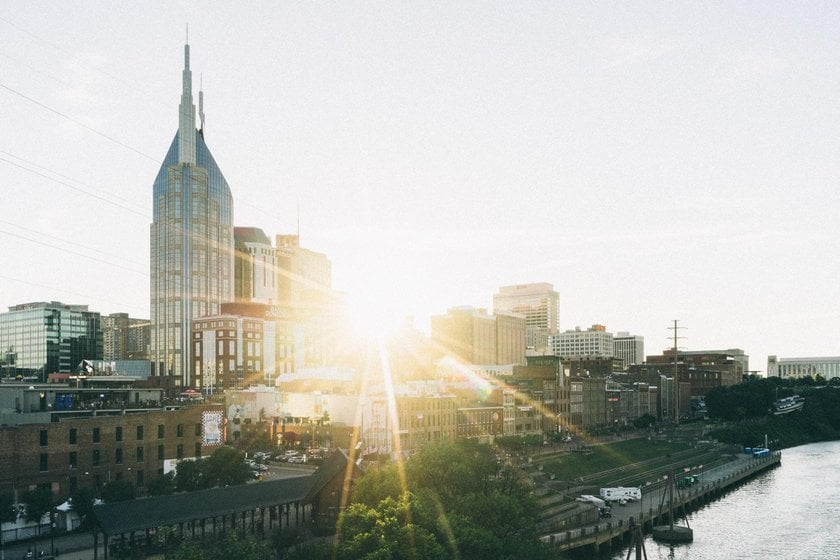
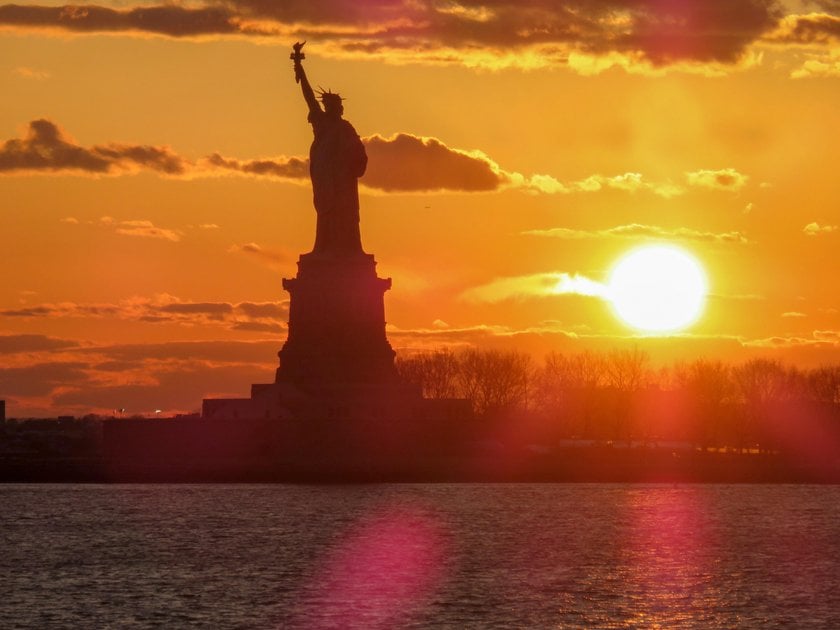
Step 1: Shoot during the golden hour
If you want to add lens flare to the photo and get a really chic effect, consider shooting at the golden hour. Sunrise and sunset are the best times of day to achieve the softest, most desirable natural light. They’re the ideal time to get great optical lens flares. In photography, we call this period around sunrise and sunset the golden hour. At these early and late hours, the sun is at the optimal angle for achieving quality lens flare, and light streaks and orbs are clearly visible in the photo.
Another advantage of shooting during the golden hour is that you don’t have to be in an awkward yoga position to get the desired effect, as you would during other times of the day. At a time like this, flare appears without much difficulty.
Step 2: Get rid of the camera lens hood
What does a lens hood do? Normally, the anti-reflective hood protects your images from a flare. A lens hood is actually a very important thing, but not when it comes to shooting golden lens flares. By removing the lens hood, you’ll most likely achieve fairy light flares in your images.
Step 3: Pick a proper lens
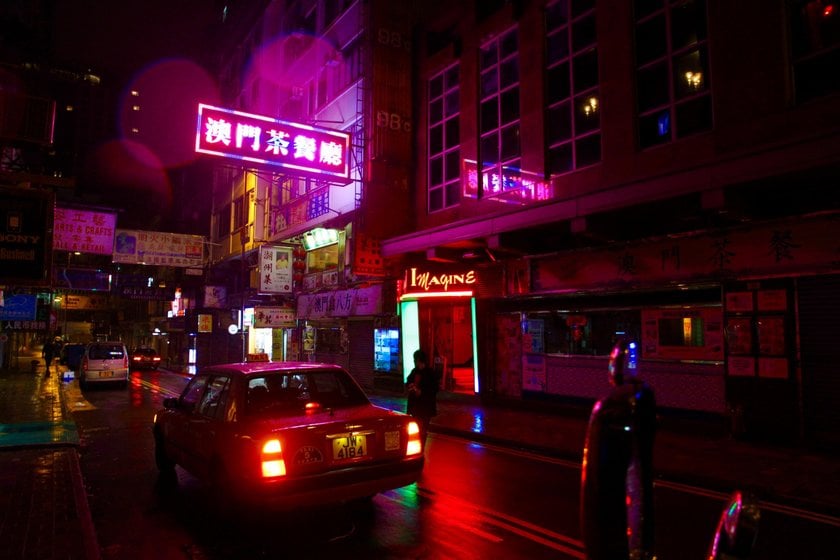
To make lens flare images with light orbs, streaks, and tear-shaped blobs, it’s best to use a wide or extremely wide-angle lens. Ensure that your glass is absolutely clean - this is the only way to get a really beautiful sun flare photo. A greasy surface will blur the image, if not spoil it completely. Meter with the sun in your image, then adjust the focal length if necessary – set it to f/11 or even f/16 to maximize the effect. The lens diaphragm and the number of blades your lens has will have an effect on the sun rays – the more blades the better. Go, for example, with a nine-bladed diaphragm.
To get the desired results, try capturing flares in the forest or framing individual trees. But shooting in a variety of situations will breed authentic images. In the photo below, the neon glow effect pink circles of stray light unveil the unique atmosphere of Hong Kong.
Where it won’t work so well is when the sun is relatively weak, behind clouds, or setting into a hazy horizon.
Step 4: Shoot into the sun
Lens flare can be instantly achieved by shooting into the sun. Just allow the sunlight to hit the lens at the right angle. What you need to do here is to redirect the light so that instead of directly reaching the sensor it reflects several times internally before hitting the sensor.
This is what makes the magic with a sun flare lens happen. If you’re shooting indoors, use a window as the source of sun rays.
What is the purpose of these light manipulations? You can do a lot with them: you can direct the viewer's eye to the most important detail of your photo or make it so that not a single pixel is left without attention.
Step 5: Partially block the light source
You can create optical flares by shooting right into the sun or any other light source. But if you want to add some creativity, you can partially block the natural light source. If you’re using the sun as your light source, that will be even more magical. But even for an indoor photoshoot, the partially blocked light coming through the window will still have the same effect. Sometimes you can even put your hand over the lens.
Step 6: Play with your angles
Once you’ve chosen a subject and placed it in the desired position, start shooting a series of test shots to find out which angle will give the best optical flares. Keep in mind that when capturing lens flares with the sun as your light source, they’ll change dramatically and quickly as the sun constantly moves. This helps you create a wonderful photography flare.
Step 7: Set the aperture to create a lens flare
Remember that when we say small aperture, we are referring to the actual size of the aperture, not the number itself. So a small aperture will correspond to a high f-stop number, such as f/22. At a small aperture, you will get a more detailed lens flare.
Your aperture can affect the appearance of the lens flare. If you close down the aperture, you’ll create lens flares that look like sun-stars. In the same way, you can make a haze trick. On the other hand, if you decide to shoot with a wide open aperture, the background details will smooth out and the dreamy, hazy effects that lens flare creates will be visible.
The easiest option is to shoot with your camera in aperture priority mode (AV on a Canon, A on a Nikon). This way, you’ll be able to easily adjust the aperture. And if your camera is set to automatically select the ISO, it will also automatically choose the shutter speed.
This allows you to quickly switch between apertures and see the difference it makes to your golden lens flares.
Step 8: Experiment with focus
When you shoot directly into a light source, your camera will have a tough time focusing and will blur background. To prevent this:
- use manual focus and take back control (this will work, but it’s not exactly the first choice);
- use a focus lock to lock the focus on your subject with the sun blocked, then recompose slightly;
- close your aperture; when you have lots of light, you can shoot with a narrow aperture, which allows for a deeper depth of field.
Step 9: Enhance your lens flare images
Professional post-processing isn’t rocket science anymore. With Luminar Neo, a robust and powerful photo enhancer and editor, any photographer with any skill level can make amazing images. The result is awesome and takes only a few minutes to achieve gorgeous sun flare in photos.
Advanced yet easy-to-use photo editor
Get Luminar Neo Now
There’s one more way to create mind-blowing images with artistic flares using Luminar Neo - a convenient app with many elements and professional editing tools.. The texture overlay technique lets you blend two images. Apply one image with flares on another one you want to get creative with. Change the amount of the texture, and use blend modes for more options.
This tool allows you to play with different colors of flares. If you’re fond of red flares or maybe want to add a blue lens flare, just find a suitable picture on the internet and blend it with yours.
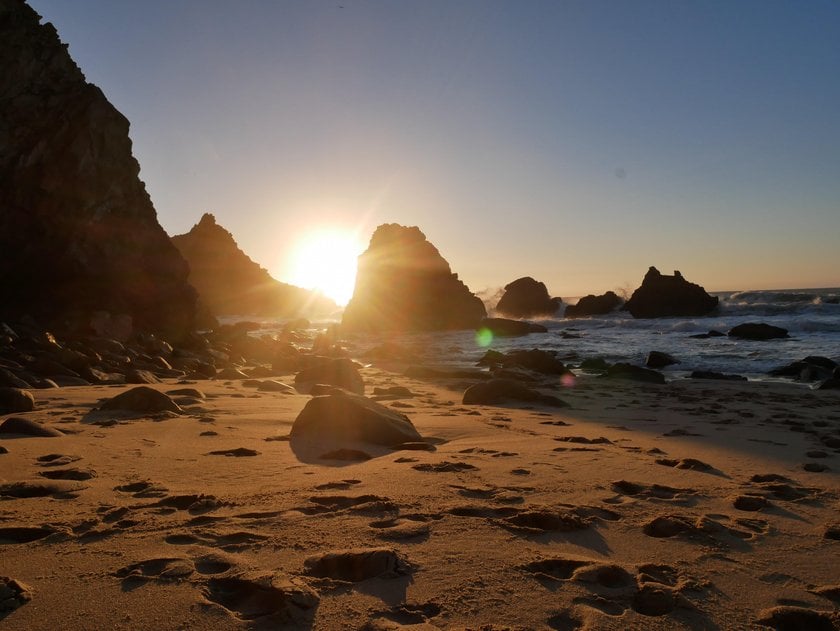 Photo by Juliana Chyzhova
Step 10: Create a lens flare artificially
With Luminar Neo, adding a lens flare Overlay effect is simple and can be done in just 3 steps:
1. Open your image and move to the Edits tab.
2. In the top right corner, find Layers. Then, click on the big plus sign in the left corner.
3. Choose the built-in Lens Flares in the Overlays menu and select the ones you like. That's it!
Enhance Your Images with Light Flare Effects
Try it out!Photoshop
Photoshop allows you to play with colors and create a red lens flare (or maybe a blue lens flare) with a gradient tool or a special filter. And it allows flexibility in adjusting your flare after it’s been applied. Below you can find a video guide on how it works.
Step 11. Play with some filters for artistic effect
When catching optical flares, filters can be helpful.
- Graduated filter with neutral density – These filters are darker at the top and lighter at the bottom. They can save the image from looking washed out, which usually happens when shooting into the sun.
- UV filter – When shooting directly into the sun, a UV filter can protect your camera’s sensor from damage.
- Polarizing filter – This filter gives different effects as you pivot it and can help increase color saturation – which can be diminished by flares – and decrease reflections.
Play around with filters and find out how they affect the golden flares in your images.

You can get incredible photos as a result of shooting into the sun + selective focus + shallow depth of field + lens flare. Follow these easy steps and you’ll automatically get a high-quality shot.
Step 12. Use extra equipment to ensure image quality
Tripod and remote shutter controller
The smaller the aperture, the sharper and clearer the flare effect. But using a small aperture also means it will take more time to take the photo. And the longer it takes, the more possibility there is for the camera sensor to shake and cause blur. That's why the photography lens flare may not work.
A tripod eliminates blur due to camera shaking. Using a tripod will help keep your photos sharp and your sun flares crisp. By using a remote timer trigger to control a shutter release, you’ll reduce camera shake even more.
Reflector
A reflector is used to reflect light back onto your subject. Reflectors are usually made of white, silver, or gold fabric. You can hold a reflector in your hand, hang it on a freestanding base, or place it on the ground.
Using a reflector can be effective if your model stays in the shade. It will aid in brightening the model’s face, making the photo look more pleasing. So you also get a really chic flare in photos.
Now let’s talk about when optical flares should be used and when they shouldn’t.
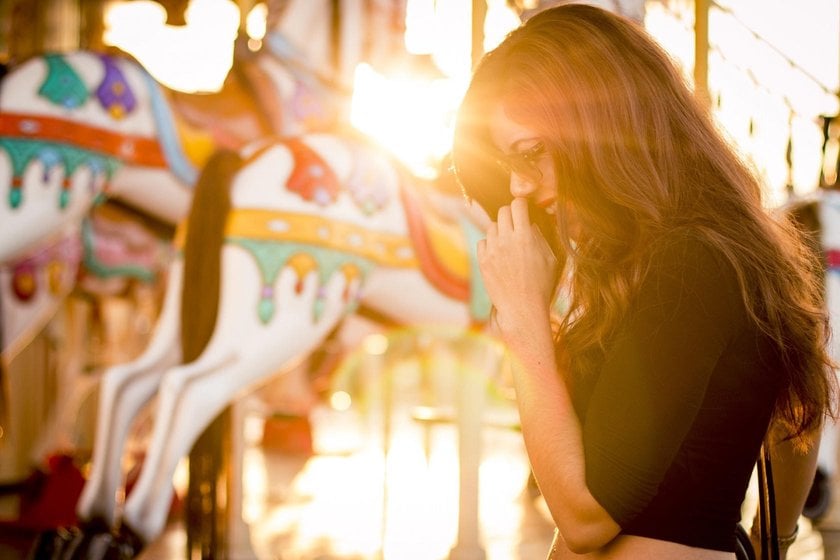
Lens flares for portraits
When it comes to portraits, the camera flare effect has been considered an annoying flaw that damages photographs and should be eliminated with the use of a lens hood. But just like the bokeh effect, the optical flare has become popular among photographers for shooting individuals with bright light sources. It adds a dreamlike haze to portraits. It’s also easy to achieve; all you need is a source of bright light (the sun in our case) and a willing model.
The key to getting amazing lens flares is in the positioning, namely in the angle at which light bounces off the front element of your lens. Positioning yourself so that the sun is about 45º from the front element is a good starting point. Then, while peering through the viewfinder, slowly turn the camera away and towards the sunburst, avoiding looking directly at the sun, until you achieve the desired optical flare.
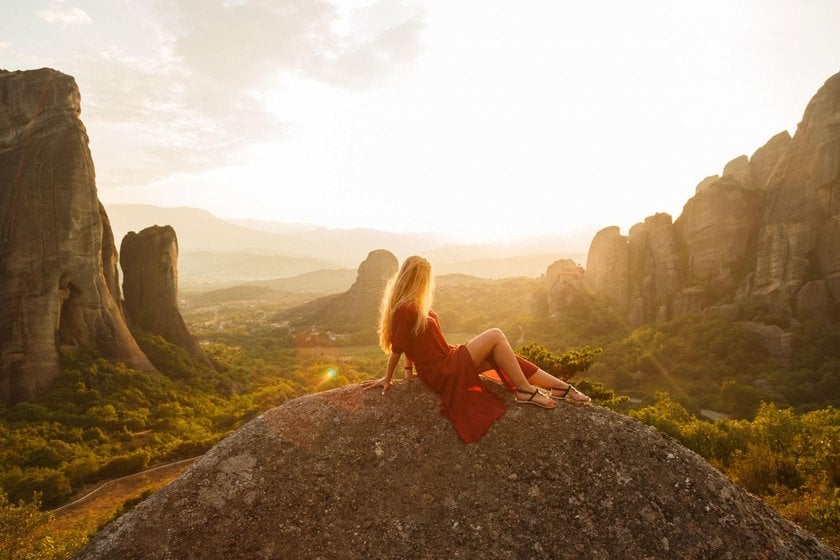
The size of the front element of your lens will play a role in the type of lens flare you achieve. Larger lenses tend to generate a soft haze, while smaller lenses provide clear rings and orbs of light. Experiment with your lenses, adjust the brightness, discover which provides the most attention-grabbing flare, and create images that leave everyone speechless.
 Now it's your turn to check your lens flare photography. Go out with your camera and equipment on a nice day, find the spot you want to photograph, and try to get lens flare using some simple tips given here. And don't forget to share your results, we can't wait to see them!
When is flare bad?
There are still cases when lens flare in photography is not desirable. It’s unlikely you want lens flare to cover a person's face, especially their eyes, forehead, and chin. You don’t want your subject to be washed out by flare and become unrecognizable.
You still have a lot of creative freedom in your decision to include lens flare. That’s why it’s so important to take multiple shots whenever you decide to include lens flare as part of your composition. Moreover, you can’t know for sure which camera angle or subject position will work for achieving a great lens flare shot. If you have multiple shots, you can choose the best, whether with or without the sun flare effect.
Let’s summarize:
- Shoot during the golden hour when the sun gives a dreamy, soft light.
- Remove the lens hood to ensure your camera will produce flares.
- Use a proper lens: wide or extreme wide-angle.
- Shoot into the sun, but don’t look directly at it.
- Partially block the light source to get new effects.
- Enhance the light flares in your photo with Luminar Neo.
Enjoy!
Note that no matter the characteristics of the light source or the camera settings, using a polarizing filter during photography reduces the amount of glare. Note, however, that a polarizing filter does not remove glare on metal surfaces.
It's important not to be afraid to experiment! Shoot and shoot again, because only practice helps you grow and find time for new ideas. Take a closer look at the beauty going on around you: a lamp in an archway spreading light in rows around itself, a glass door in a dark high hallway “cutting up” the walls with bright light, a candle on a table creating a shadow theater in your room, etc. Try to see the beauty around you.