Photoshop halftone filter: the easiest you can do in Photoshop!
January 14, 2023
Hello, friends! In this article, I will tell you how to halftone in Photoshop. By tradition, a little lyrical introduction (as I like), and then move on to practice. Ready?
Sometimes you want to plunge into the atmosphere of retro. Unfortunately, the past cannot be returned. However, these days there are many ways to recreate the old days. You can watch films about the 60s or listen to the oldies that inspired the guys from the Beatles or Black Sabbath. However, all this is just a contemplation of the romance of the past. If you definitely want to dive into retro, you need something more.
Today, there are plenty of different methods to make retro part of our everyday life. One of them is our social networks. Posting retro-style photos on Instagram allows you to express yourself and share that vibe with your friends.
In this halftone Photoshop tutorial, I'll show you how to make your photos look like old newspapers and posters from the last century to surprise your followers with an unusual profile style. You can also use it for other purposes, such as creating advertisement creatives or printable designs.
The roots of the halftone effect
The halftone effect is gaining more and more popularity these days. However, this was initially a harsh reality for newspapermen and designers, as color printing technologies were not as advanced in the 20th century.
By the way, the emergence of the well-known CMYK color model, which is still actively used in printing, is connected with the halftone effect. It was these four colors (cyan, magenta, yellow, and key/black) that old printers used to create other shades. The image was a set of thousands of tiny dots (similar to pixels today) of four colors, which created a smooth offset illusion, so the new shades appeared.
Today we will learn how to recreate color halftones in Photoshop.
The halftone effect in Photoshop: 3 easy ways to do it
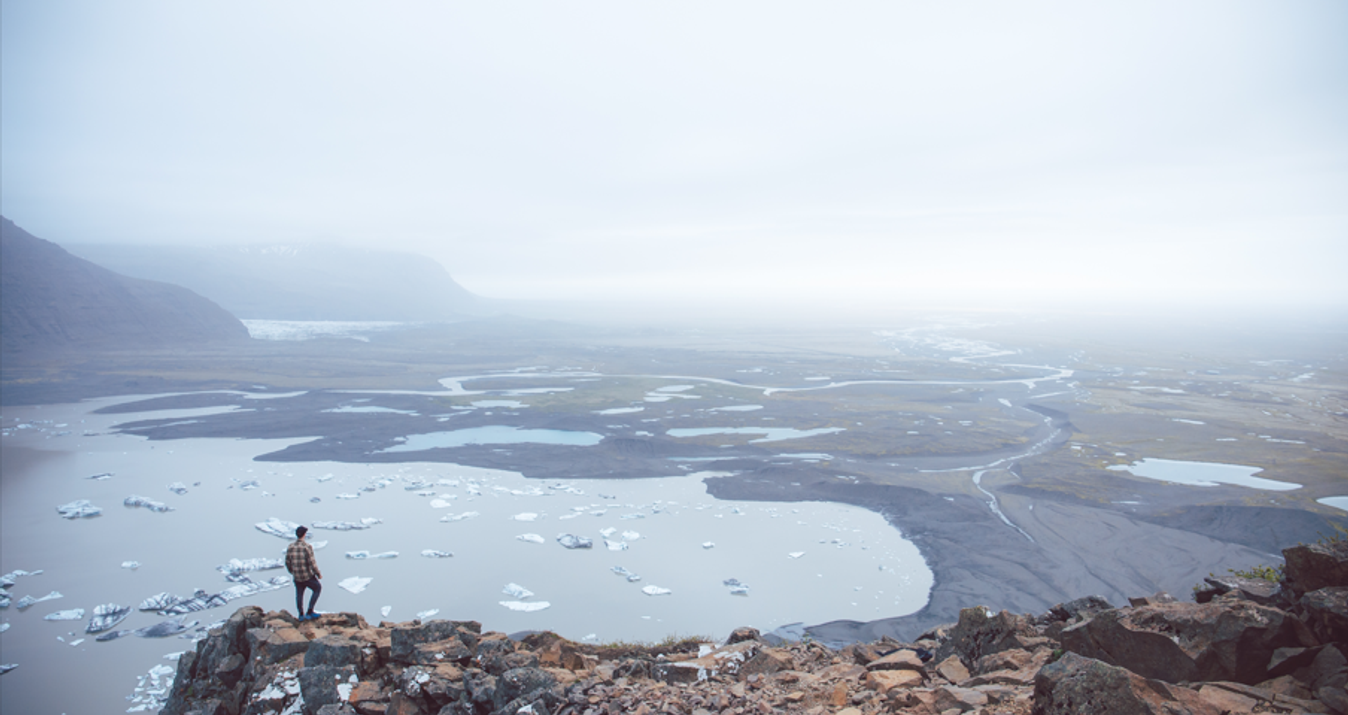
Take a look at this photo below. I think even by itself, it already looks quite retro. But we can do even better. An excellent test subject, in short:

1. The easiest way
So let's open our image in Photoshop. To get started, select Filter from the top bar. In the dropdown list, click Filter Gallery:
 On the left, in the dialog box, you will see a preview of your picture, and on the right, there will be folders with a set of filters. Open the Sketch folder and select Halftone Pattern in Photoshop:
 The preview will immediately take on a new look. However, in my case, the result was not very convincing. Yes, it began to look like the old paper of classical print media, but I did not see the characteristic dots. So I used the Size slider (1) to make the Photoshop halftone pattern more distinct:
 I also increased the contrast (2) to give our picture more of a retro look. The Pattern Type option (3) allows you to change its shape. It can be a dot, a circle, or straight lines. I left a dot to make it look as similar as possible to a real print from the last century. However, I note that the circle also looks cool:
 You can compare the end result with the original by clicking on the eye icon (4).
That's what I did:
 This is the easiest way to use the halftone filter in Photoshop. However, there are others. Let's look at them too.
2. The most natural pattern
So, we have an image with a filter applied. Press ctrl+z to set it back. This will return you to the original image, and you can try another method.
To get the most out of this method, I suggest first desaturating the image by hitting Shift+Ctrl+U simultaneously.
Go to Filter (1) again and look for the Pixelate (2) option. In the drop-down list, select Color Halftone (3) in Photoshop:
 In the dialog box, you can set the maximum radius of the pattern, that is, its size, as well as the angles for the four CMYK channels: cyan, magenta, yellow, and key/black:
 If you want to keep the picture black and white, just set the same degree for all channels. But you can also experiment with mixing colors.
I set all parameters randomly. That's what I did:
 Let's zoom in on the image for a closer look:
 That's how old printers worked, which I mentioned at the beginning of this article. Interesting, isn't it? This method looks the most natural. However, you will have to experiment as there is no preview.
I also made a few variations: darker and brighter:


 As you can see, there is a huge field for experimentation here. You can change the pattern elements' frequency, size, gradient, resolution, and slope to give your photos a retro look.
3. The most varied way
Excellent! Now let's try the third method to add the Photoshop halftone filter, the most variable, in my opinion.
Remove any changes you made earlier. Then go to the Image tab (1) on the top bar. You need the Mode option (2) and then Grayscale (3):
 Photoshop asks us if we really want to discard the color information. An alternative option is also listed here, which also allows us to control the conversion. We do not need to convert. Besides, we cannot try this method in an RGB color model, so feel free to agree:
 Now follow the same path, selecting Bitmap at the end:
 In the dialog box, select the Halftone Screen method:
 Here the settings are slightly different. You can see the angle (1) as in the previous version, but also the frequency (2) and shape (3):
 Unfortunately, there is also no preview. However, this method seems to be the most variable since there is a halftone shape setting here. You can use a line, square, oval, cross, etc. It looks delicious!
Combine these settings to create a fantastic halftone pattern in Photoshop. Here is my end result (one of them):

On a final note
Finally, I hope that the Photoshop half-tone tutorial was useful. I would like to recommend you one more thing. This is Luminar Neo, an alternative photo editor that lets you do more with less effort. The program uses artificial intelligence to help you achieve a particular effect in just a few clicks.
There are many filters here, including the Photoshop halftone effects, so you get unlimited possibilities for your creativity. Change the lighting and colors, add a mist or sun rays effects, accentuate any details you want, remove or add anything to your pics, experiment with the object shapes, etc. Anything you may imagine is possible and easy to do due to the Luminar Neo smart features. This is really worth your attention.
Friends, I hope you find the answer to this article's question. I tried to tell as much as possible about the color halftone in Photoshop. As you can see, this is not difficult to do, but it will add a unique style to your photos. Use it to surprise your friends and followers. See (write) you later!