With a 2.2.1 update, we introduce a new feature - lens correction, which automatically fixes distortion, chromatic aberration and vignetting.
With the 2.2.1 update, we introduce a new feature - lens correction, which automatically fixes distortion, chromatic aberration and vignetting.
By default, it will be enabled after you update your app to 2.2.1. You can disable/enable it anytime. In Photolemur, lens correction is applied only to those photos where it's needed and it won't affect any well-taken photos, so you can just leave it on all the time.
What is lens distortion correction?
Lens correction is a set of fixes for such common issues as distortion, chromatic aberration and vignetting.
Distortion usually appears on images taken with wide lenses and causes objects to look different in size and shape to how they actually look in real life.
Straight lines appear curved because the field of view of the lens is much wider than the size of the image sensor.
Chromatic aberration causes objects on photos be framed with yellow and pink lines. It happens because of light being refracted differently while passing through the lens. As a result, it does not coincide with the focal length.
Vignetting is caused by optics and looks like black corners on an image.
Photolemur's lens photo correction fixes all these issues completely absolutely automatically.
How to enable lens correction in Photolemur?
If you’re on Mac, click on File, choose Settings and click on Auto Lens Correction.
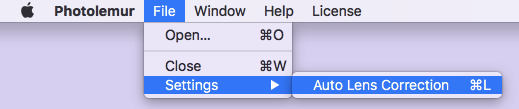
If it’s already checkmarked, it means it's enabled.
As soon as you upload your photo to Photolemur, lens correction will be applied.
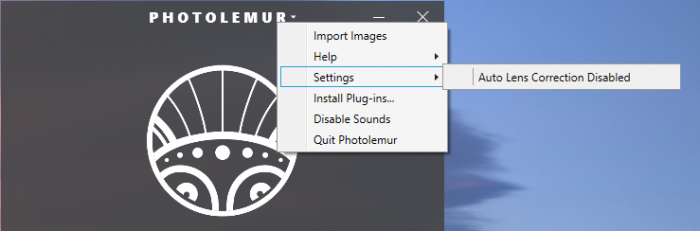
If you’re on Windows, click on Photolemur - Settings - Auto Lens Correction.
 By default it's enabled, so if you click on it when it says 'Enabled' you'll turn it off.
How to disable lens correction?
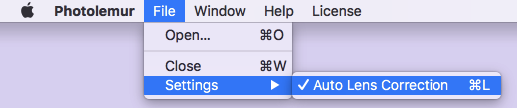
If you’re on Mac, click on File, choose Settings and click on Auto Lens Correction.

After you disable it, there’ll be no checkmark next to Lens Correction.
If you’re on Windows, click on Photolemur - Settings - Auto Lens Correction. After you turn it off, it should say Auto Lens Correction Disabled.