November 20
18 min. to read
How to Reduce Photo Size Without Quality Loss
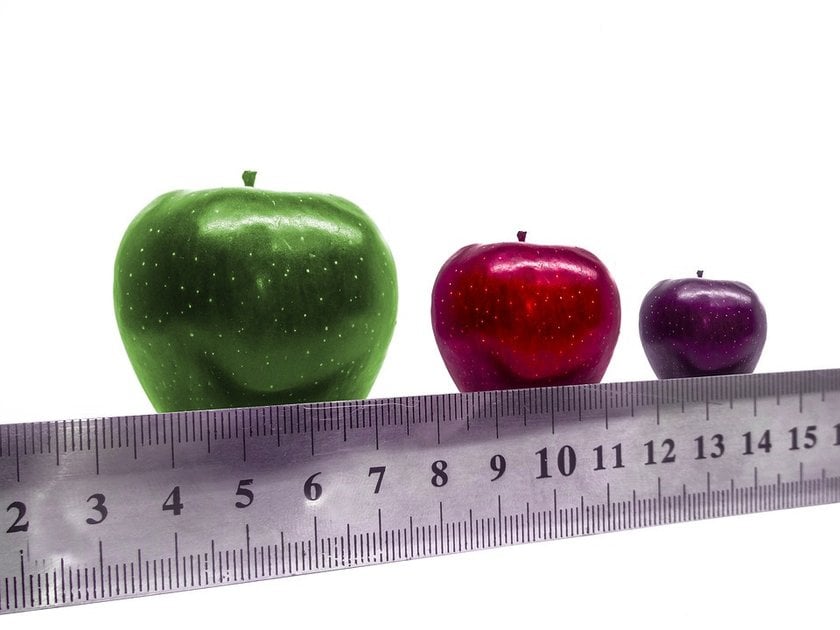
Sometimes, reducing the size of an image is necessary. High-resolution original images can take up a lot of space on your computer or mobile device, potentially slowing performance and causing storage issues. While larger photos often mean 'high quality,' it's important to note that a picture's size does relate to its quality to some extent. However, you can often reduce the file size without significantly compromising the photo's visual quality.
So, how can you make an image smaller in file size, and what is the purpose? And how do you use a photo editor for this?
Don’t feel like reading the whole breakdown? We’ve pulled together a quick summary below.
Key Takeaways
Reducing image file size helps save storage, speed up websites, and make file sharing easier, without losing visible quality.
You can shrink photo size by adjusting dimensions, resolution (DPI), or file format—JPEG usually offers the best balance.
Cropping, compressing, or removing metadata are quick ways to lower MB without affecting detail.
Online tools (TinyPNG, JPEG-Optimizer) and editors like Photoshop, Lightroom, or GIMP make resizing fast and simple.
Luminar Neo stands out with AI-powered resizing, smart compression, and batch export that preserve clarity and sharpness.
Understanding Image Compression and Its Benefits
Image compression is the process of reducing the file size of an image, which can be achieved through various techniques. It plays a crucial role in digital image management and has both advantages and disadvantages.
Reducing a file’s size is often necessary for various reasons. Here are some of them:
To free up disk space: You want valuable storage space, but files take almost everything. You can easily reduce the size of an image and free up some space. At this point, it is also worth mentioning that you should definitely choose the best photo organization software.
For easier file sharing: You want to upload a photo as an attachment (email or otherwise), but the file size is too big to attach. Reduced file size would allow you to upload the file easily and quickly.
For website optimization: You want to upload the image to your website, but the big size is not only taking up space but also causing the website to load slowly.
Next, we will look at several ways on how to resize an image.
Step-by-Step Guide: How to Reduce Image File Size
All these situations described above require the size to be reduced. And how can you do that? Let’s find out together. This guide provides useful tips on how to reduce the file size of a photo, especially when you need a specific image size for upload limits, so you can store and share your images easily and efficiently. Before making changes, check the current file size so your adjustments are more precise.
By the way, if you want to simplify the post-processing of your best photographs, be sure to check out Luminar Neo’s AI photo editing. (Spoiler alert!)
Changing Picture Dimensions for Smaller File Size
The best way to reduce the size of an image is to lower its dimensions. You can usually go to your image editing software and select Resize Image from the menu bar.
The dimension of a photo refers to its width and height, or its pixel dimensions, which together determine the overall size and shape of the picture. You’ll then be able to adjust the width and the height of the image as per your needs, but keep the aspect ratio locked so the image does not look stretched.
Changing Image Resolution to Reduce Photo Size
How to reduce photo size this way? There is one more great option. Besides changing the width and height of an image, you can also reduce its size by altering its dimensions. The resolution of an image is defined by DPI or Dots Per Inch, and it works together with image dimensions in pixels. On a PC screen, the maximum number of dots per inch you see is 72.
Larger images are said to have an increased DPI. So, all you need to do is decrease the DPI according to your needs or to 72 to reduce photo sizes. You can perform this task simply by using any of the image editing tools. This works best for screen use when you do not need to preserve the image at its actual size for print output.
Choosing the Right File Extension to Decrease Image Size
How to reduce image size? Changing the extension of a file can help you save a lot of space and create smaller file sizes depending on the image type. Some files such as .PNG and .BMP are generally bigger. Saving the file as a .JPG can be of help.
All you have to do is open the file on a software, choose Save As…, and select JPEG when saving the file, which is often the best bet for photographs.
Software Solutions: Making Photo File Size Smaller
Photoshop: You can reduce the size of an image by using the Image Size option. Once you click on the option to resize the image, it will ask you for a new height, width, and resolution. Type in the new values and click save to have a smaller file. It's as easy as that.
Lightroom: You can reduce the file size of an image during the export process. When exporting, simply adjust the dimensions and resolution in the Image Sizing section. You can also set a maximum file size if needed.
Online Tools: TinyPNG and JPEG-Optimizer are websites where compressed images have a reasonable level of quality. Their easy use doesn’t involve software installation.
Free Software: You can also make your pictures smaller using some of the free alternatives to Photoshop.
How to lower MB on a photo: General tips
1. Upload in Lower Quality
When uploading or saving, select a “space saver” or lower quality option to initially reduce the file size; lowering jpeg quality can shrink it quickly while still keeping good quality if you do not push compression too far.
2. Crop Unnecessary Parts
Trim away unneeded areas by cropping the photo, which not only decreases the dimensions but also the overall file size.
3. Adjust Image Resolution
Lower the resolution of the image. Creating different sizes of the same image can help match web, email, or upload needs more precisely. This is particularly effective for images intended for web use rather than printing. Also, we recommend you check out How to Compress an Image Without Losing Quality.
4. Convert the File Format
Change the image format to one that uses more efficient compression. JPEG is generally good for photos because it reduces data efficiently while maintaining visual quality, which helps lower the size, while PNG is better when transparency matters but usually not for the smallest file.
5. Use Compression Tools
Employ online tools or software features that compress the image further without significant loss of quality, so the compressed image still looks acceptable to the human eye and is easier to hit a specific size for an upload.
6. Remove Image Metadata
Strip out non-essential metadata (like GPS info and camera settings) that can take up unnecessary space.
Why Luminar Neo Stands Out in Reducing Image Size
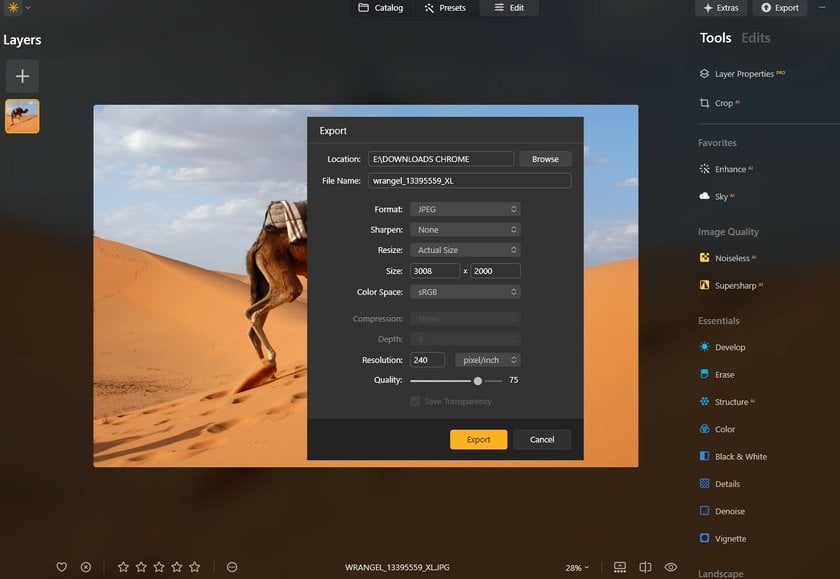
Luminar Neo is one of the best photo editors, making this job easy. It allows you to upload image files and perform the task. You can bring up the Export Menu by either selecting it from the Menu Bar or by pressing the shortcut keys “Shift+Command+E”.
You’ll be asked to either sharpen or resize the image. Choose Resize in the window. It will bring on several other options, such as original, short edge, etc. You may choose one of these or set your desired size for your picture and reduce it. After that, click on Save, and you will have the file saved but in a smaller size.
Luminar Neo’s standout feature in image resizing is its commitment to preserving high photo quality, a crucial factor for professional work. The software’s AI tools adeptly handle the delicate balance of reducing file size while keeping picture size practical for common uses and maintaining image integrity. This approach ensures minimal loss of detail and quality, which is often a concern during resizing.
By the way, after you have resized the image, try using photo editing presets; you will definitely like the result.
Advantages of Using Luminar Neo for Image Compression
AI-Powered Tools: Use Luminar Neo’s AI Sharpener and AI Upscaler to keep the photos clear even after compressing them. It is especially useful if you're concerned about losing detail during the process.
Newbie-Friendly Interface: Users with different skills will find this software easy to use. Go and see for yourself at the Luminar Neo Tutorial.
Batch Editing: Luminar Neo allows you to process numerous photos simultaneously, so your time is not wasted.
Extensive File Format Support: Luminar Neo can work with many file formats (including JEPG, PNG, and TIFF), which allows you to pick the appropriate format for online usage, high-resolution printing, etc.
Quality Management: When exporting images, Luminar Neo lets you adjust the quality to find the perfect balance between file size and image fidelity – which is crucial for both digital and print mediums.
Conclusion: Mastering the Art of Making Photos Smaller in File Size
By now, you have learned several quick and easy ways to resize your files for online photo storage, email, or upload, regardless of your device or operating system. Each method has its own unique advantages, depending on your workflow and the platforms you use. Choose the one that works best for you, and share your images with ease!
FAQ
How to make a picture file smaller?
To reduce the file size of an image, increase the compression level. In most image editing software, you can do this through the “Save As” or “Export As” options when saving formats like PNG, JPG, or GIF. Higher compression results in a smaller file, which loads faster on web pages. Adjust the compression settings to find the right balance between image quality and file size, especially if you need to hit a specific kb limit for an upload.
Here are several ways to make a picture file smaller:
Choose an Image Editor: Open your image in an editor like Photoshop, GIMP, or an online tool like TinyPNG.
Resize the Image: Reduce the image dimensions (width and height). This typically reduces file size without compromising too much on quality.
Compress the Image: Adjust the quality settings during saving. Lower the quality to reduce the file size. Tools like JPEG compress well with minimal quality loss.
Save in a Different Format: Consider saving the image in a different format. For example, JPEG is typically smaller than PNG for photos.
Use Online Compressors: If you don’t want to manually adjust settings, upload your image to an online compressor that will automatically reduce the file size.
How to reduce the size of a photo on iPhone?
You can resize the image using the built-in Photos app to reduce its file size by cropping and decreasing its resolution. Smaller files are also useful for profile pictures on apps and social platforms, where upload limits and fast loading matter. Moreover, you can adjust your camera settings to take pictures in a space-saving format like HEIC rather than JPEG.
How to reduce image file size on Mac?
On a Mac, you can utilize the Preview app to reduce image file size. Open the picture in Preview, go to Tools, select Adjust Size, and then reduce the size or the resolution. Numerous third-party apps also can give you better compression options.
How to reduce image file size in Photoshop?
Open your image in Photoshop, then select File> Export > Save for Web (Legacy). Such an option helps to change the picture dimensions and quality. To minimize file size, choose a lower-quality JPEG format and use the Image Size options to adjust dimensions (if needed).
How to reduce image file size on Android?
You can reduce image file size on Android by using built-in photo editing tools to crop and resize the image. Various apps in the Google Play Store, like Photo Compress & Resize, allow you to reduce file size better.
How to reduce image file size for a website?
You can use photo editing software such as Luminar Neo, Adobe Photoshop, GIMP, or Lightroom to reduce the picture file size by adjusting the compression, resizing the image, or cropping unnecessary parts of the photo.
 >
>
