How to Restore Old Photos: Old Photo Restoration
March 13, 2024
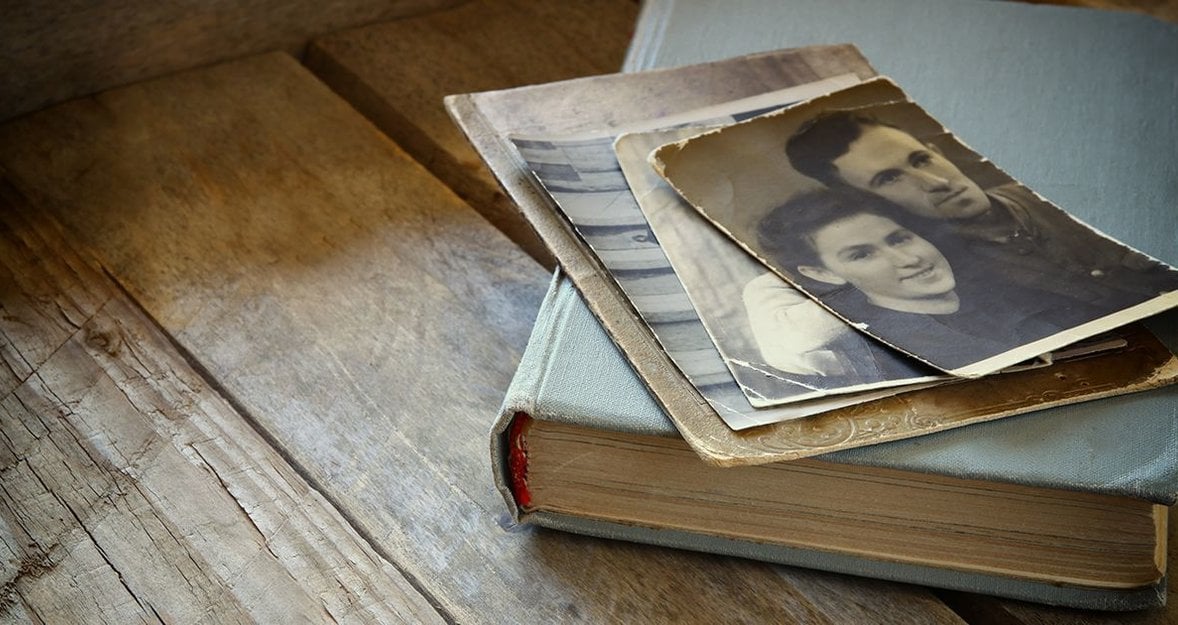
Preserve the important images from your family history, and make them available for generations. From this article, you’ll learn some new techniques on how to restore old pictures with ease.
Many of us have piles of photo albums filled with old family photos just waiting to be restored. While restoring old photos used to be a very time-consuming process, nowadays photo editing programs make it relatively easy. Restoring old photos can be as simple or as complicated as you want to make it.
Completely colorizing and restoring old photos can take a lot of time. But if you’re simply interested in restoring contrast and removing dust and scratches, look no further. Using a post-processing program such as Luminar Neo with its advanced AI-powered tools for photo restoration, you can quickly and easily bring new life to your old photos. In our article, you will find all the information you need for repairing old pictures.
Reasons Why Your Old Photos Fade
Old photographs are very vulnerable. Their lifespan depends entirely on storage conditions. Of course, nowadays you can find a way how to restore old pictures regardless of their damage, but there is no need to make things more complicated. Here are the key factors that affect the preservation of old photos.
Light Damage
One of the most common mistakes is not protecting a photograph from the damaging effects of sunlight. This is the easiest way to ruin its look in a very short period. Remember, it is better to choose a nice photo album made of high-quality plastic, which does not contain substances that destroy images. It is good if they have inserted transparent pages so that you don't have to pick up the photos with your hands. If you want the picture to be visible all the time, take care to keep it in the shade. This is one of the best ways how to enhance old photos state.
Temperature Changes
If the temperature is too high or too low, it can also damage the pictures. Again, it all depends on where and how you store your images. For example, heat accelerates the deterioration of photos. Cold also carries a certain amount of danger, especially due to the increase in humidity. More on this topic in the next section.
Air Humidity
It's no secret that humidity is detrimental to photos. The image darkens and becomes dull and it is no longer possible to make out what the photographer captured. Of course, there are many ways to old photographs restored, but still, keep photo albums in clean and cool places with optimum humidity. An attic, basement, or garage is not suitable for this purpose.
Based on the above points, the following conclusions are worth making:
- How long your pictures will be kept is up to you. After all, all photos tend to fade over time. Only the extent and speed of this process depend on exposure to weather conditions.
- Be responsible and ensure the necessary conditions of the storage place - then, even if you need to resort to the restoration of old photos, it will be much easier to do.
- Progress has given us the ability to digitize old photos and fix old photos. That way you can share extra copies with your relatives and, most importantly, preserve the pictures for many years.
From Print to Digital
The first step to restoring photos is digitizing the prints. This can be done in a number of ways. If you have a scanner, you can simply scan the photographs into your computer and turn them into JPEG images. If not, smartphones now make the process even easier. To digitize most old photographs, you can use a scanning app and your device’s camera to literally take a picture of the print and turn it into a digital image for subsequent touching up old photos.
Two useful applications for this are PhotoScan and Unfade. To use them, try to brush off as much dust from your print as you can and lay it flat on a table. Try to choose a spot that has diffused lighting, such as next to a north-facing window. Follow the instructions in the app to digitize your image. You can then transfer the file to your computer for restoration.
Sometimes, smartphone scanners don’t offer the highest resolution for restoring old photographs. For better quality, use a flatbed scanner set to 600ppi or higher. Save the file in TIFF format instead of JPEG. TIFF files are lossless and won’t degrade in quality as you edit and save the photograph during the restoration process.
Some scanning software will try to automatically edit the tone and contrast when you scan the print. While this isn’t a foolproof method, using these automatic adjustments may save you time later. If you have the option, give it a try!
How to restore old photos in Photoshop
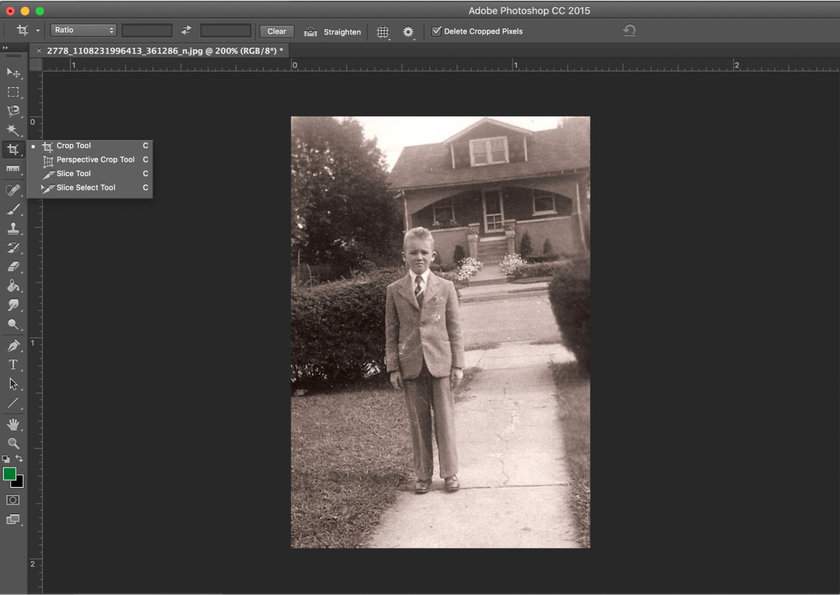
Restoring old photos in Photoshop is very similar to restoring them in Luminar Neo. First, I used the Crop tool to get rid of the excess white edges.
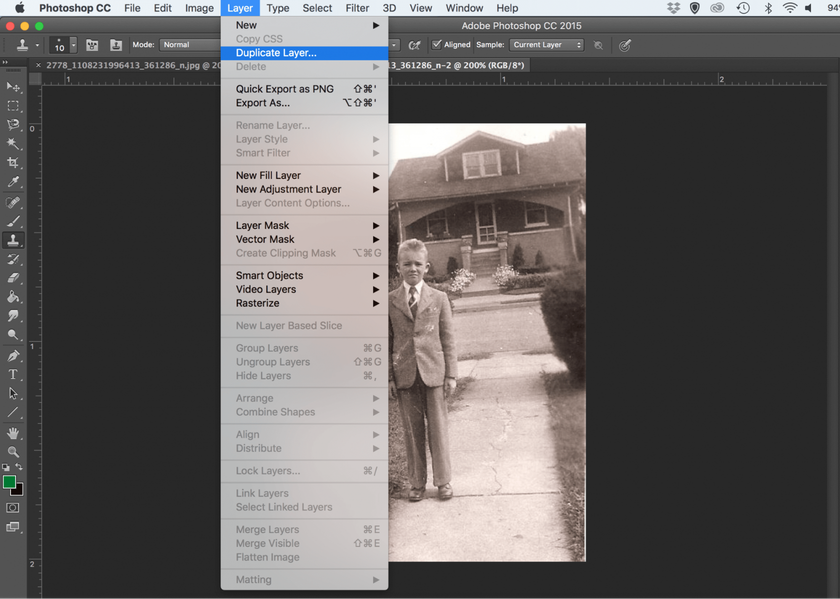
Step 1: Using Duplicate Layers
It’s a shame to get to the end of your restoration process only to realize that you’ve mistakenly cloned part of your image. If you don’t use multiple layers, you’ll have to start all over. An easy way to avoid this problem is by using duplicate layers. This basically places a copy of your photograph on top of the original. You can duplicate the layer for every step of the process of restoring old photos and label them accordingly. You may have a “dust and scratches” layer, a “color tone” layer, and a “contrast” layer, among others.
If you end up with too many layers and you know you’re happy with the edits you’ve made so far, you can always merge layers. Simply click on a layer and hold down the Shift or Control key to choose the other layers you’re finished working with. Then right-click and choose Merge Layers.
Step 2: Adjusting Tone and Contrast
How to restore a photo easily? Photoshop offers a few automatic adjustments under the Image dropdown, such as Auto Tone, Auto Contrast, and Auto Color. You can try all of these automatic adjustments until you find one that works for your particular image. For this image, I found that Auto Contrast boosted the contrast without affecting the color too much.
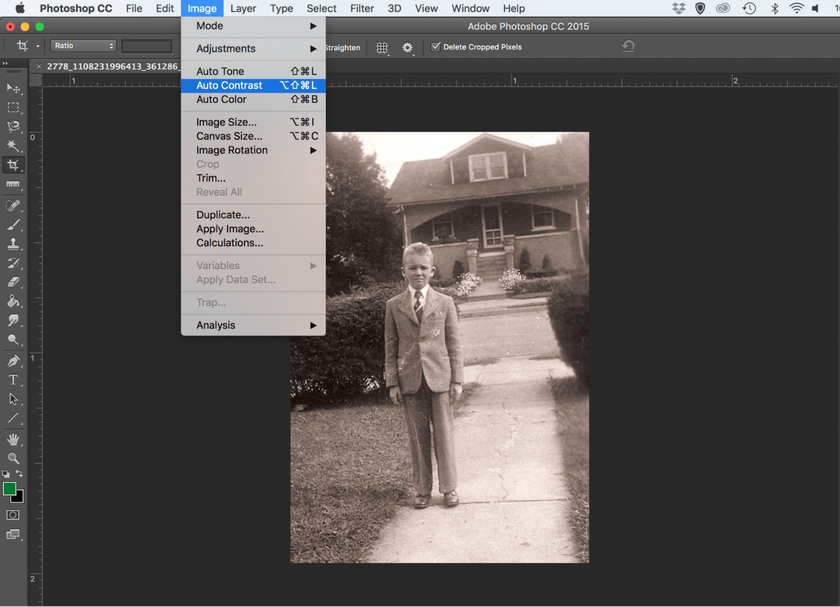
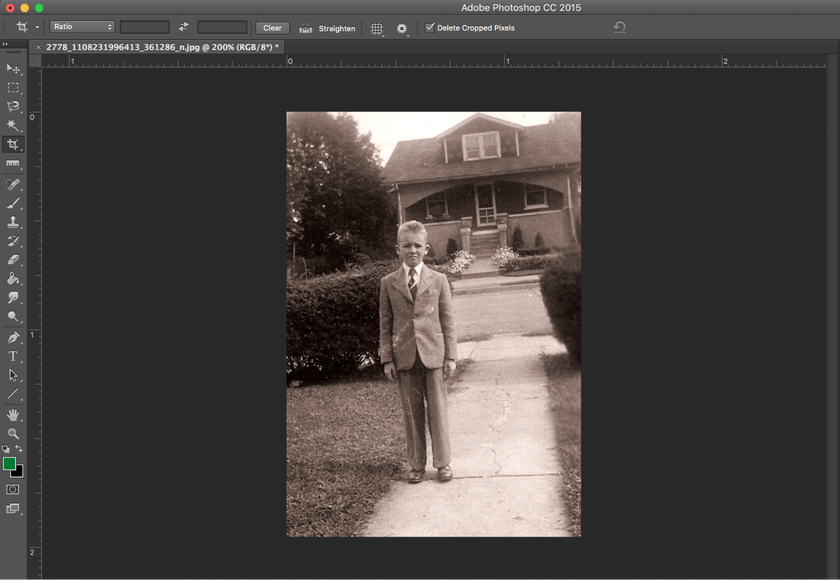 The image still has a bit of a sepia tone to it, so I’ll convert it to black and white. Image > Adjustments > Black & White is a quick and easy way to convert your image.
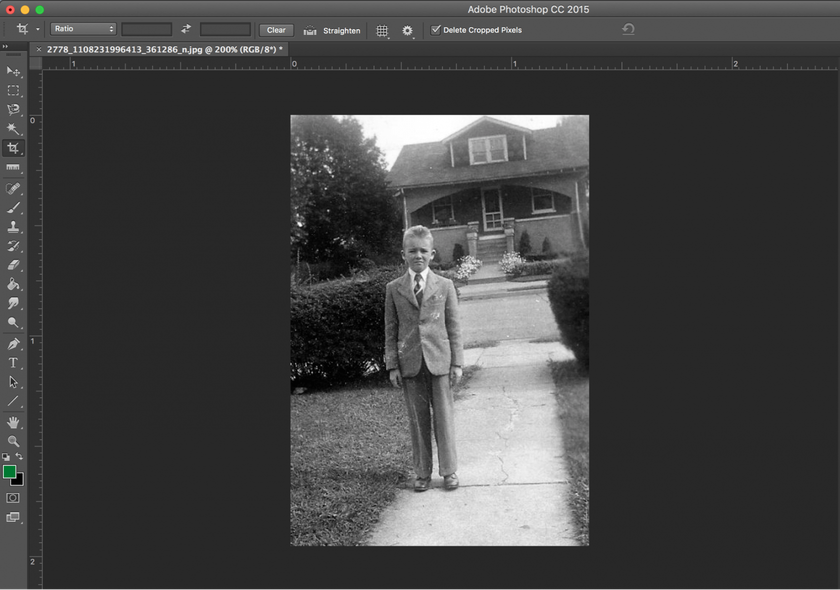
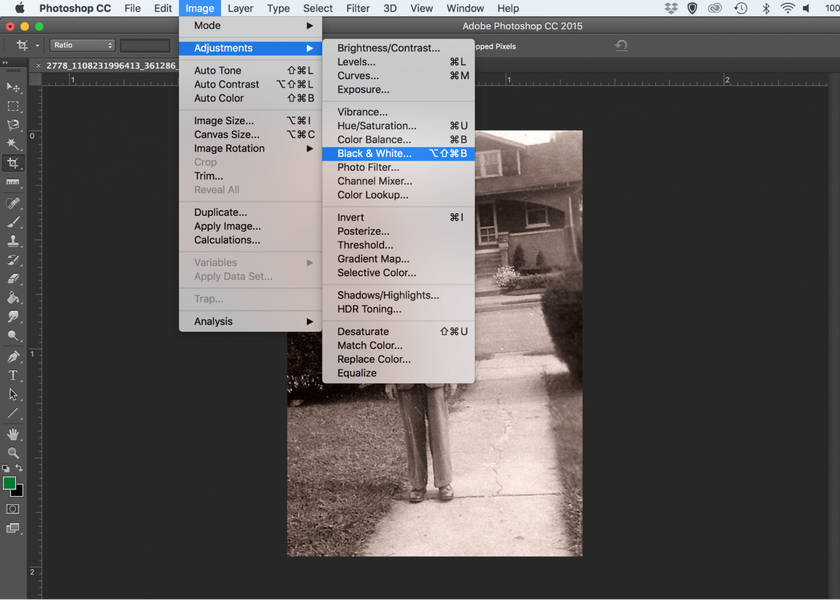 The final result has a bit of depth and contrast without being too punchy. At this point in the restoration process, you may choose to adjust the Brightness, Contrast, Levels, Exposure, or Curves to adjust the highlights, shadows, and tones. These options are all found under Image > Adjustments.
Step 3: Fixing Damaged Areas
Again, you can use the Clone Stamp tool to fix creases, dust, scratches, and other distracting marks in the process of restoring faded photos. I’ve used the Clone Stamp tool to remove the marks on the child’s suit, but the same process can be used for the rest of the dust in the image as well. This is easiest to do if you zoom in on the part of the image you're editing and use a small brush for better control. Just like in Luminar Neo, the size of the brush can be adjusted using the bracket keys.
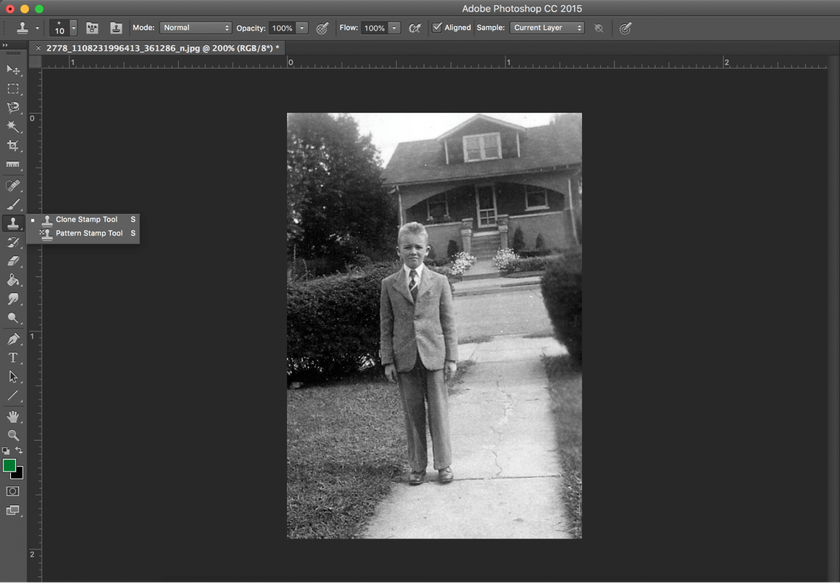 At this point, the restoration can be finished. If you’re restoring old photos in color, there will be more work to do. There are many different ways of adjusting color tone in Photoshop, but start with Auto Tone or Auto Color and work from there. You can locate more elaborate color adjustments under Image > Adjustments > Channel Mixer.
Is your image too grainy? Are there a lot of small specks of dust that simply won’t go away? While it’s a long, manual process to fully get rid of small dust marks, there’s a quick way of reducing noise in a photograph. This can be found under Filter > Noise > Reduce Noise. If your image is very low quality, this filter will remove a lot of the clarity, however. It works best if you’ve scanned the photograph at a high ppi. Simply adjust the pixel radius and threshold rates of restored old photos until you reach your desired result. The higher you pull the sliders, the more detail you’ll lose. The trick is choosing just enough to smooth out unwanted noise without losing too much detail.
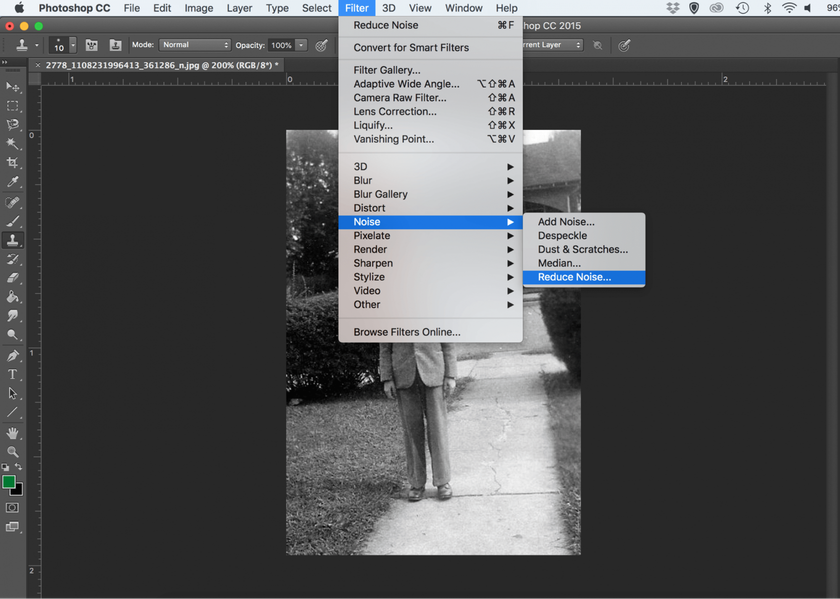
Step 4: Exporting and Sharing the Final Image
File > Save As will allow you to save the final restored picture to your computer. I recommended saving the image as both a Photoshop (.psd) file and a JPEG image. Saving it as a .psd file will allow you to open up all of your layers in case you need to make any tweaks in the future. Once you save the restored photo to your computer, you can then email it, share it on social media, or print it!
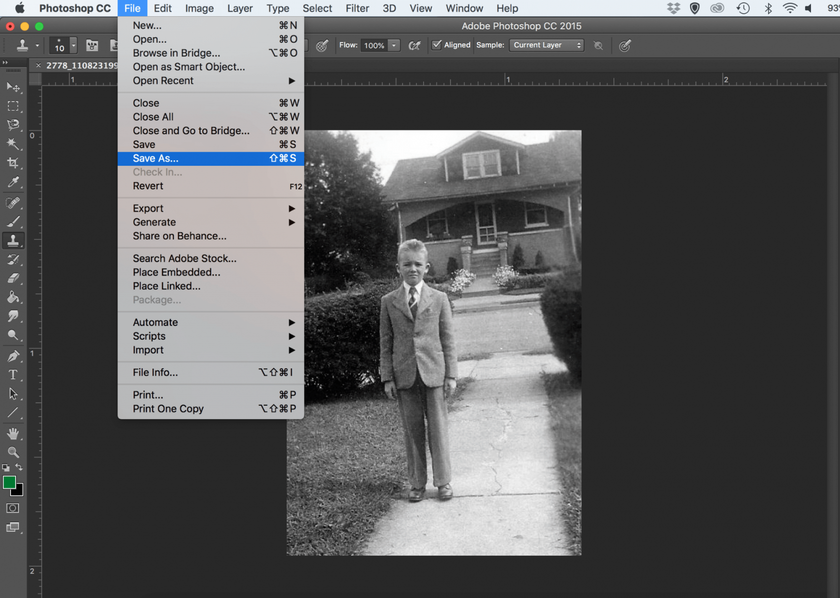 Whether you’re restoring old photos in Luminar Neo or Photoshop, the process is simple after you master a few tools. The more you practice, the better your restorations will become. Restored photos make a wonderful gift for family members that they’ll cherish for years to come. If you’re ready to learn how to restore photos, you can download a free trial of Luminar Neo before deciding to purchase!
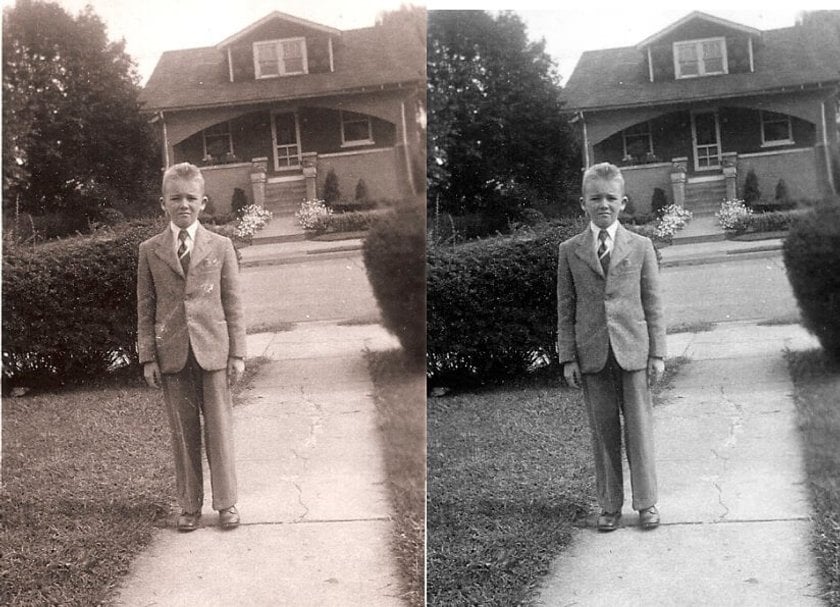
Restoring Old Pictures in Luminar Neo: Alternative Way
Step 1: Cropping and Straightening
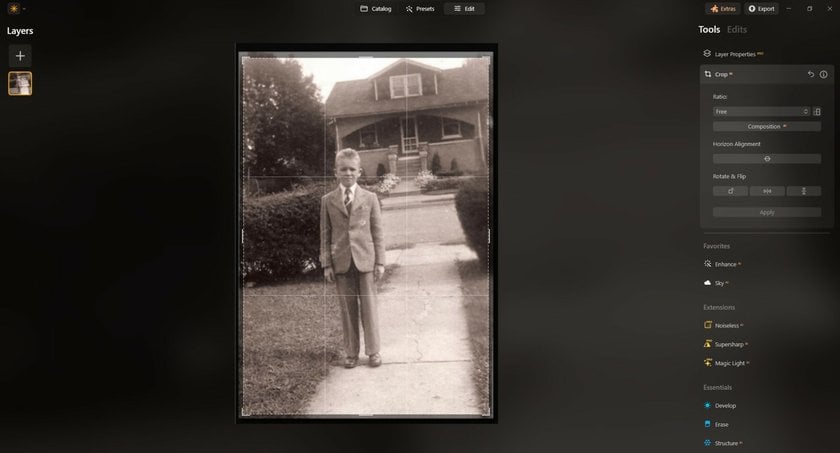
The first step to photo restoration is to make basic adjustments such as cropping and straightening. This old photograph doesn’t need a lot of these adjustments, but you can see that there’s a small border of white on both the left and right. The image was also taken at a bit of an angle, but it can easily be straightened in Luminar Neo.
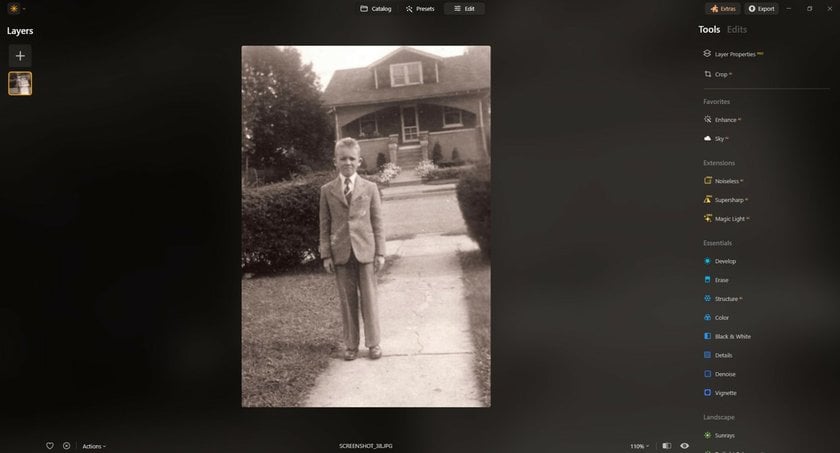
When you start to fix old pictures, open the image and click on the Tools dropdown at the top of the screen. I used Free Transform to straighten the image and Crop to get rid of the edges.
Step 2: Adjusting Tone and Contrast
Old black and white photographs will likely need a fair amount of exposure and contrast adjustments. This image isn’t too bad, but it’s lacking in contrast and has a bit of a color cast. Many old images have been yellowed with age, and this will need to be adjusted as well. Photos fade over time, but luckily it’s easy to add contrast back into an image.
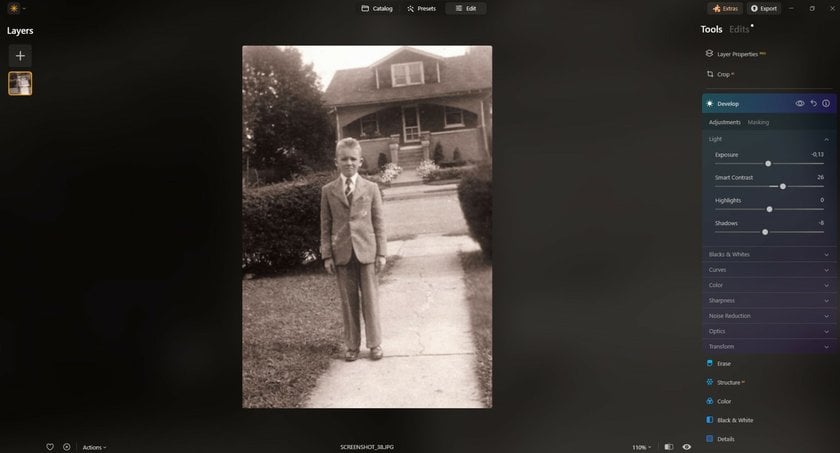
Once the photo is cropped and straightened in Luminar Neo, you can try to use a couple of Basic Tools to get a good starting point. I started to edit old photos with the Landscape tab Dehaze Tool, which automatically added some more depth and contrast. However, there’s still a sepia cast. If you prefer, you can keep it. If not, it’s easy to convert the image to black and white.
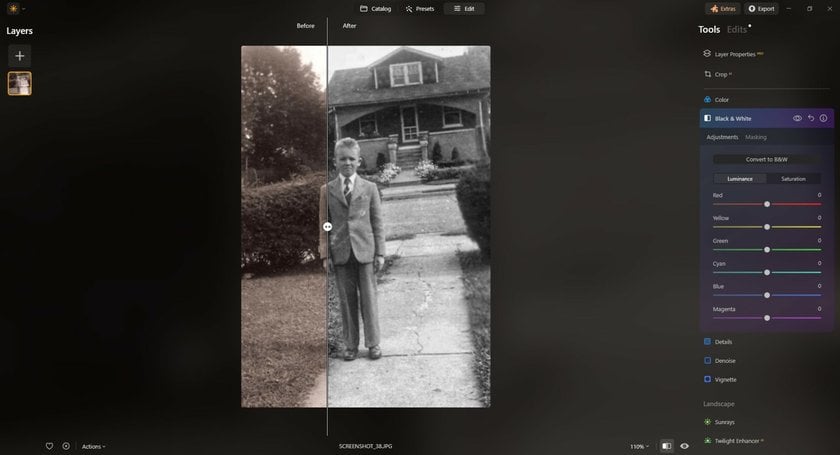
On top of the Dehaze Tool, I added Classic B&W, which is in the Essential tab. At this point, the tones in the image are much better, but it’s still lacking in clarity. On the right-hand toolbar, I adjusted both the StructureAI and Details sliders to bring out more detail to touch up old photos. As you adjust these sliders, more noise will appear. This is all down to personal preference: some people don’t mind natural film grain, but some may not want to sharpen the image enough to bring it out. If the photo were in color, you’d have to decide whether to fix the exposure first or correct the color. Start with whichever is in the worst shape. The Color Tool works great for luminance corrections, as does the Curves filter in the Develop tab. Most color photos are faded and have a cast, usually magenta. Start with the Remove Color Cast filter in the Color Tool to pull the colors into line. You might also want to activate the HSL, which gives you precise control over these types of adjustments. People expect a bit of fading with older photographs, so you don’t need to be too heavy-handed at this point. Use the Before / After curtain to check your work as you edit.
Step 3: Fixing Damaged Areas
Chances are good that parts of the print are damaged. Stains, creases, and spots are the most common culprits when you restore photographs. An easy way to fix these is to take advantage of the Erase and Clone & Stamp tools in Luminar Neo. The Clone & Stamp tool allows you to use a specific area of the image as a source. The Erase tool is useful when you’re working with an old photograph with a white or black background. For most old images, the Clone & Stamp tool will be your best bet. You can choose the option that works best for you.
Keep in mind that not every imperfection needs to be cloned out. Start with the most distracting offenders, then decide from there. This image has a lot of dust and scratches, and I could easily spend a couple of hours cloning parts of the image to get rid of them all. The dust in the background isn’t too much of a bother, but the dust and scratches on the child’s suit are a bit distracting.
I’ve chosen to use the Clone & Stamp tool to get rid of some of the more distracting scratches while repairing old photos. This tool allows you to choose the Size, Softness, and Opacity of the Clone brush. I’ve chosen a small size so I can work on small details and kept the Softness and Opacity at 100%.
The Clone & Stamp tool allows you to choose a source, which will then be copied and pasted onto another area of the image. To fix the suit, I chose to use parts of the suit without dust or scratches as the source and pasted them onto the areas that were scratched. You can use the [ and ] keys while restoring photographs to easily adjust the size of your tool.
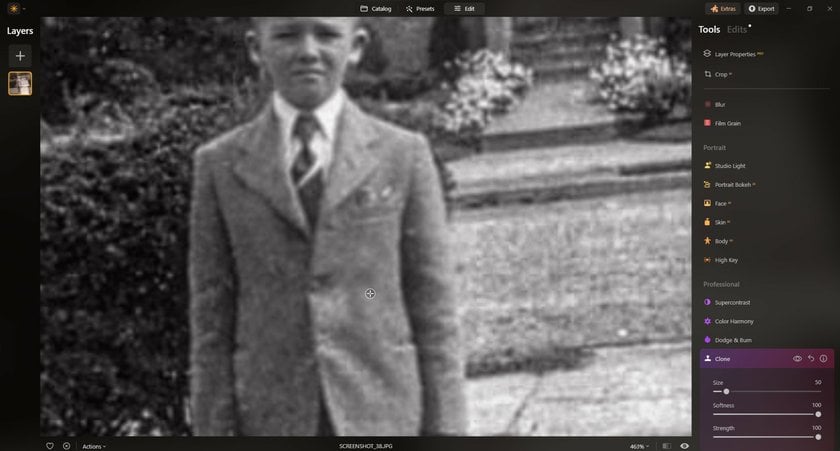
This same tool can be used to remove the other small amounts of dust throughout the rest of the photograph, or you can finish your photo retouching work at this point.

Step 4: Exporting and Sharing the Final Image
Chances are that if you’ve gone into trouble to scan a picture, you’ll probably want to save the work you’ve done to it. In Luminar Neo, go to Export.
Layers, masks, and filter settings will be saved as the catalog that can be reopened with a simple double-click, allowing you to pick up right where you left off.
Save Your Old Memories with Photo Restoration
Try it for freeAt this point, you’re probably ready to send a JPEG version of the restored photo to friends and family, post it on social media, and, if you wish, make new prints. To do so from within Luminar Neo, you have two options.
The first is File > Mail
The second method after you restore faded photos is using the Folder command. In this dialog, you’ll have five options to prepare the restored photo exactly how you want: Sharpen, Resize, Color Space, Format, and Quality. Once you’ve made your selections, click the Save button to prepare the export and save it. You can output in a variety of formats to suit any use case.
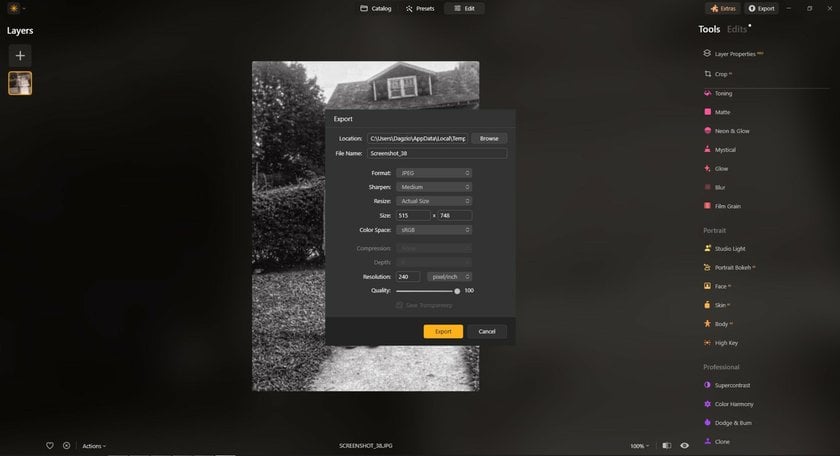
Now that the old photographs are restored, with just your smartphone and Luminar Neo, you can preserve important images from your family history and make them available for your whole family and for generations to come. If you’re ready to learn how to enhance old photos, buy Luminar Neo now!
If you can’t restore your old family photos on your own, buy a Damaged Photo Restoration Package and experts will give your faded photos a second life.
Tips on How to Restore an Old Photo
Before you start to repair old photos, it's important to understand the causes of the blurriness. Each cause has its own way of fixing it, and finding the right method means choosing the most appropriate, fastest, and most economical way to get a good result.
Assess the scope and content of the restoration work
How to repair photographs? First of all, evaluate the work you are going to do. Next, crop the obtained image. As a rule, we remove the margins of the old photo. The main thing, in this case, is not to cut off important parts and elements. This way we prepare the image for the coming processing and we can take into account all the details at once.
Examining the obtained image
If you are working on how to restore a picture, you should pay close attention to the problem areas of the image. Consider which tools are best suited to your particular situation, and choose the right photo editor. An important detail, don't forget to make a copy of the photo. First of all, you will need it if something goes wrong. Second, you can easily compare the original to the processed version.
Don't be afraid to make mistakes
If you are interested in how to fix old photos, you should understand that it is a difficult and painstaking process. However, as in any task, practice is important here. Don't be afraid to try and experiment, it might take you some time, but in the end, you'll get an amazing result!


