Full Guide To Luminar Neo File Management Options
January 08, 2026

Learn how Luminar Neo organizes your photos—and how to never lose a shot again.
Organisation is one of those lesser talked about virtues that can make a good photographer great. Understanding your own file management system will help you locate photos much more quickly when you come to look for them months or even years later. And as photographers, the last thing we want is to remember a great shot we took a long time ago, only to realise we can no longer find it.
Luminar Neo understands this and aims to support not only an efficient editing workflow, but also a practical approach to file organisation. It offers several ways to manage and structure your images so that old shoots are easy to locate and past work is never lost in the shuffle.
In this article, we are going to help you get your work in order and understand what is happening under the hood inside Luminar Neo’s file management system.
How Luminar Neo Handles Files
First of all, let’s understand what Luminar Neo does with your images as soon as you start editing. Luminar Neo is a non-destructive editor, which means that any adjustments you make do not overwrite the original file. Instead, all edits are stored separately and your original image remains completely untouched at all times.
These adjustments are saved within the Luminar Neo Catalogue. Rather than creating a new image file on your drive, Luminar Neo records the editing instructions and displays a rendered version of your image inside the catalogue, while always referencing the original file. This ensures that your source image stays intact and unchanged.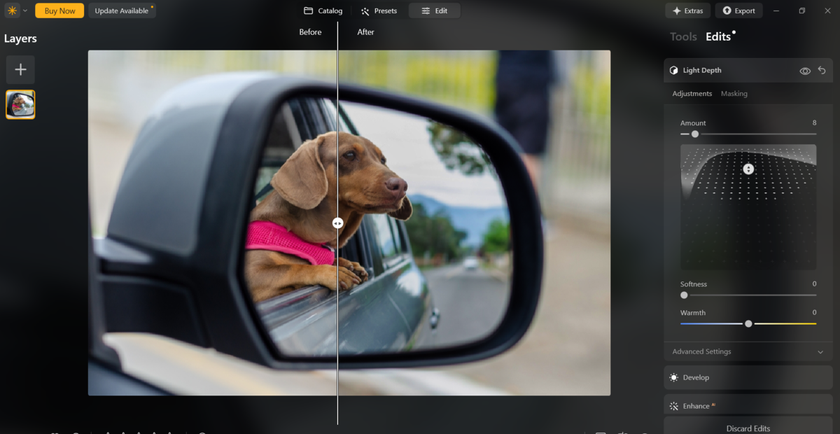
Keeping the original file untouched is essential, as you may later want to revisit the image and edit it in a completely different style, or return to the RAW file with fresh ideas. Because Luminar Neo is non-destructive, you are free to do this without duplicating or damaging your original photos.
Your AI-Powered Photo Editor for MacOS and Windows
Discover Now!The catalogue system also allows you to organise your images in a way that suits your existing workflow. Luminar Neo does not force you to store all of your images in one location. Instead, it reads files from wherever they are stored on your computer or external drives, while keeping track of edits, previews and organisational data inside the catalogue.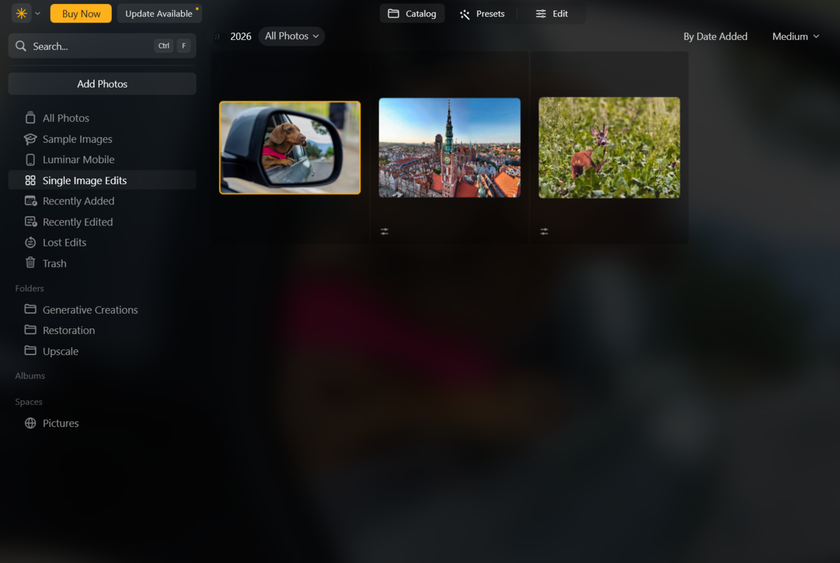
For example, I organise shoots by year, then by month and date, and name folders based on the location or project. Luminar Neo works seamlessly with this approach, allowing me to import images from those folders and begin editing without needing to move or duplicate files.
Now that we understand how Luminar Neo handles files behind the scenes, let’s take a look at how you can improve organisation within the software itself to speed up your workflow even further.
Catalogue vs Folders
Let’s open up Luminar Neo and take a look at the larger file systems. We’ll start with the catalogue. This is home to every image that has been imported into Luminar Neo. It is not a folder in the traditional sense, but rather an index, meaning it acts as a reference system. The catalogue itself exists as a file on your computer and stores information about where your images are located, along with all of the edits, previews, and organisational data associated with them.
As you continue to use Luminar Neo and import more photos, the catalogue will naturally grow larger. With time, simply browsing through everything in the catalogue can become inefficient, especially when you want to locate files from older shoots. This is where folders become particularly useful.
In the menu on the left side of the window, you will find the Folders section. By clicking the plus icon, you can point Luminar Neo to a folder that already exists on your computer or an external drive.  Once selected, every compatible image inside that folder will become visible and editable within Luminar Neo.
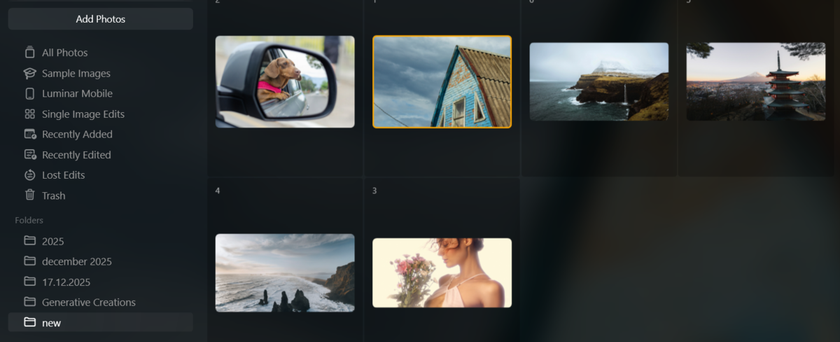
One very important thing to understand about folders is that they reflect the real location of your files on your drive. This means that actions such as deleting or duplicating files from within Luminar Neo will affect the original files in that folder. If you delete an image from a folder inside Luminar Neo, it is moved to Luminar Neo’s Trash, which mirrors your system’s recycle bin or trash folder. This gives you a safety net and allows you to recover files if something is removed by mistake, rather than deleting them permanently straight away.
Working With Folders
Not every single photo you take during a shoot is going to be one you want to keep. That’s where the flag and rating system comes into play. As you work through the photos in a folder, you can flag an image as Favourite by pressing the P key, or mark it as Rejected by pressing the X key.  You can also use the star rating system by pressing the number keys from 1 to 5 to rate images according to their quality or usefulness.
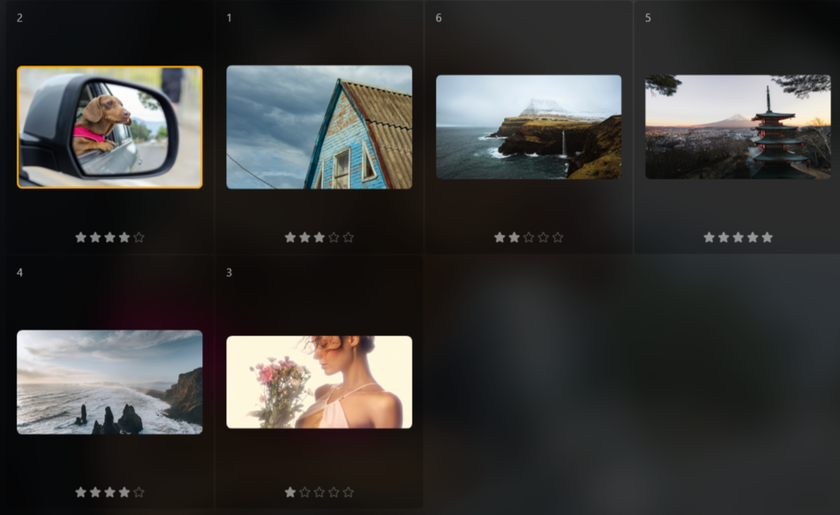
Once you’ve reviewed the images in a folder, you have a few options for organising what you see next. At the top of the window, images are initially sorted by Capture Time. However, you can change this to sort by flag or rating instead, allowing you to focus only on the shots you want to edit or deliver.
Rejected images can later be removed entirely by sending them to the Luminar Trash and emptying it when you are ready.  This is something I recommend doing to free up storage space and keep both your folders and catalogue tidy. As always, it’s best to do this only once you are completely confident that those images will not be needed.
It’s also worth mentioning what happens if folders are moved to a different location on your computer or an external drive. Doing so will break the file path that Luminar Neo uses to locate your images. When this happens, you’ll see a warning icon on the affected photos and Luminar Neo will prompt you to locate the missing files. Simply click the Locate Folder option and point Luminar Neo to the folder’s new location. Your edits and adjustments will not be lost, as they are stored in the catalogue and will reappear once the file path has been restored.
Working With Albums
The next file system you can work with is albums. These are especially useful for grouping images together virtually, without affecting file paths or moving images from their original locations.
You could use albums to group the final images from a shoot, build your own collections, or create reference sets to come back to later.
To create an album, simply select a series of photos within the catalogue or folder view. Then head to the Albums section in the left-hand menu and click the plus icon.![]() Give your album a name and all of the selected photos will be added to it.
Give your album a name and all of the selected photos will be added to it.  You can also add more images later by dragging them from the catalogue or folder view directly into the album.
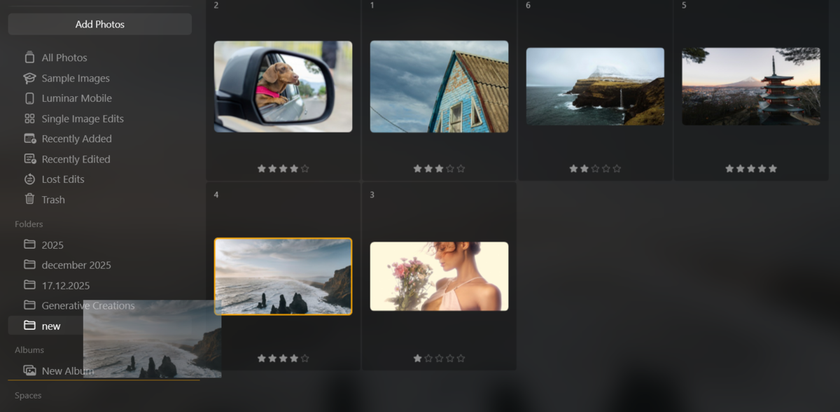
All of the organisational tools available in folders, such as flagging, rating, and sorting, are also available within albums, allowing you to refine and organise your selections even further.
Exporting Files
Once you are ready to export an image, you can do so by going to File > Export, or by using the shortcut keys (Ctrl + Shift + E on Windows, Cmd + Shift + E on Mac).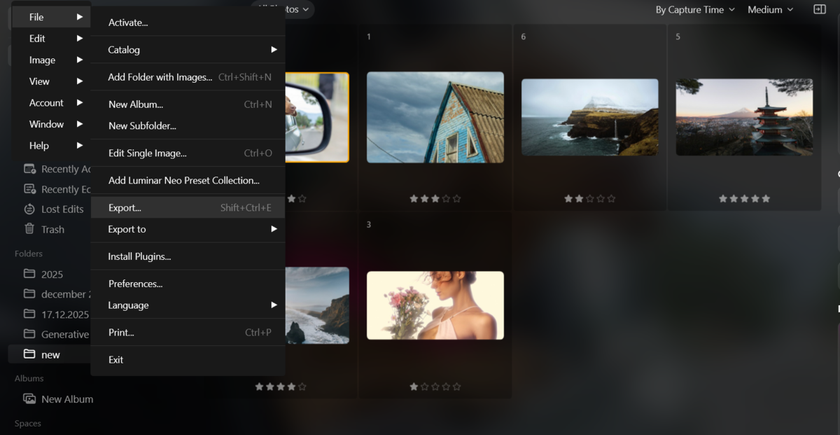
As mentioned earlier, Luminar Neo uses a non-destructive editing system. This means that when you export an image, it is saved as a brand new file, leaving the original completely intact. During export, you will be asked to choose the file type, quality, and the location where you want the image to be saved.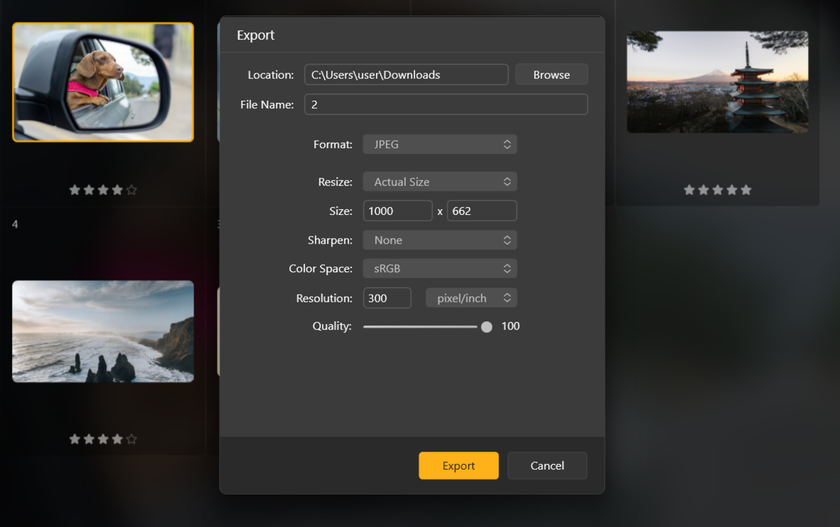
Personally, I like to keep my RAW files and exported images in separate folders to keep everything organised. If you are working with JPEG files and export them to the same location using the same file name, there is a risk that the original file could be overwritten.
Once you are happy with your export settings and the chosen location, simply click Save and your image will be ready to use.
The Bottom Line
With Luminar Neo’s file management system, you are able to stay on top of your image organisation, making it easy to locate photos months or even years down the line. Managing your images inside Luminar Neo is straightforward and intuitive.
The catalogue window gives you an overview of every image you have imported into the software. From there, folders and albums allow you to sort and group your shoots, while flagging and star ratings help you refine selections and focus on your best work. Thanks to the non-destructive editing process, you can experiment freely without any risk of losing your original files.
Organisation goes a long way in photography, especially when it is so easy to take hundreds of images in a single shoot. By taking full advantage of Luminar Neo’s file management tools, you can keep your work tidy, accessible, and ready whenever you need it.