How to Batch Edit in Lightroom for Faster Workflow
February 05, 2026

Learn how to batch edit photos in Lightroom to save time, keep a consistent style, and optimize performance across desktop and mobile workflows.
Do you make a living from photography and can't remember the last time you got a good night's sleep? Batch editing in Lightroom is just what you need. Instead of repeating the same actions dozens of times, you can simply edit one photo to a high standard and then save all the changes as a separate style.
This approach is especially good for event photography, vlogs, studio sessions, and social media content, as it lets you maintain a consistent style regardless of the total number of images. In this article, we'll take a detailed look at the benefits of the "Batch Processing" feature and provide step-by-step instructions on how to use it in Lightroom.
Advanced yet easy-to-use photo editor
Get Luminar Neo NowBasis for Simultaneous editing of multiple photos in Lightroom
Batch edit Lightroom is based on the principle of inheriting settings, so you will need a prepared “sample” from which all changes will be applied. If the photos were taken in different lighting conditions, it is worth sorting them by date added or manually grouping them by location, brightness, or time of day. For each such group, you need to prepare a unique preset to avoid serious artifacts after import.
Additional changes will be required in the later stages of editing, when the main work has been done automatically, but there are still photos for which the selected filter didn’t suit. You can decide for yourself whether to delete such photos, edit them manually, or install the Luminar Lightroom plugin so that artificial intelligence does all the monotonous work.
Preparing our Photos for Batch Editing
The first technical changes occur before Lightroom batch processing begins in the “Lens Corrections” section, where you can correct distortion and chromatic aberrations. Select one frame, check the “Enable Profile Corrections” and “Remove Chromatic Aberration” boxes, and then synchronize this to the entire import. Lightroom will determine the lens model for each file based on metadata, even if they differ. 
Once you have cleaned up your profile, all that remains is to edit the exposure and brightness of your images. The principle is the same: select one frame, adjust the settings to the desired values, and enjoy life. If the sorting was done correctly, then all the photos in the group were taken under identical conditions, and you don't need to configure each one manually—just use the “Match Total Exposures” function. It automatically compensates for microscopic fluctuations in the camera's exposure meter, making the entire series visually seamless in terms of brightness.
Applying Presets to Multiple Images Simultaneously
Lightroom batch edit greatly speeds up the workflow, while also achieving visual consistency across an entire series of images. No more tedious copying of settings from frame to frame, so users can focus their attention on aspects that really deserve it.
Creating a custom preset captures unique color correction, contrast, and detail settings, making it possible to quickly apply the same settings to any future work with just a few clicks. Now, complaints about “why does it take so long to prepare photos” are a thing of the past. Save time and nerves by using advanced technology for this:
Editing. Select a core image for the category from the general catalog, and adjust it to achieve the desired visual effect.

Saving settings. Click on the “Presets” section at the bottom of the toolbar, then find the icon with three dots and select “Create New Preset.”
Rules. In the window that appears, you need to specify three things: the name of the style, its location on your computer, and the specific settings that will be saved. After filling in all the items and selecting the checkboxes, all that remains is to click the “Save” button.

Working with photos. Switch to grid mode, select all the images from the group that require the same processing. Use the “Shift” button to select multiple photos at once.
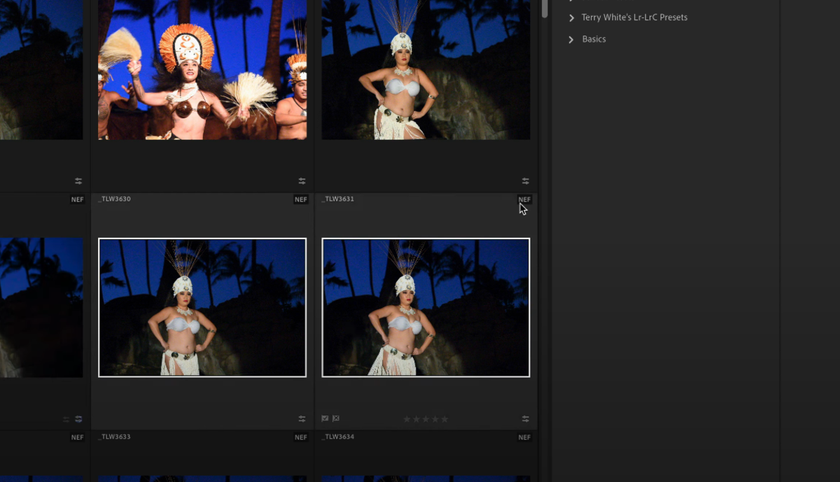
Applying changes. Click on the preset you created earlier in the list of user settings. The filter will be applied automatically.


Developing templates from scratch is a challenging task. If you encounter problems at any stage or are dissatisfied with the overall style, you can use the Lightroom Presets Marketplace to download a filter created by another user and apply it to your projects.
Copying and Pasting Edits Across Your Photo Collection
When users asked, “Can you batch edit in Lightroom without creating separate presets?”, Adobe simply added a feature to copy changes. If style synchronization is a handy tool that helps photographers when they have several hundred photos to edit and their coffee is running out, then copying is a simple trick that enables you to process 5-10 photos in the same style without having to register a new filter.
The principle of operation differs in only one thing: you need to select one frame, edit it, and then, instead of saving the preset, press the key combination “Ctrl” + “C” (Win) or ‘Cmd’ + “C” (Mac). This will bring up a context menu where the user can configure which parameters will be saved for copying.
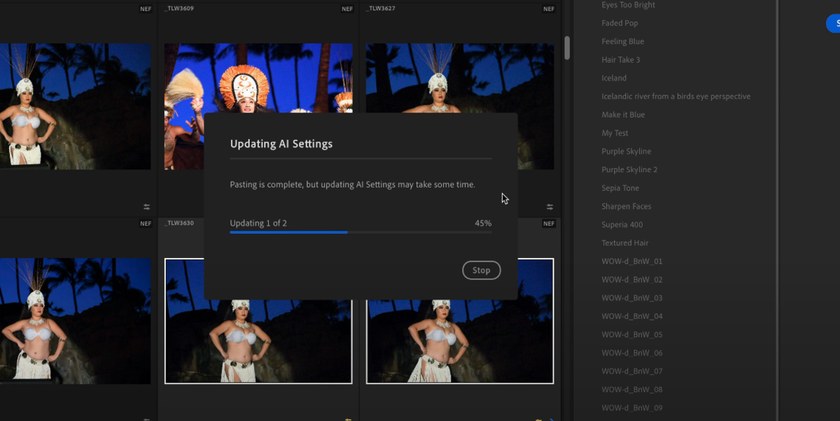
 To apply the changes to other photos, simply return to the collection, select one or more files using grid mode (the “G” key by default), and then use the “Ctrl” + “V” (Win) or ‘Cmd’ + “V” (Mac) combination.
  If batch editing or the method discussed in this section is not suitable for some reason, Luminar may be able to help.
Exclusive Tools of Endless Possibilities in One AI Editor
Explore Now!Using Lightroom Classic for Efficient Batch Processing
In Lightroom Classic, batch processing is based on the principle of “master” and “slave” frames. To transfer edits, select the edited frame, then select the rest using Shift, and click the “Sync” button. In the window that opens, select the items that apply to the entire series, such as white balance or camera calibration, excluding local masks and cropping.
If the collection was shot under identical conditions, it is more efficient to enable “Auto Sync” mode (the toggle switch next to the sync button).  When activated, any movement of the slider on the “master” frame is instantly duplicated on all selected photos, letting you see the result on the entire series in real time.
For quick technical corrections without switching to the processing module, use the “Quick Develop” panel in the Library. Its main value is relative editing: if you select photos with different brightness and add exposure, the program will add the specified value to the current indicator of each frame, rather than equating them to a single number. This makes how to batch edit in Lightroom Classic especially effective for studio or event workflows.
Managing Batch Edits on Lightroom Mobile Devices
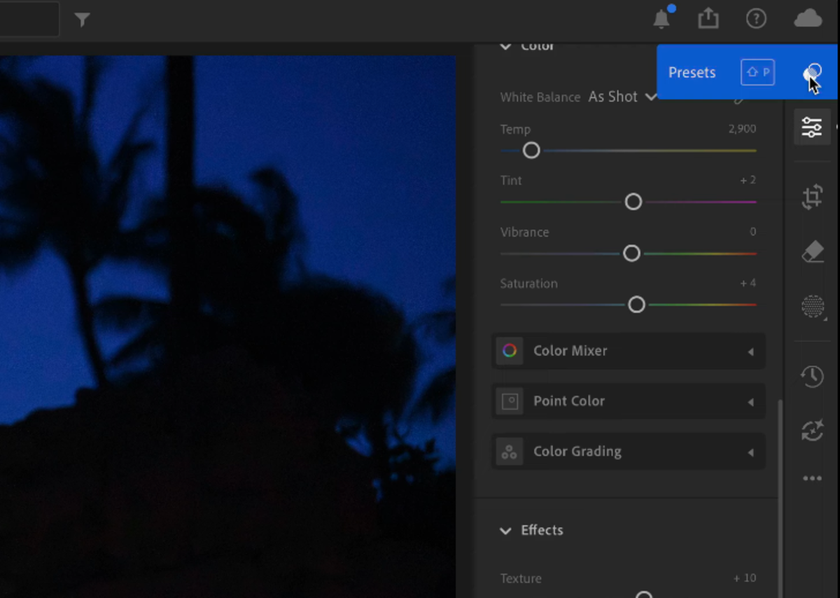
 Real-time processing cannot be used on mobile devices due to system architecture and hardware limitations. Therefore, the most reliable option for how to batch edit photos in Lightroom on a phone or tablet is the copy and paste method described above. The principle is the same, only instead of using a key combination, click “Copy Settings” in the top menu (three dots), then open the next image and select “Paste” in the bottom panel.
If the collection is large, it is more convenient to create a custom preset. In the reference frame editing mode, click “Create Preset,” and it will appear in the “Custom” folder. Now you can open any photo from the series and apply this style with a single touch, which is faster than constantly exchanging data via the buffer. An Adobe Creative Cloud subscription lets you sync all styles created with the batch photo editor between your PC and smartphone. So even if a filter was created earlier, you can still use it on a new device after logging in.
Tips to Optimize Lightroom Performance During Batch Editing
 Editing multiple photos at once is the most resource-intensive process in Adobe Lightroom. The load is so heavy that even computers that are powerful by modern standards can “freeze” or, in the worst case, crash. To understand how to edit multiple photos at once in Lightroom and avoid slowdowns, you need to configure the cache and preview settings correctly.
Smart previews. Creating smart preview images during import enables the software to avoid accessing heavy source files. This affects the response speed of sliders when synchronizing settings across hundreds of frames, making the process more enjoyable and efficient.
Cache size. Increase the Camera Raw Cache size to 20-50 GB in the settings. This will reduce the likelihood of Lightroom crashing and speed up the reading of edit data during batch copying.
Order of operations. Each operation has a certain “weight” for the processor, so to avoid having to recalculate heavy algorithms with each slider shift, leave retouching and neural network applications for the final stages of editing.
Interestingly, alternative editors, such as Luminar, use different optimization algorithms, relying on artificial intelligence that can “analyze” a group of photos differently. However, Lightroom remains the standard for large collections thanks to its ability to fine-tune performance for specific hardware. If the program still lags, try temporarily disabling the histogram panel—this will free up some resources for calculating the pixels themselves.
Batch Editing: Convenience Without Risking Quality
Simultaneously editing a set of photos can save a lot of time, but it's even better at managing the integrity of the visual narrative. Smartly dividing resources between quick basic corrections in Lightroom and deep artistic refinements in Luminar lets you achieve flawless quality. Ultimately, automating routine processes frees up space for pure creativity, letting the photographer focus on finding that unique style that makes a series of works truly professional and recognizable, rather than on the technical movements of sliders