How To Edit Photos On iPhone - Essential Editing Techniques
January 21, 2026

Learn how to edit photos on iPhone—from basic cropping and light fixes to filters and advanced edits that make everyday shots look polished.
Capturing pictures on an iPhone is part of a daily routine just like brushing your teeth or having bread and fruit in the morning. It is a practice enabling us to share our feelings and memories with some people who, one way or another, are unable to be with us at this moment. The possibilities of the camera are not unlimited, however, unless conditions are favorable, and you have a good idea, and a stroke of luck, your shot will not be as expressive as you would like.
The photo editor built into the iPhone can be used to correct the situation, where you can edit the fundamental parameters, like: the saturation, the brightness, the contrast, and the format within a few clicks. We are going to inspect the editing options in this paper and provide an account of how to make this work!
Preparing Before You Start Editing
 The first thing you should do before you begin editing is to pick the pictures you will be working with. It goes without saying, yet too many people base on the final scene they have made or the one that they believe to be attractive, even though it is inappropriate to edit.
In a series of photos of people, select a shot in which the eyes take the center stage, and the facial expression is joyful or relaxed. The shadows must be gentle to underline the cheekbones and face volume. To have an urban-like image, focus on a conceptual idea: the frame should have a distinct guideline, time has to be used to develop a sense of setting, and a search for beautiful colors ought to be conducted.
Nature photographs also demand a distinct strategy in this respect. In this case, it is focused on the interaction of layers and comfort. Unless there is something of interest in the foreground (a stone, a flower, a snag), you will find that a photo, however much you may colour it, is flat.
When looking for the answer to the question “how to edit a photo on iPhone”, be prepared to change your attitude towards photography in general. After all, proper preparation guarantees 50% of a high-quality result. It would be wrong to deprive yourself of such an advantage because of an unwillingness to take pictures with editing in mind.
How to Edit Pics on Iphone: Cropping
Once the images for interaction have been selected, set the tone of the story with cropping. Tools for cropping, rotating, and flipping photos are mainly used to correct mistakes made during shooting. Although the changes are minor, they can completely alter the impression of the scene. In situations where an extraneous object is in the pics or a detail is severely distorted, simply click on “Edit” and then navigate to the cropping settings section.
Manual photo cropping. Use your fingers to change the shape of the rectangle to select the area you want to edit. This is a somewhat inconvenient option, as it is difficult to achieve a perfect square manually.
Cropping with magnification. The result achieved using this mode is the same as when making changes manually, but the approach is different. Use the pinch gesture to zoom in on the scene, pushing unnecessary details out of the frame.
Aspect ratio. It is a parameter that is defined in a separate menu, which is available by locating the icon with multiple rectangles in the upper right portion. The pop-up menu will provide an option to crop the photo as per one of the popular formats.


The scene framing can be redefined at any time. In case you dislike the changes you made during the editing period, all you need to do is press the button of the Cancel button located at the bottom left corner to restore the changes to the original state.
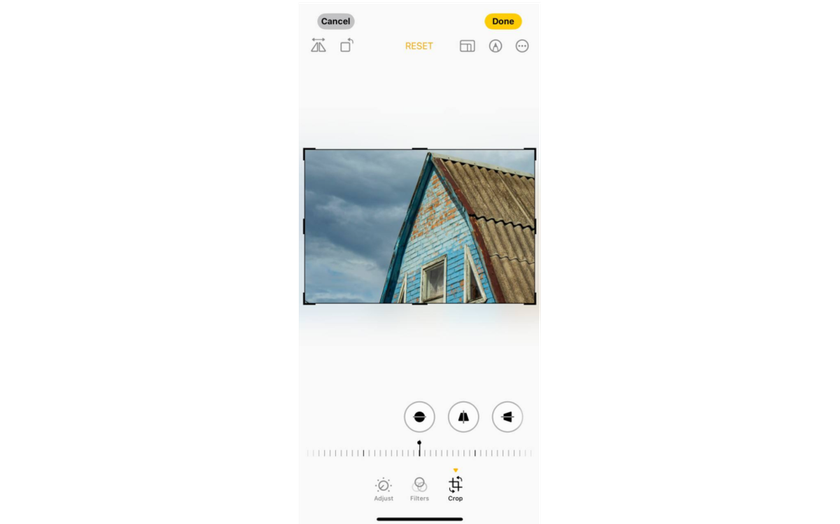
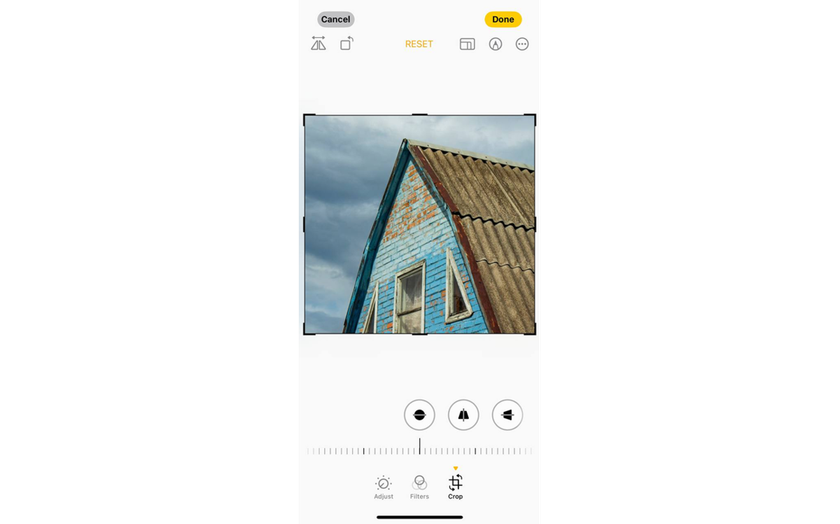
Slanted or crooked lines often become noticeable only after shooting, however, the built-in iPhone editor can quickly correct the perspective. Open the photo, tap “Edit,” then tap the “Crop” icon. Three tools will appear below the image for aligning and adjusting the vertical or horizontal perspective.  Move the slider at the bottom for precise control, or tap Auto at the top to have iOS apply automatic correction based on the selected tool.
Use “Straighten” to level the horizon and tidy up all horizontal lines. The ‘Vertical’ tool will enable you to correct tilted buildings or objects by aligning the edges. To correct distortions on the sides, use the “Horizontal” tool. After making a few changes, the lines will appear parallel. When the photo looks right, tap “Done” to save the result. As with regular cropping, you can undo any changes in the lower left corner if needed.
Light and Color
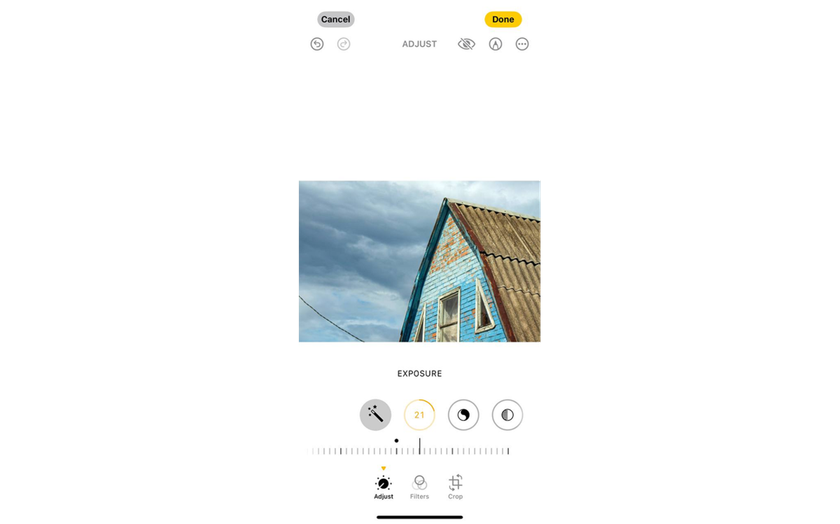
For easy photo editing, adjust the lighting first, then correct the color. Open the picture in the “Photos” application, touch “Edit”, and touch the settings icon.![]() The row of tools under the pics will have a control that you desire, and as a result, swipe the row of tools. The slider can be moved freely from left to right, and it alters the effect of a particular parameter. What can you change?
The row of tools under the pics will have a control that you desire, and as a result, swipe the row of tools. The slider can be moved freely from left to right, and it alters the effect of a particular parameter. What can you change?
Set the overall brightness. Tap Exposure and change the value until the main subject is clear. While adjusting, keep an eye on the brightest area and then stop before it turns into a flat white spot.
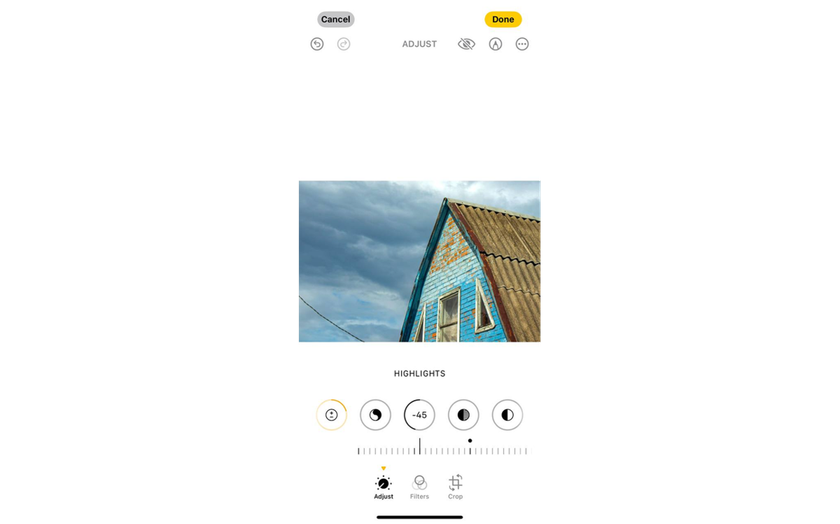
Restore details in bright areas. Tap “Highlights” and drag to the left until the clouds, windows, and white fabric become textured again. If the photo starts to look dull, move the slider slightly to the right.
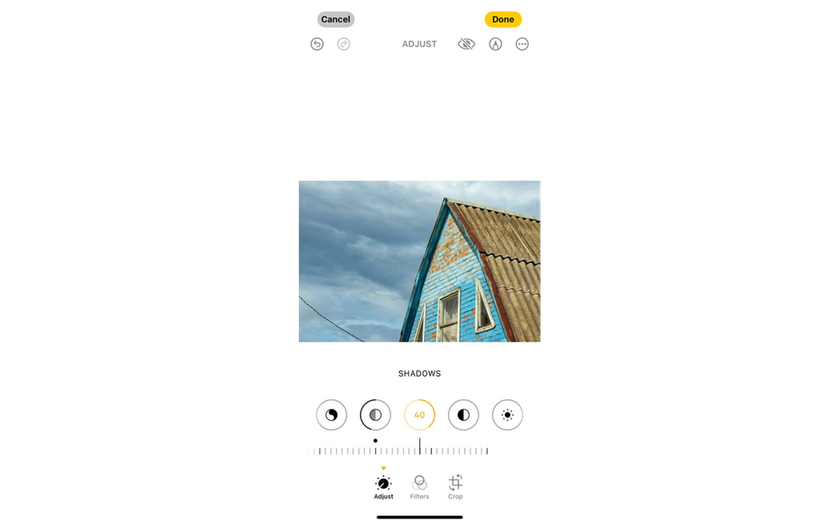
Brighten the dark areas without adding haze. Click “Shadows” and drag to the right until the hair, dark clothing, and corners of the background become clear. If the image starts to look hazy, reduce the value.
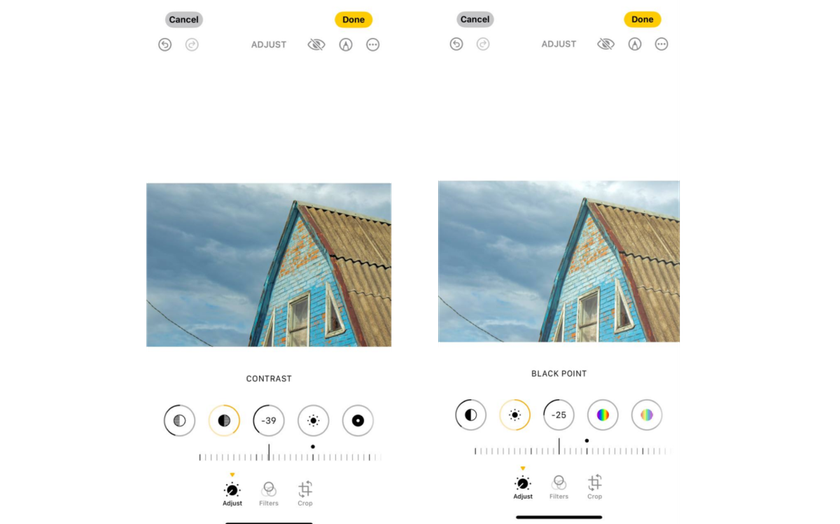
Restore depth and contrast. Tap “Contrast” to slightly increase contrast. Then tap “Black Point” and increase it slightly to make dark areas appear deeper while retaining detail in clothing, hair, and other elements.


Finish working with display intensity. Click “Brightness” and increase it slightly to restore muted colors while maintaining a more subdued skin tone. Avoid making major changes to the “Saturation” setting, as this can cause orange tones to appear on faces and neon green colors. 
Filters: Change The Concept in One Click
For the average user, the best way to edit photos on an iPhone is to use filters. This does not require any skills, a sense of balance, or checking settings. Just select an image, go to edit mode, and select the icon with three circles. Swipe through the filter preview to view the effect on the entire frame, and then tap the filter that you want and adjust the intensity slider below the image.
The photo editor for iPhone of most filters can be done without pre-setting color and lighting adjustments, though in certain instances, it might be required to carry out these adjustments before one is able to get a realistic picture. One should also not use filters when posting an image. The same option is available in Instagram and other apps, but the outcome will be rather disappointing: lines will be blurred, colors will be oversaturated, and highlights will be visible all over the scene.
Batch Processing of Images
Among photo editing tips for iPhone, batch editing is perhaps the most useful option. Style matching is rarely useful for ordinary users, but it will be a real lifesaver for people who earn their living from photography. No more sleepless nights, dark circles under your eyes, and nerves frayed by tight deadlines.
Just edit one file successfully, tap the three dots icon, and select “Copy Changes.” All that's left is to select the images to which the same settings will be applied, and then tap “Paste Changes” in the same menu.
Editing Third-party Suggestions: Exporting Pictures with iPhone
 As previously stated, the applications built into the iPhone are adequate to edit scenes. However, what if you want more? At that point, one can refer to the services of third-party editors like Luminar Neo, Adobe Photoshop, or Adobe Lightroom that specialize in more advanced editing.
Figuring out how to edit iPhone photos outside the system is easy thanks to the well-designed export system. Depending on the system, some users may be able to move pics directly through the “Share” section to installed utilities (Photoshop, Photoshop Express, etc.). If the desired application is not in the lists, select “Save to Files” in the “Share” menu and download the file to a folder that the editor you are using has access to.
If you are one of those who believe that the best iPhone photo edit settings can only be achieved using a computer or laptop, the export process will be a little more complicated. For Windows, simply connect the USB, unlock your phone, and click “Trust this computer.” You can open your phone's internal storage via “File Explorer.”
For Mac users, the scenario is the same in most respects. Open the “Photos” or “Image Capture” program, select your iPhone from the list of devices, and click “Import” (you can select individual photos or “Import All New”) after connecting the cable. You can also transfer pics using cloud technology. iCloud is initially available on Apple devices, but users of other operating systems will have to install the appropriate application manually.
Removing And Replacing Objects
The built-in editor does not allow deleting or replacing objects, and therefore, in case you wish to replace the sky, add details to the background, combine them, or work with separate layers, rely on Luminar. The AI-based assistant will choose the object automatically, and then you will have the option to do what you want with it.
Pictures improvement
Luminar NEO outperforms Photoshop when it comes to the feature of easy and all-encompassing image optimization. This is in case of generic objects or specific ones, of faces, eyes, sky, and other details of the same nature. It has its own tool, which avoids the creation of artifacts, each with the respective editing direction.
The AI HDR enhancement feature available in the latest version of Skylum's app improves the overall quality of the picture. This can be a great starting point for more global editing: retouching, replacing objects, and creating color depth. The filter system allows for precise intervention, which the iPhone is currently unable to provide on its own.
A Universal Tool For Creating And Enhancing Images
Although iPhone photo editing settings are inferior to many specialized applications in terms of quality and efficiency, it is difficult to call this a serious drawback. The purpose of the built-in editor is a concise, simple, and practical tool that even your grandmother can use.