Portrait Mode On Iphone: Techniques You Didn't Know Existed
January 14, 2026

Discover the hidden powers of your iPhone's Portrait Mode in this detailed guide! Learn how to capture stunning, professional-looking portraits with just your phone, making every snapshot worth a second look!
Ready to take your iPhone portrait photography to the next level? Forget just blurring the background — today, we're diving into some cool tricks of iPhone’s Portrait Mode that can seriously step up your photography game!
Let’s jump in!
What Does Portrait Mode Do
Portrait Mode is a feature available on newer iPhone models that elevates your photography game to levels akin to DSLR cameras. When you switch to Portrait Mode, the camera focuses sharply on the main subject while beautifully blurring the background.
This effect, often referred to as 'bokeh', helps your subject stand out as if professionally shot. Beyond just blurring the background, Portrait Mode also offers various lighting options to enhance the photo's mood and focus!
How to Use Portrait Mode on iPhone
To start using Portrait Mode:
1. Open the Camera app and select Portrait Mode.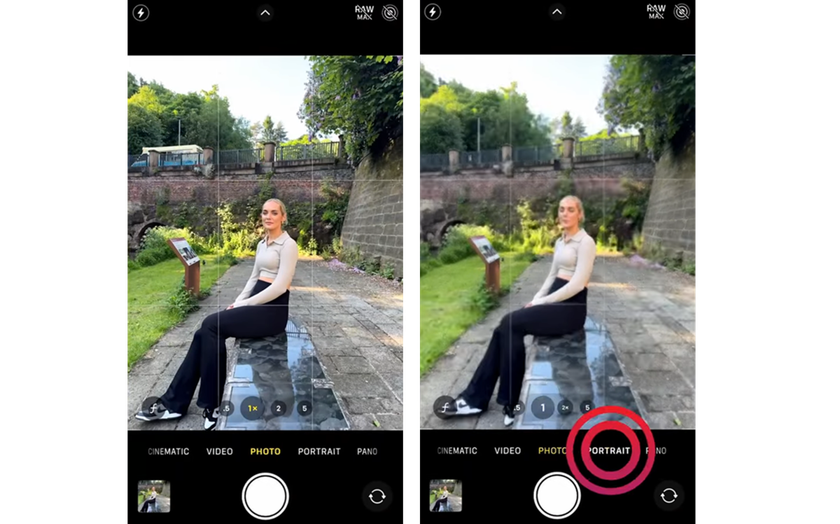
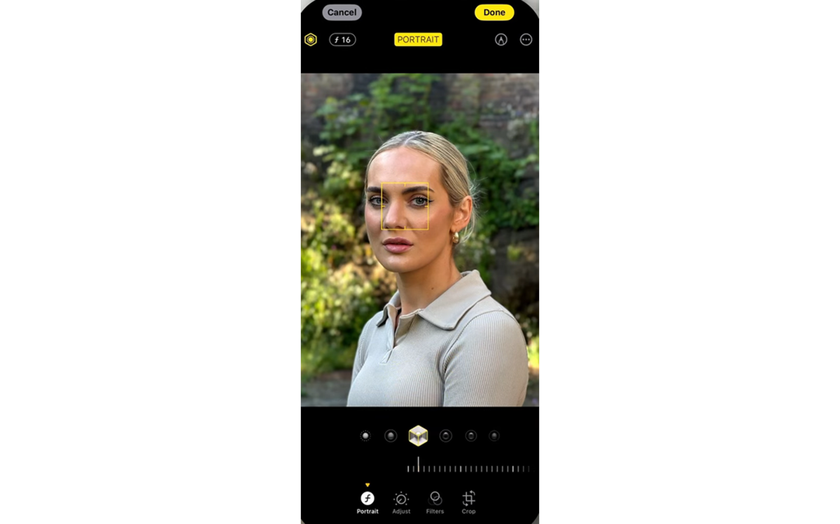
2. If prompted, follow the on-screen tips to properly frame your subject within the yellow portrait box.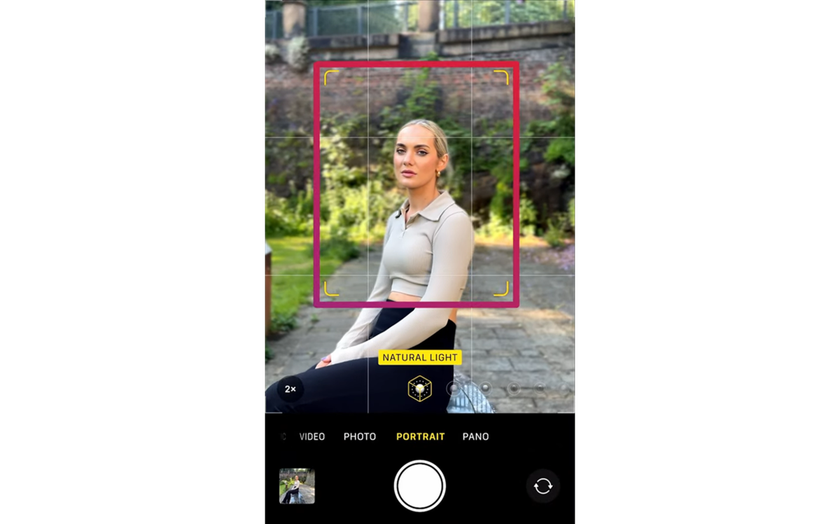
3. Adjust zoom. On supported models, tap 1x, 2x, or 3x to zoom in or out. On the iPhone 15, you can also pinch the screen to zoom.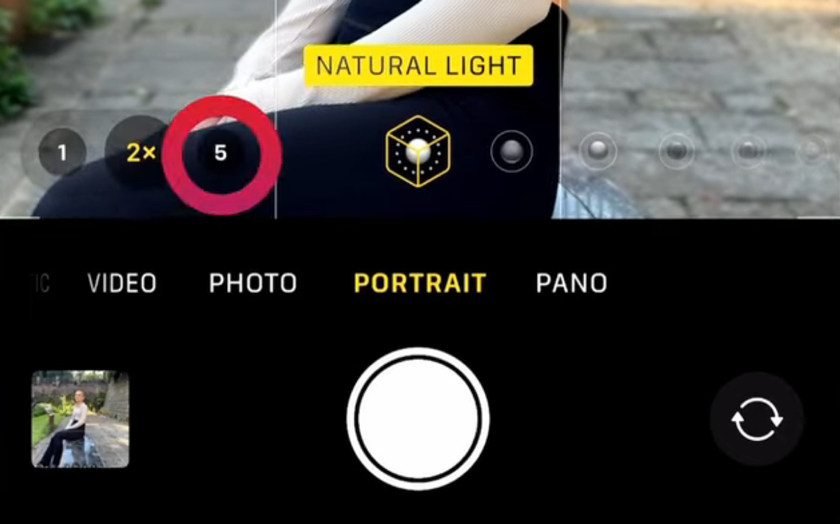
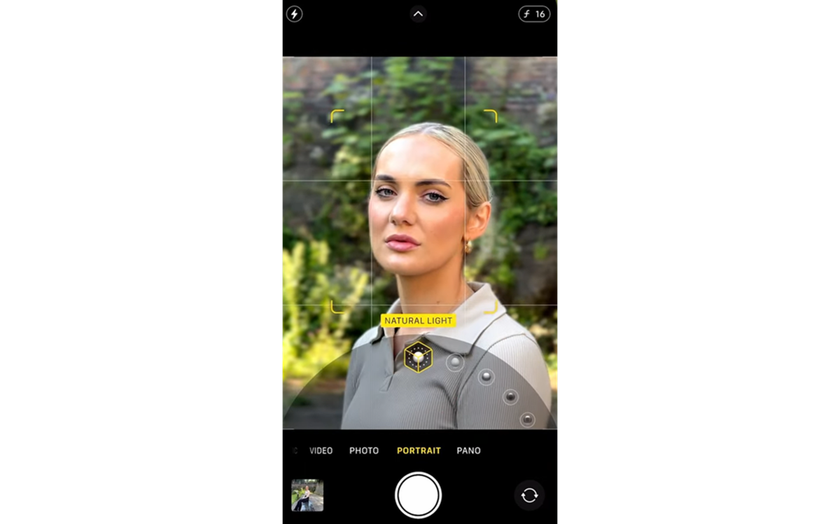
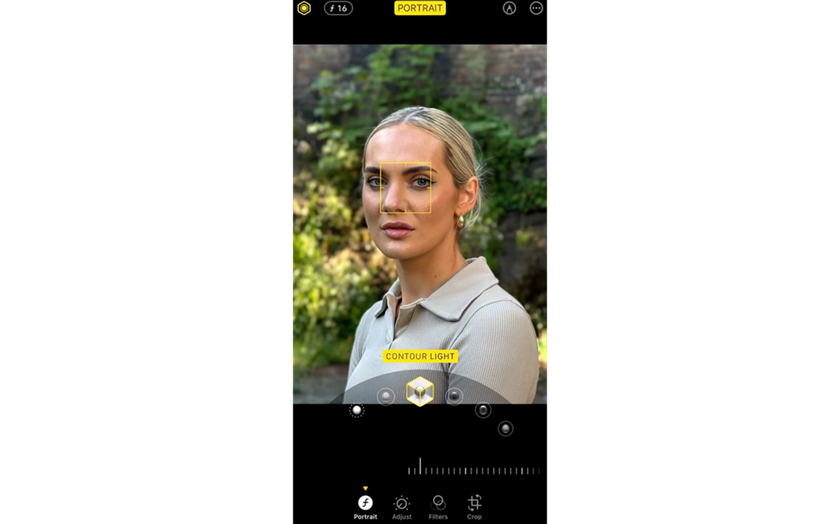
4. Choose a lighting effect by dragging the Portrait Lighting control:
Natural Light keeps the face in sharp focus against a blurred backdrop.
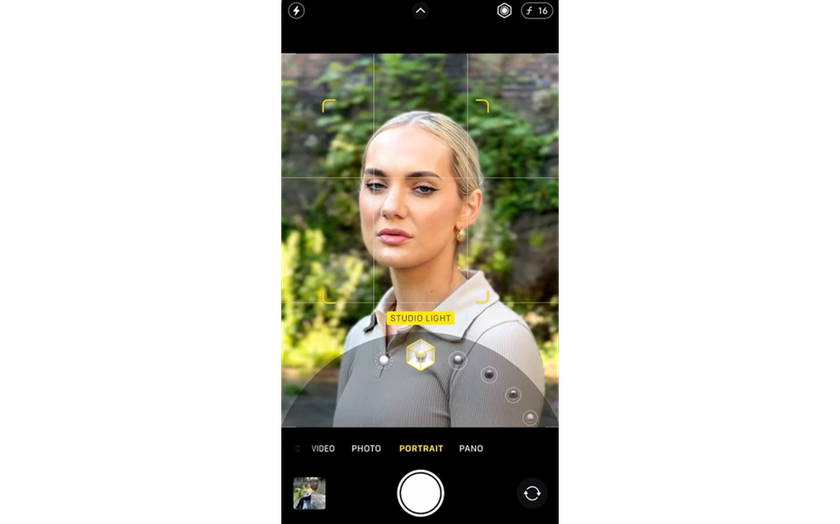
Studio Light brightens the face and gives the photo a clean look.
Contour Light adds dramatic shadows with highlights and lowlights.

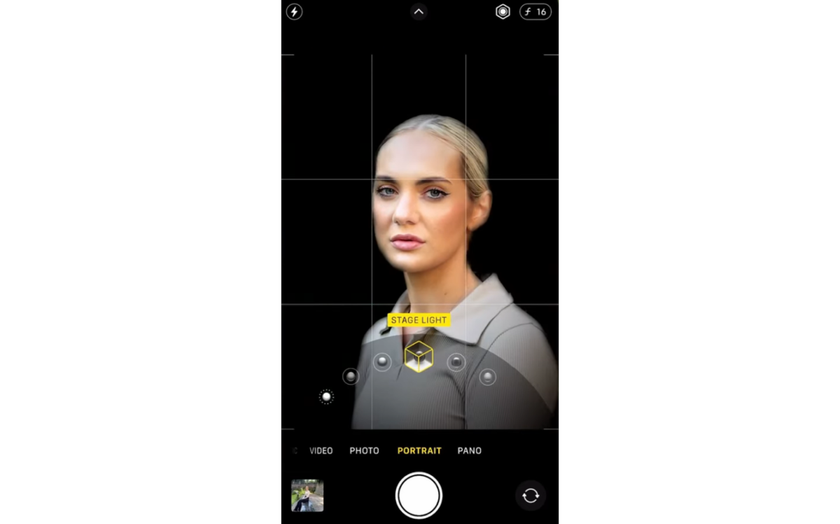
Stage Light isolates the face against a deep black background.
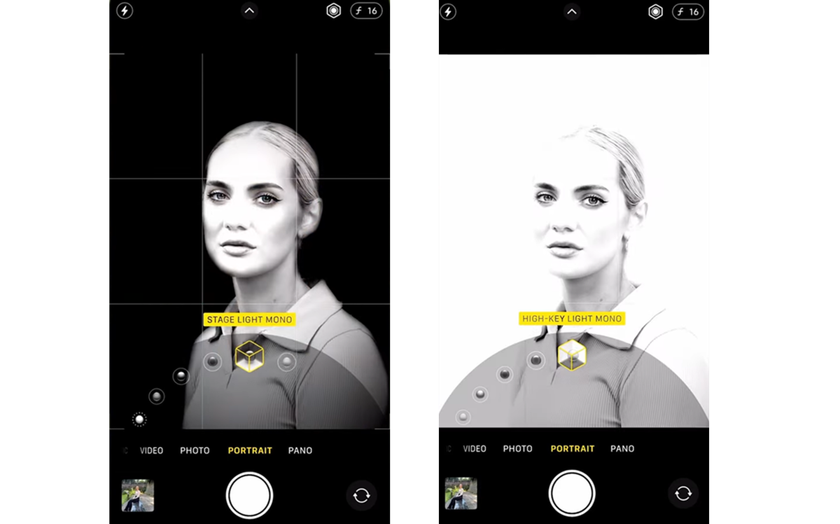
Stage Light Mono and High-Key Light Mono provide dramatic black-and-white effects.


5. Take your shot by tapping the Shutter button.
After capturing a photo, you have the flexibility to tweak it:
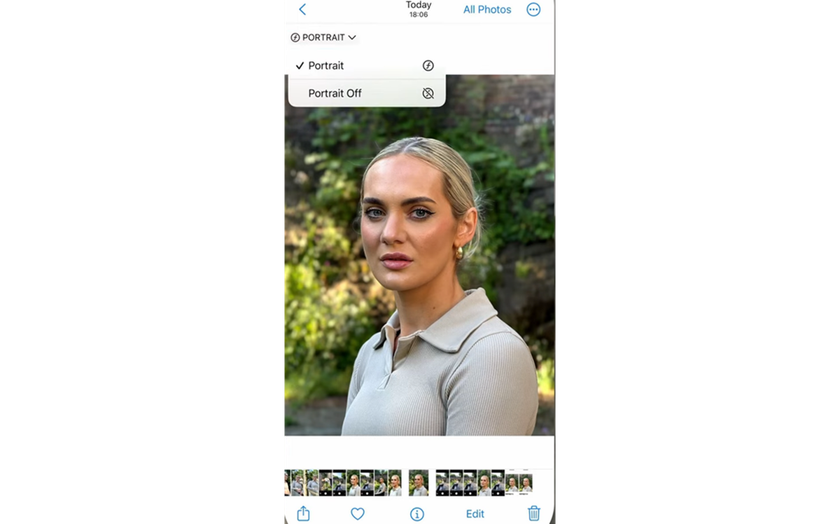
You can turn the portrait effect on or off in the Photos app by opening the photo, tapping Edit, and then tapping Portrait.
Adjust Portrait Lighting intensity and position for different effects on facial features.
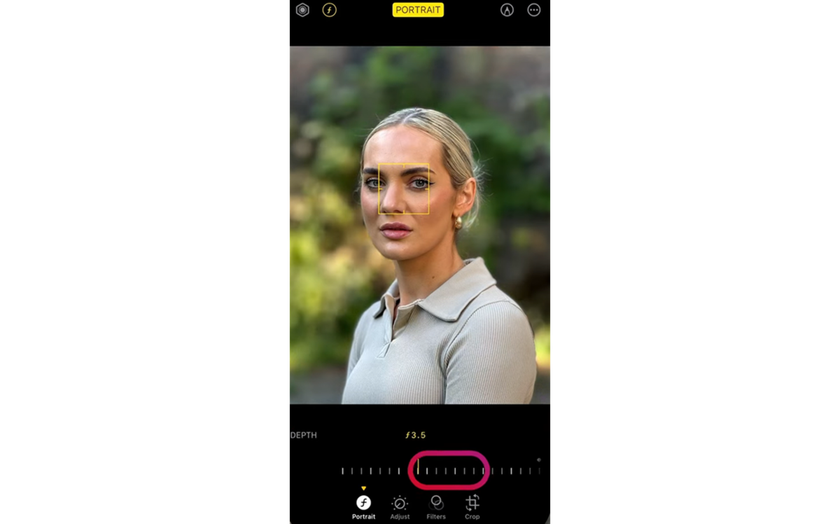
Adjust Depth Control and Refocus Portraits. When you use Portrait Mode on your iPhone, you can initially adjust the depth control by tapping the depth adjustment button to modify the background blur. This helps set the focus and depth right when you capture the photo.


For more advanced editing, the iOS allows you to refocus and adjust the depth of field even after taking the photo! Here's how to do it quickly:
Open the Photos App: Find your picture and open it.
Tap "Edit": This opens the editing tools.
Adjust Depth Control: Use the Depth Control slider to change the level of background blur.

Refocus the Subject: Tap a new area to shift the focus. This works especially well on iPhones with Pro models due to their advanced depth data.
Save Your Changes: Tap "Done" after adjusting!


Additional Features
Night mode automatically activates in low-light conditions using the wide lens.
Photographic Styles can be applied to alter the color and contrast of your photos directly in Portrait Mode.
On iPhone 15, you can also apply a portrait effect in the standard Photo mode. If the camera detects a person, dog, or cat, the Depth button will appear!
Techniques for Great iPhone Portrait Photography
 Portrait Mode on your iPhone is a powerful tool for creating beautiful, professional-looking images, especially with these techniques!
1. Watch the Distance Markers on Your Screen
When you're setting up to take a portrait, keep an eye on the distance markers displayed on your screen. These indicators help you maintain the ideal distance between the camera and your subject. If you’re too close or too far, the camera will prompt you to adjust your position, ensuring the focus and depth effects are just right.
2. Make Sure to Place Your Main Subject Inside the Circle
For effects like Stage Light or High-Key Light Mono, it’s crucial to position your subject within the circle shown on the camera interface. This placement ensures that the lighting effects highlight your subject correctly and the background blur is applied accurately.
3. Use the 2x or 5x Zoom
Utilizing the 2x or 5x zoom can dramatically enhance the portrait by adding a beautiful background blur that’s difficult to achieve with the normal 1x setting. This zoom feature allows you to close in on the subject without physically moving closer, preserving the natural look of the shot.
4. The Size of Your Main Subject Matters
The size of your subject within the frame can affect the quality of the portrait. Larger subjects generally produce better results because the camera software can more easily apply the depth effects accurately. If the subject is too small or too far away, the camera might struggle, leading to potential distortions or unclear edges.
5. Use Auto Exposure/Auto Focus Lock
To maintain consistent lighting and focus in your portrait, use the AE/AF Lock feature. This is particularly useful when you want to focus on a specific element in a complex scene. Long press on the subject until you see the AE/AF Lock banner appear, securing your iPhone portrait mode settings throughout the shoot.
6. Two Things to Avoid
Poor Background Choices: Try to keep the background behind your subject simple and uncluttered. This makes sure your subject stands out more. Also, putting your subjects in a shady spot with sunlight behind them can create a beautiful glow around them.
Low Light Conditions: Portrait Mode struggles in dim lighting, as it can’t accurately detect edges and apply depth effects properly. Whenever possible, shoot in well-lit environments to avoid fuzzy, unclear photos.
Advanced Shooting Techniques
 Do you want people to think that you are a professional at photography? Follow these tips!
Get Close
Moving closer to your subject can show off more details. This is especially good for capturing the little things that make a photo interesting.
Taking Photos of Pets
If you’re photographing pets, stay about eight feet away — this is the sweet spot for using Portrait Mode with animals. Keep some treats handy to help keep them still.
Look for Soft Light
Soft light is the best for portraits because it makes everyone look good. It doesn’t create harsh shadows or bright spots on faces. Try to find areas with gentle, indirect light.
Choose a Good Spot
Pick a place that isn’t too busy or distracting for your photos. Portrait Mode works best when there’s a clear focus on your subject, with nothing else taking away attention!
Edit Portrait Photos
Once you've captured your portrait, the next step is to make it shine with some editing. You can start with the Photos app on your iPhone, which is built right into your device!
However, if you're aiming for truly stunning results, you might want to use a dedicated photo editor for iPhones. One of the top choices is Luminar Mobile!  It doesn't just offer standard editing tools; it's packed with advanced AI features designed to refine your images automatically. Beyond Structure AI and Sky AI, you'll find a suite of other AI tools that can tackle tasks from sharpening details to perfecting lighting!
Conclusion
That's all there is to it! With these tips, you're ready to really make the most out of your iPhone's Portrait Mode. Just remember, the best way to improve is by practicing, so keep experimenting with different settings and subjects. Capture your friends, family, or any interesting scenes you come across. Each shot is a chance to create something special.
So go ahead, start snapping, and see how you can turn everyday moments into standout portraits!