5 Photography Tips for Dark Aesthetic Pictures
December 17, 2024
Discover tips for capturing dark aesthetic photos that stand out. This guide covers essential techniques for shooting and editing moody, atmospheric images
In a world filled with bright and vivid photos on social media, dark and beautiful images can really capture the eye and stand out. It can be tough to find good advice on creating this style though, since most online tips tend to focus on how to brighten photos instead.
This article is here to fill that gap, offering practical tips on how to both take and edit photos that embrace a darker aesthetic.
Don’t feel like reading the whole breakdown? We’ve pulled together a quick summary below.
Key Takeaways
Dark aesthetic photography focuses on using shadows and highlights to create mood and depth.
Always include a light source or highlight to keep dark photos clear and intentional.
Adjust exposure and contrast to make details stand out without losing the moody tone.
Reduce saturation for a soft, cinematic look and avoid harsh colors.
Clean dark areas and remove reflections or clutter for a professional result.
Edit photos with Luminar Neo. Use tools like Smart Contrast, Erase, and AI Detail to enhance lighting and texture easily.
Advanced yet easy-to-use photo editor
Get Luminar Neo NowWhy Dark Aesthetic
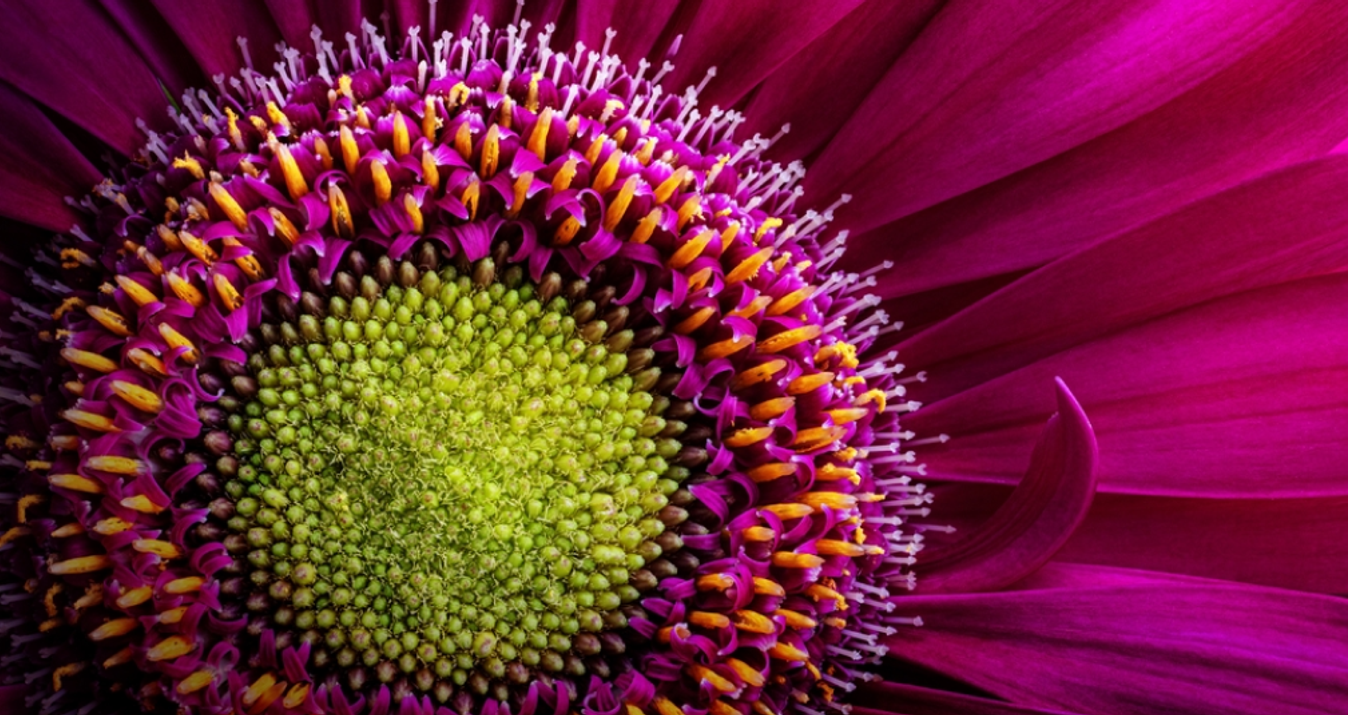
Dark images excel in simplicity and mystery. Consider this example: the subject’s eyes are sharply focused, and the texture is vivid, drawing immediate attention. However, without clear context, viewers might overlook the intent of the photo.


When you darken the subject to create a silhouette, the image gains a new dimension of strength and intrigue, capturing users’ attention more effectively.
This technique and others discussed below, will help you create compelling, dark aesthetic images that can truly stand out in a sea of conventional photos.
Tips for Taking Dark Photos
When venturing into the realm of dark photography, it's crucial to not just reduce light but to use it strategically. Keep these key points in mind:
1. Highlighting
Simply taking a photo in low light can result in a flat, underwhelming image. Instead, introduce a point of interest with a highlight. For example, in the photo below, I used a ceiling light as a highlight, which not only brightens the scene but also adds an accent and creates a sense of depth. The light on the ceiling and floor gradually diminishes, enhancing the photo's spatial feel
Also read: How To Post A Panorama On Instagram?

2. Direction of Light
The direction from which light hits your subject can dramatically alter the mood and impact of your dark photos. Always consider how the light interacts with your subject.
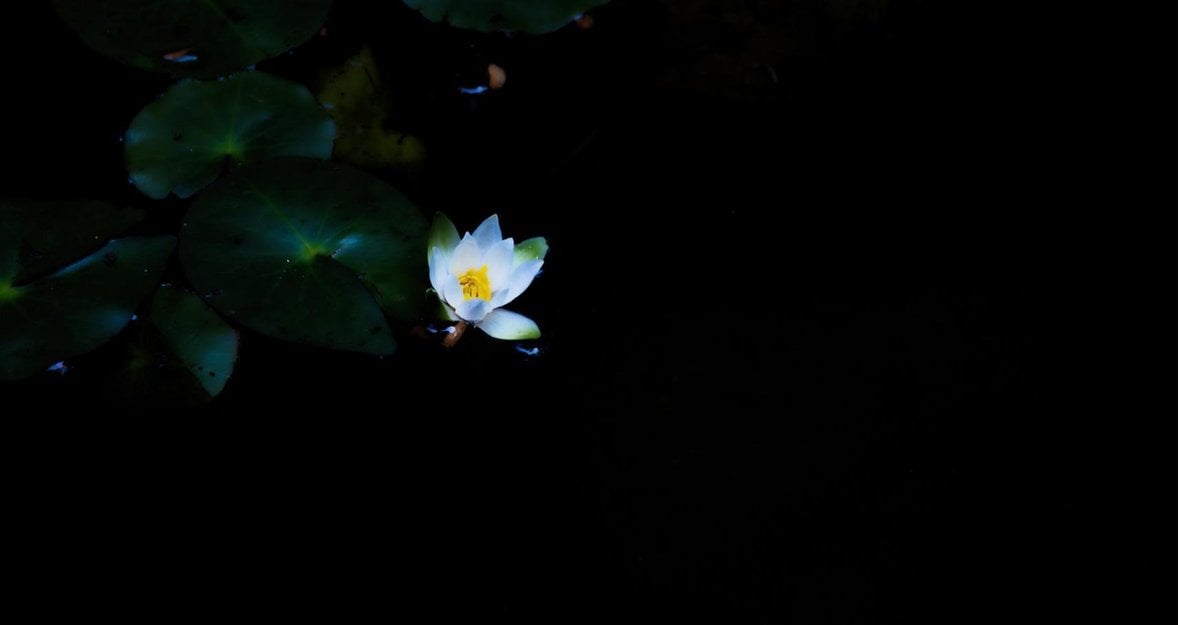
Backlighting
This technique can be used to create powerful silhouettes, adding mystery and drama to your images, as illustrated in the following photo.
Diagonal Light
Lighting your subject from a diagonal angle can introduce a sense of depth and volume, making the space appear more dynamic and interesting.
Think carefully about which direction of light will best capture the essence of what you're trying to express. By consciously manipulating light, your photos will more accurately reflect your artistic intentions.
Exclusive Tools of Endless Possibilities in One AI Editor
EXPLORE NOW!5 Tips on Retouching Dark Photos with Luminar Neo
Capturing the perfect dark photo directly from your camera can often be challenging due to tricky exposure settings. However, with the right retouching techniques, you can transform your images into the dark, moody scenes you envision. Here are five effective methods to enhance your dark photos during the editing process:
1. Lower Exposure
One of the simplest ways to deepen the mood of a photo is to lower its exposure. This adjustment can be made under the "Develop" section.
By reducing the exposure, you not only make the photo darker but also diminish the visibility of any unwanted reflections, helping to focus more attention on the subject.
Here’s an example where I adjusted the exposure to -2.61:


As you can see, lowering the exposure has significantly reduced the brightness, enhancing the overall dark aesthetic and making the subject stand out more prominently.
2. Increase Contrast
When you lower the exposure to darken an image, the subject might become less distinct. To counteract this effect and bring clarity back to your photo, increasing the contrast can be very effective. Adjusting the contrast enhances the differences between the bright and dark areas, making the subject stand out more prominently.
In Luminar Neo, you can adjust the contrast using several settings:
Smart Contrast: This tool intelligently adjusts contrast without overly altering the natural look of the photo. For this example, I increased the smart contrast to enhance the overall clarity and definition of the image.
Highlights: Increasing highlights helps to bring forward and accentuate the key elements of your subject. This adjustment makes the brighter parts of your image pop.
Shadows: Lowering the shadows deepens the darker regions of your photo, which enhances the background's depth and focuses attention more on the subject.
Here’s a practical application of these adjustments:


As you can see, the adjustments have significantly improved the photo, particularly emphasizing the beauty of the flowers by making them more vibrant against a darker, subdued background.
Also read: How To Be More Photogenic: Tips & Tricks
3. Reduce Detail for a Softer Effect
While increasing contrast can help make your subject stand out in dark photos, it can sometimes lead to overly harsh transitions between light and dark areas, giving the image an unnatural appearance. To mitigate this, consider softening or reducing the detail in the image.
In Luminar Neo, you have the option to adjust various scales of detail:
Small Details: These are the finer textures and nuances within the image. Reducing these can help smooth out minor imperfections or granular noise that become more apparent after adjusting contrast.
Medium Details: This setting affects slightly larger elements than small details. Dialing these down can help in blending the transitions in textures more smoothly.
Large Details: These are the most noticeable elements in the image. Lowering the intensity of these details can significantly soften the overall look of the photo, which is especially beneficial in creating a gentler mood.
After adjusting the detail levels to your preference, the result should be a photo that feels softer and more harmonious, as demonstrated in the example below:


By reducing the details in this photo, I've enhanced the gentle and ethereal quality of the flower, making it less harsh and more visually appealing.
4. Erase unnecessary things
Dark photos often look their best when the dark areas are clean and uncluttered. Unwanted reflections or distractions in these areas can detract from the visual impact of your image. Removing these elements can help maintain the focus on the main subject and enhance the photo's overall cleanliness.
In the example below, notice the reflection marked within the red circle. Such reflections can be distracting and diminish the quality of the image:
With the Luminar Neo’s Erase tool, you can easily remove these reflections.
As illustrated in the before and after photos below, the changes might seem minor but can make a significant difference. The dark areas become cleaner, making the image look more refined and focused.


Small adjustments like erasing minor reflections are crucial in crafting a professional-looking dark photo. Even though these changes might be subtle, they contribute to the overall aesthetic and quality of your work.
5. Reduce Saturation to Enhance the Mood
As a final retouching step for dark photos, consider reducing the saturation. This technique is particularly useful when aiming to create a more subdued, classic atmosphere in your images.
Lowering the saturation can mute overly vibrant colors, which helps in achieving a timeless look. For example, here, I set the saturation to -30.
As shown, the reduction in saturation quiets the colors, lending a classic and serene feel to the image. This adjustment is especially effective for photos with historical themes or old townscapes, where you want to evoke a sense of the past.


While I applied all five retouching techniques discussed in this article to one photo, you can choose to use just a few depending on the specific effect you're aiming for. Experiment with these methods to find the best fit for the aesthetic you wish to achieve.
Quick Recap
When diving into the art of dark photography, remember these essential points to make your images stand out:
Highlighting: Without highlights, a dark photo may appear merely underexposed and unintentional. Strategically placing highlights can convey your artistic intent and add depth to the image.
Direction of Light: The way light falls on your subject can dramatically affect the mood and impact of your dark photos. Experiment with different lighting setups to find what best enhances your subject.
Controlling exposure in dark photography can be challenging, making post-processing a crucial step. Here are five retouching techniques to enhance your dark photos:
Lower exposure: Deepen the shadows to enrich the dark atmosphere.
Increase contrast: Make your subject stand out against the background.
Reduce detail: Soften the image to focus on essential elements.
Erase unnecessary elements: Clean up the scene to minimize distractions.
Reduce saturation: Tone down colors to add a classic feel.
You don’t have to use all these methods. Choose and combine techniques based on what best suits the mood and message you want to convey in your work.