Photography Lighting Tips From A Pro
December 19, 2025

What really separates professional work from everything else is how well the photographer controls light. The mere presence of great light is good, but not sufficient, no matter natural or artificial.
To understand how to get the best lighting for photos, you need a handle on direction, intensity, color, and other aspects that we will go through today.
Learning to Command Your Light Source
Before you even touch a modifier or studio photo light, you must master the fundamental relationship between light and your camera. Light is basically the main tool that decides the fate of your photographs, whether they end up looking fabulous or flavorless. To turn every light situation to your advantage, you should understand its logic, principles, and tactics.
Three Core Qualities of Light
If you want predictable, pro-level results, you have to stop thinking of light as “good” or “bad” and start breaking it into specific, controllable pieces. Three qualities matter most, such as:
Direction of light. The orientation of your light—high, low, forward, or opposed—is the foundation of shaping. Light from the camera's perspective is clear, but flattening, light from the side carves out dimensionality, and a source positioned opposite the camera creates the coveted rim light effect.
Quality of light. Hard light is what you see from a tight, focused source—strong contrast, visible texture, and shadows with a very definite edge. Soft light comes from something larger and more spread out, so it wraps around the subject and smooths the transitions. You decide which version you want by changing how big the light feels to the subject and by adding or removing modifiers.
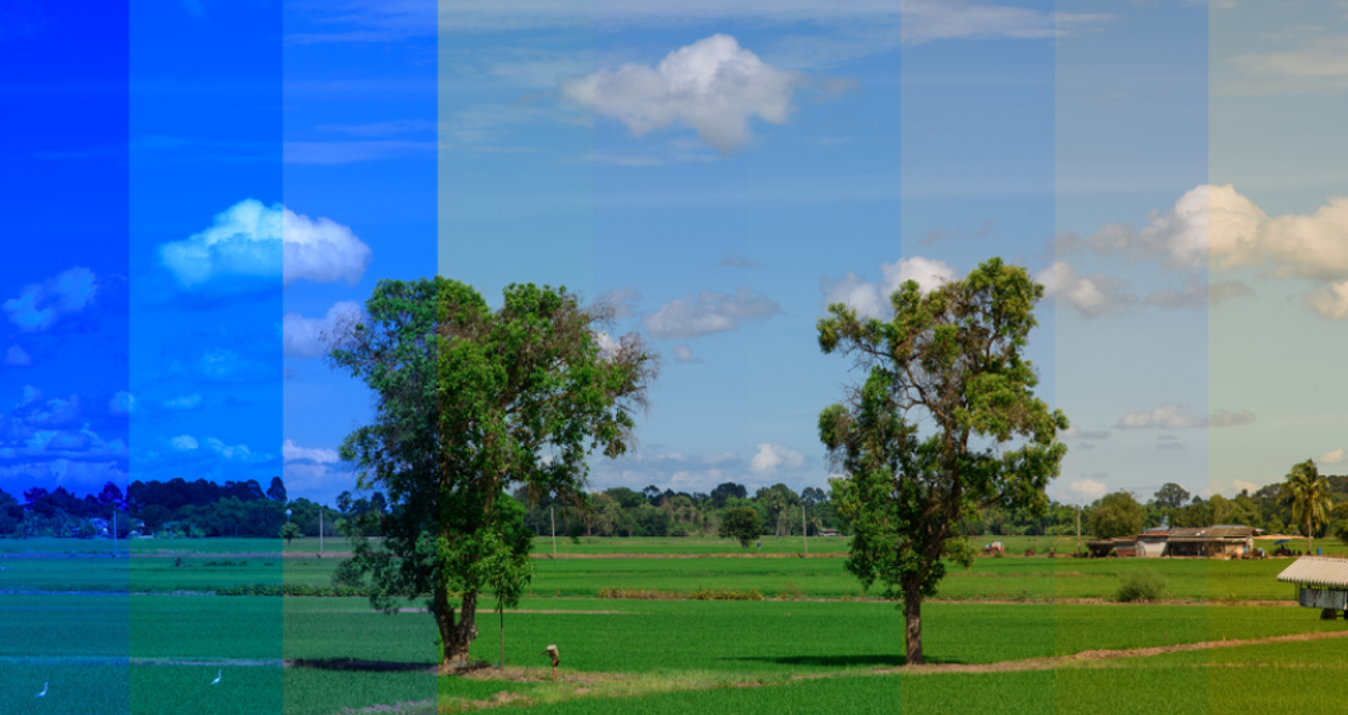
Color of light (the Kelvin scale). Color temperature is the dial that turns a photo from fireplace glow to screen-lit hush. The Kelvin scale marks where that light sits on the line, and white balance is the control panel that either smooths out the color cast or locks it in as part of a deliberate style. Get the settings right, and all your colors, especially skin and whites, will be spot-on.
-5030.jpg?q=85&w=840)


-5030.jpg?q=85&w=840)
You instantly gain the photographer's sixth sense when you understand direction, quality, and color. The scene ceases to be a lottery. You'll know exactly what the camera will deliver before the shutter even clicks.
Exposure and Dynamic Range
 A camera behaves more like a strict accountant than a relaxed observer. It records fixed amounts of light instead of the full nuance of a scene. The camera sensor cannot hold the full spectrum of light the human eye sees. That's why you take control and set your priorities using the exposure triangle, we talk about shutter speed, aperture, and ISO.
Dynamic range is the camera's ability to see detail across the full spectrum, from the brightest whites to the deepest blacks. When shooting scenes with strong contrasts, this range is really put to the test. With this in mind, choose to let shadows be dark, add some fill light, or take several photos with changed exposures, as the camera can't do it all.
Controlling the Scene: Reflect, Diffuse, and Reduce
 When you know how light behaves, the challenge shifts to steering it. For most setups, that comes down to three moves: bounce, diffuse, or subtract.
Bouncing is about using another surface as your “new” light source. Aim a lamp or flash away from the subject and toward any large, white, matte surface. Such a technique fools the light into acting larger than it is, making shadows subtler.
Diffusion works by putting translucent material between the light and the subject. Once the beam hits diffusion, it scatters and loses that “laser” attitude. Tools such as a softbox, scrim, foldable reflector, shoot-through umbrella, or even a light curtain stretch a tight point of light into a wider source that feels more like a glow than a stab. The result—shadows become whisper-soft, and skin gets a smooth texture.
Subtracting light is the opposite. You block reflections with black foam board, flags, or negative fill so shadows grow deeper, and the subject stands out more.
Making the Most of Natural Light
Real expertise starts with learning to use the most common light source you have: daylight. Once you can bend it to your needs, you’ll know how to get good lighting for pictures almost anywhere. Whether you’re by a window, in open shade, or out in the street, good control over daylight is the foundation for every other lighting setup.
Window Light and Reflectors
 For many photographers, a window is the first and best “softbox” they ever use. On the CRI scale, the sun scores 100, and that value is used to judge how well other lights reproduce color; anything above 90 is generally acceptable for serious work. Generous windows can give beautiful light, as long as they don’t create a hard patch of direct sun. Find a spot where light has bounced around, softly wrapping the person instead of hitting them head-on.
Even the nicest window setup naturally gives a “bright side” and a “shadow side.” To stop shadows from completely wiping out detail, bounce some fill light into them. Don’t overthink it—a sheet of paper, a piece of poster board, a slice of styrofoam, or a roll of white paper towels all do the job. Yet a dedicated pop-up reflector in white, silver, or gold is a more durable and professional option.
Outdoor Lighting
 Shooting outdoors might sound like a total win, with the biggest light source out there—the sky. But, in reality, it can be a tough process with harsh rays and weird shadows. The real challenge is the midday sun. When the sun is high, look for open shade, doorways, building edges, or trees to soften things.
Overcast conditions are often ideal. An overcast sky is like the best lightbox for photography that spreads light evenly and does the softening. The photographer's safety zone is when the sun is low and less direct, such as early morning and late afternoon.
Wait for golden hour if you're craving that syrupy, honey-like glow that all these pretty pictures have on social media. Or, if you are into more melancholic and bluer settings, hunt for the blue hour. These two windows of time provide real-life filters, which is why they are the most popular.
Mastering Studio and Artificial Lighting
Even though natural light has many benefits, it can't be controlled to your favor. To stop waiting for the right time and weather, it's better to get a reliable artificial light setup. This allows creating any kind of light and setting, no matter what the situation is outside.
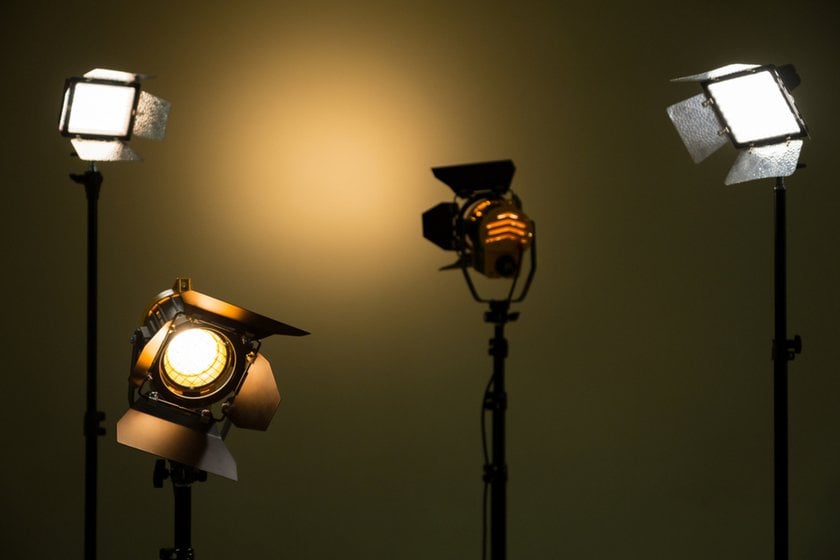
Classic Three-Light Setup
 The most reliable way to get steady, repeatable control over a studio setup is three-point lighting. It’s a favorite for portraits, interviews, and product shots since you can shape three things separately. A classic three-light setup is like a small team where each light has a clear job:
Key light. The main light, the one that defines the direction and strength of the lighting. It sets the brightness and feel of the scene.
Fill light. A gentler light or reflector that softens the shadows from the key, keeping contrast under control so details don't disappear. By the way, a white reflector or bounce card works just as well as an actual lamp.
Hair or back light. Placed behind or above the subject, it creates a glow along the edges, so they stand out from the background.
Once the “job description” of each light is clear in your mind, how to flatter a face and keep shadows under control becomes easy. Changing the height, angle, or strength of a light lets you decide whether the subject looks more chiseled and contrasty or smooth and easy on the eye.
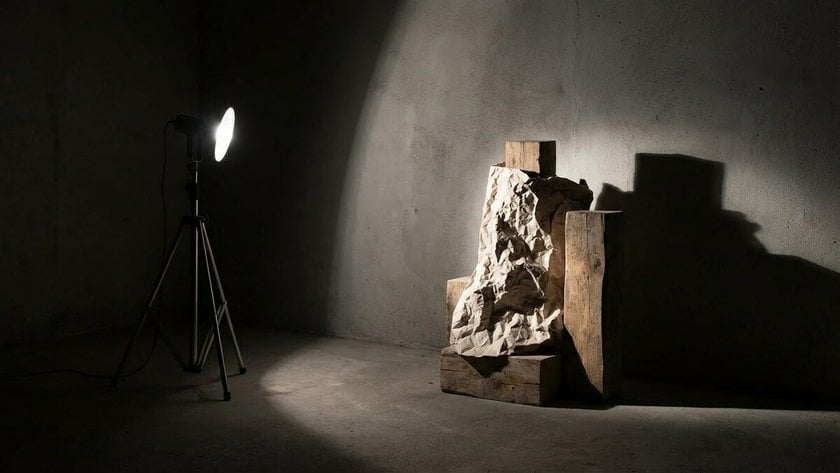
Studio Photo Light Gear and Modifiers
 Confidence starts when you stop treating lights as mystery boxes and learn what they actually do. Continuous LEDs are like working with a live preview—you tweak, and you see the change right away. Strobes provide short, strong flashes that hold onto sharp detail, even with a moving subject. The answer to how to use photography lights lies in a recipe: one steady light, one modifier you like, and an uncluttered background.
Modifiers are the seasoning in a lighting setup—the same light tastes completely different once they step in. A softbox or an umbrella spreads light for portraits that feel relaxed instead of harsh. A reflector lifts shadows without adding another lamp. Grids and flags keep stray light from washing over the whole scene.
A starter kit might include:
one adjustable LED or strobe with a stand;
a medium softbox or umbrella;
a collapsible reflector (white/silver);
a simple backdrop or sweep for products.
With lighting tools on hand, dependence on chance weather starts to fade. Each session feels more like running a small stage than chasing the sky, and the final frames carry a deliberate look from shoot to shoot.
Perfecting Light in Post-Processing
Lighting work doesn’t stop when you leave the location. On the editing side, you can do a lot to push the scene toward the feeling you had while shooting, so it fits the concept you have in mind. Be it Luminar Neo, Lightroom, Photoshop, or any other online photo light editor you choose, the touch-up guide is universal:
Set the base. Adjust overall exposure and white balance so nothing is blown out or buried in deep shadow.
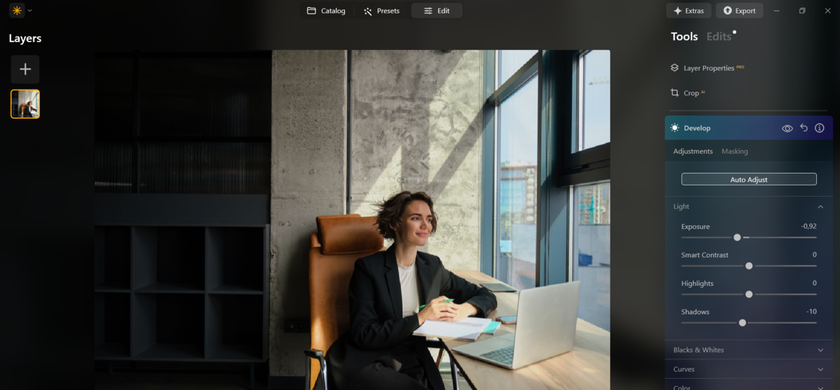
Shape contrast. Refine highlights, shadows, whites, and blacks so the picture gains shape and weight without losing what matters in the darker areas.
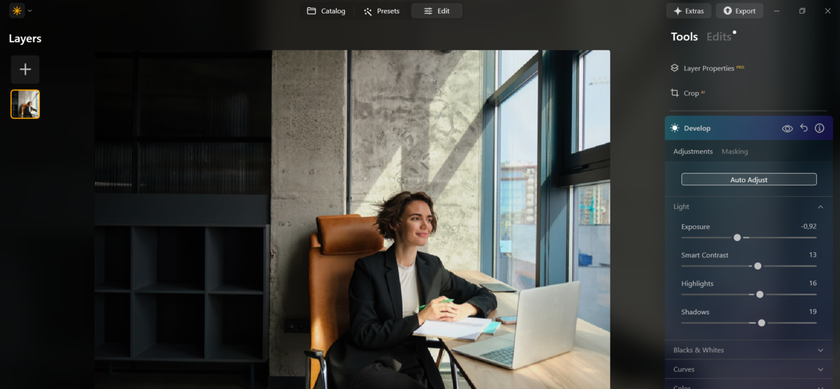
Work locally. Use masks, brushes, or layers to brighten and darken faces, hands, and important textures.

Balance color. Clean up color casts from mixed light and give a gentle tint if it supports the mood.

Finish with tweaks. Add clarity, noise reduction, and sharpening where needed.


Build edits up mindfully, so your photo looks natural and nothing screams it was pushed too far.
Becoming the Light Director on Every Shoot
Well, today was quite a substantial lesson, and we hope this knowledge, along with these studio lighting tips, will shed light on the areas that weren't entirely clear to you. While you certainly don't want to always be at the mercy of the weather or time of day, you now know more effective approaches to selecting light, so why not gradually master professional lighting? In any case, the final result can be adjusted in post.