November 06
11 min. to read
How to Brighten Dark Backlight Photos - Luminar Neo First Look
 What is backlighting in photography? This photography technique involves positioning the subject before a bright light source, producing a stunning play of shadows and highlights, and casting a radiance around your issue. Fascinating silhouettes, intricate details, and a dreamy ambiance characterize these photos. When you learn how to shoot backlit images, you gain the power to evoke emotions and tell compelling visual stories. It is a creative superpower for both seasoned photographers refining their professional skills and passionate newcomers who have just begun to explore the intricacies of photographic art.
Backlit photography empowers photographers to harness the magic of light and shadow, turning mundane scenes into mesmerizing visual stories. The ability to capture the perfect shot in challenging lighting conditions is a hallmark of a skilled photographer. That is why we empower you with some helpful tips on how to shoot backlit photos.
But that’s not all because even perfectly taken backlit pictures can still turn out dark, so the post-processing stage cannot be overlooked. Good photo editing software is the key to easily achieving professional-quality results and enhancing the beauty of your backlit photos. So, the article includes theory on backlighting and practical step-by-step instruction on brightening dark backlit images using profound AI-based tools of Luminar Neo. Be ready to make your shots shine!
Backlighting Technique And Where It Is Used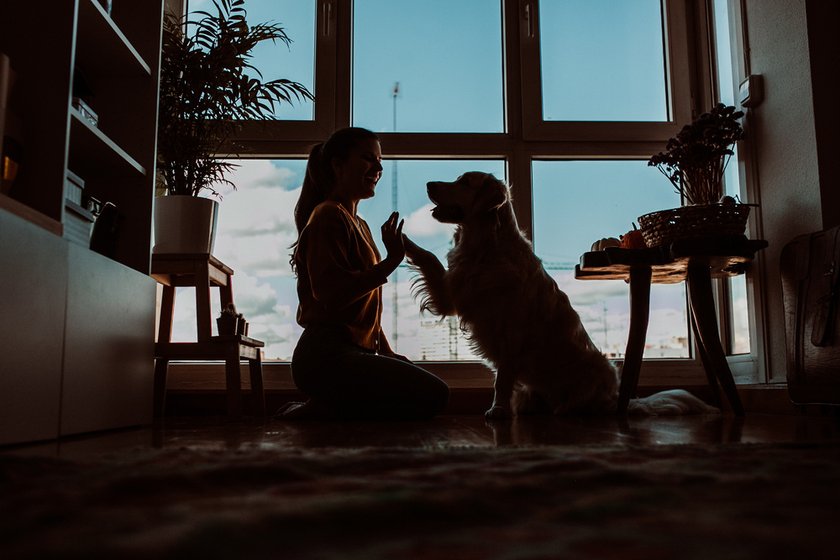

One of the remarkable aspects of backlit photography is its versatility. It is not confined to a single genre; it transcends boundaries. This technique can be applied to a multitude of photography genres, adding a touch of enchantment to each. For instance:
Wildlife Photography
In the world of wildlife photography, backlighting can produce awe-inspiring results. It can emphasize the texture of fur or feathers and create a halo effect around your subject, drawing attention to its majesty.
Product Photography
For product photographers, backlighting can add depth and create an eye-catching glow around the items, making them appear more alluring and desirable.
Architectural Photography
When capturing architecture, backlighting can emphasize the lines and structure of buildings, resulting in stunning and dramatic compositions.
Street Photography
Backlighting can bring Street scenes to life, creating dynamic contrasts between the illuminated subjects and the shadowed surroundings.
Understanding where and how to use backlit photography can elevate your work, opening up a world of creative possibilities.
As we continue this enlightening journey, the next section will provide practical tips on capturing the perfect backlit shot, ensuring you make the most of this powerful technique.
How To Take Backlit Photos?

Backlit photography often shines during the "golden hours," which are the moments just after sunrise and before sunset. During these times, the sun's angle creates soft, warm, and diffused light, making it ideal for this kind of shot.
Understanding the interplay between your subject and the backlight is crucial. In most scenarios, your issue may appear dark while the background is brilliantly lit. Use exposure compensation to adjust for this difference and properly expose your subject. Experiment with your camera's exposure settings, such as changing the aperture and shutter speed, to create the desired effect.
The choice of a lens plays a fundamental role in every genre and technique of photography, and backlighting makes no exception. A wide-angle lens can capture dramatic vistas and grand landscapes, while a prime lens with a wide aperture can create beautifully blurred backgrounds (bokeh) for a more artistic effect. Explore different lenses to achieve the desired visual impact.
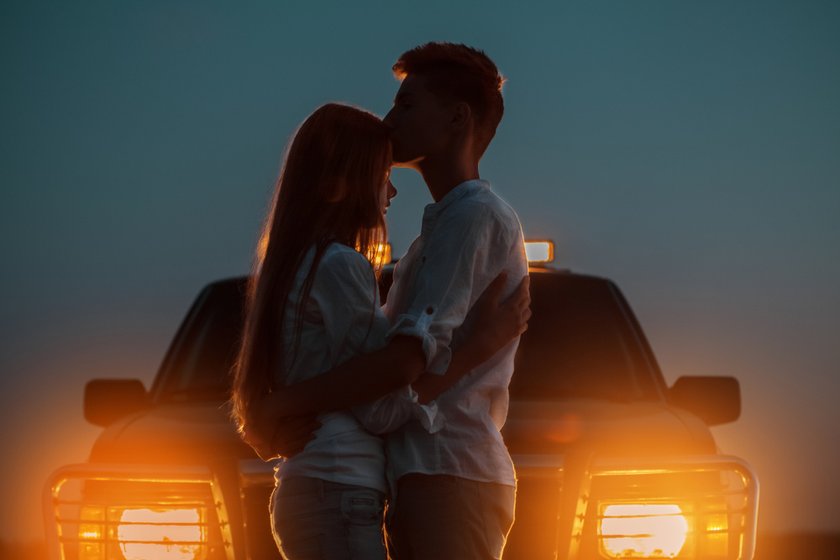
If you capture humans, tell your models to stand between you and the light source. It can create a halo effect and beautiful rim lighting around the subject's edges. For non-human subjects, such as animals or products, consider the composition beforehand, choosing the angles that best highlight the interplay between light and shadow.
In some situations, a simple reflector or a fill flash can help balance the exposure and eliminate harsh shadows on your subject. Reflectors bounce light back onto the subject, while a fill flash can provide that extra illumination when needed.
Position your subject in front of the light source and expose it to the bright background, leaving your subject in shadow. Silhouettes can convey mood and evoke emotions; backlighting reveals this potential better than ever!
You will be on your way to capturing stunning backlit photos by mastering these practical tips. In the following section, we will learn how to turn them into the ultimate perfection during post-processing with the help of Luminar Neo.
Brighten Dark Backlit Photos With Luminar Neo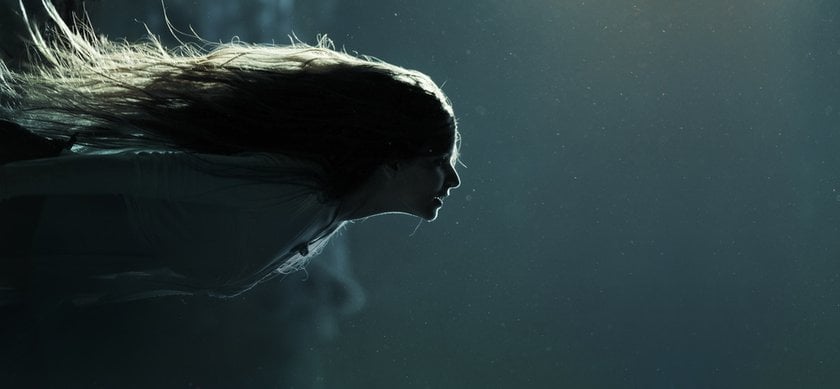

In this section, we introduce you to a remarkable tool, Luminar Neo, which simplifies the post-processing phase, enabling you to achieve professional-quality results effortlessly. We will provide a step-by-step guide on how to use Luminar Neo to brighten up your creativity when you use the backlight:
Import your image
Import your dark backlit photo into Luminar Neo. Open the software and select your image from your files.
Adjust exposure
Luminar Neo offers a range of exposure adjustment tools, such as exposure compensation and shadows/highlights adjustments. Use these to balance the exposure and reveal your image's hidden details. Gradually increase the shadows and highlights to show more depth and contrast.
Enhance colors
Luminar Neo has a wide array of color enhancement tools. Experiment with the vibrance and saturation controls to make your backlit photo pop with vivid, natural colors. Adjust the temperature and tint to refine the color balance and create the desired mood. Selective Color tool from Luminar is your loyal helper in this matter.
Refine details
Sharpening and noise reduction tools are indispensable for perfecting the details in your backlit photo. Enhance the clarity and sharpening to make your subject stand out while reducing noise to maintain image quality. Try Enhance AI or Structure AI to emphasize the quality of the photo.
Add the finishing touch
To give your backlit photo a professional touch, explore Luminar Neo's creative filters and effects. Vignettes can draw the viewer's attention towards the subject, and various filters can provide artistic enhancements. Experiment with these options to give your image a unique, polished look.
Luminar Neo streamlines the editing process and empowers you to bring out the full potential of your backlit photos. Whether you're enhancing the glow of a backlit sunset, accentuating the intricate details of a backlit flower, or highlighting the silhouette of a backlit subject, Luminar Neo offers a range of tools and filters to make your photos truly shine.
Advanced yet easy-to-use photo editor
GET LUMINAR NEO NOW
Bottom Line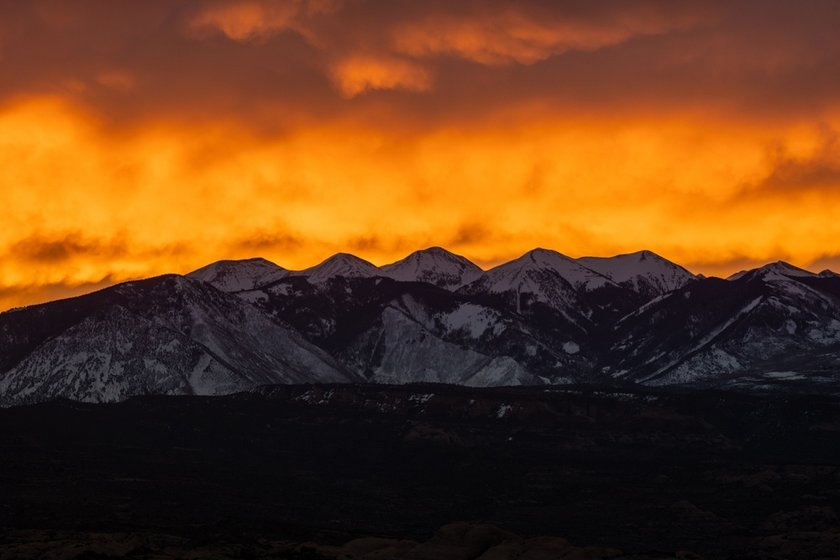

Backlit photography, with its magical interplay of light and shadow, transcends genres and empowers photographers to evoke emotion, tell compelling stories, and capture the beauty of the world around them. It is a fascinating photography technique that is artistically fulfilling and a testament to your photography skills.
With the practical tips we have shared in our guidelines, you can now consider yourself well-equipped to seize those golden moments and make the most of the enchanting light. Whether you are drawn to street photography, wildlife, products, or any other genre, backlit photography offers a new dimension to your creative expression.
Luminar Neo, our trusted companion in the realm of post-processing, simplifies the task of enhancing your backlit photos. With this powerful tool, you can bring out the hidden details, enrich colors, and add the final touches that make your images truly professional.
We encourage you to explore, experiment, and embrace the world of backlit photography. Your creative potential knows no bounds; the journey is as beautiful as the images you capture. Happy shooting!
 >
>
